

How many Battleplans can you specifically name from 3rd Edition? Geomantic Pulse? The Crazy One With The Wizards That Nobody Plays? That Gally Champs One You Lost Because All Of The Objectives Randomly Switched Off? I mean…it’s hardly Starstrike, Battle for the Pass and Knife to the Heart, is it?
The tragedy of 3rd Edition is that almost every mission across all of the Battlepacks score as “Two for your battle tactic, plus One-Two-Yawn”. It’s no coincidence that one of the few missions that everybody can name is Geo Pulse, where Primary scoring is back to the fore.
Anyway. Tyler Emerson, of Warhammer Weekly fame, has addressed this by reimagining some classic AOS scenarios for 3rd Edition. This isn’t some half-arsed fan fiction, or “I wonder how this would work” daydreaming; it’s been extensively play tested and it works.
You can download the missions here, leave a dollar in the tip jar for Tyler if you feel like it, and they’re ready to rock:
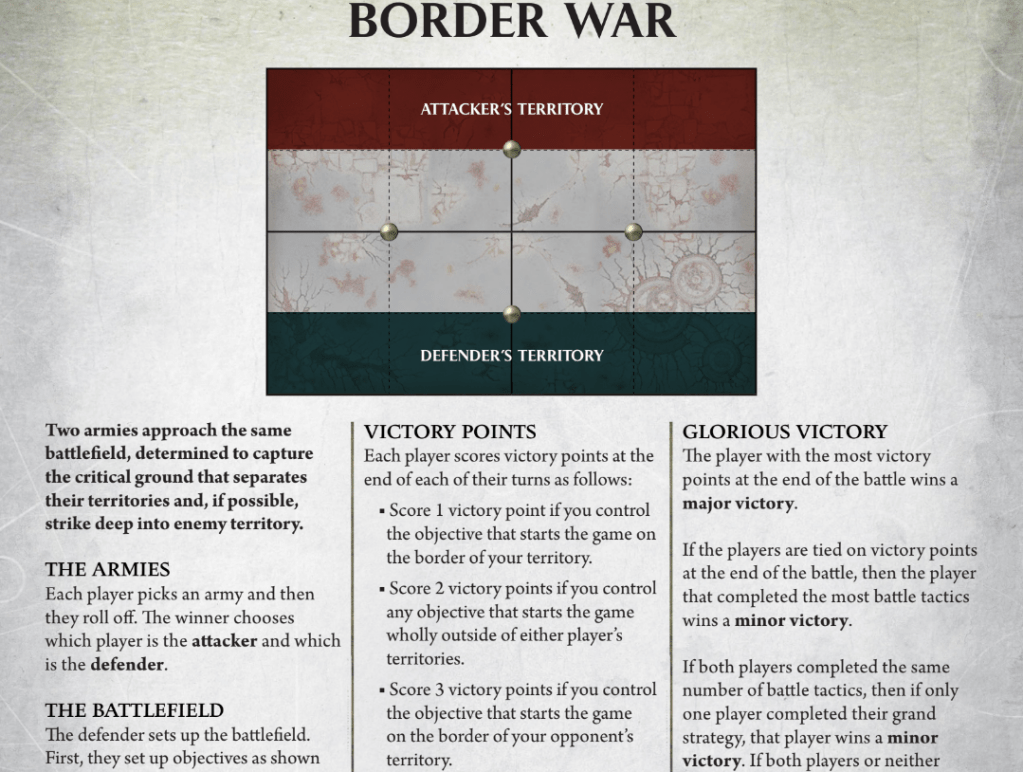
We dived right into what I consider the most iconic of Age of Sigmar Battleplans – Border War – with my MSU Ironjawz list smashing into Gloomspite “Mostly Troggs”. We didn’t use the optional terrain maps in the Warcoda supplement.
The Destroyer
The opposition for this one was my mate Jay. We play each other regularly, and Jay is a worthy opponent – at Cancon last year for example, Jay went 3-2, with his two defeats coming against Mat Tyrrell and Joel Graham*. Jay won all his other matches, so if you’re not on top of your game, he’ll switch your lights out.
Fun Fact: Jay earned his nickname “The Destroyer” because that’s his stage name when he works as a male stripper. Either that, or he peppered our local chat with about 300 consecutive lists, all of them featuring his favourite Orruk artefact. You decide which reality you’d rather live in.

There’s also a little sub-plot in this game whereby we had some custom Tracksuit dice made for our local group, and they’ve got a fearsome reputation for rolling hot. Jay thinks it’s bullshit, so I made sure to roll in the blue tracksuit dice for important rolls, because I’m petty a scientist.
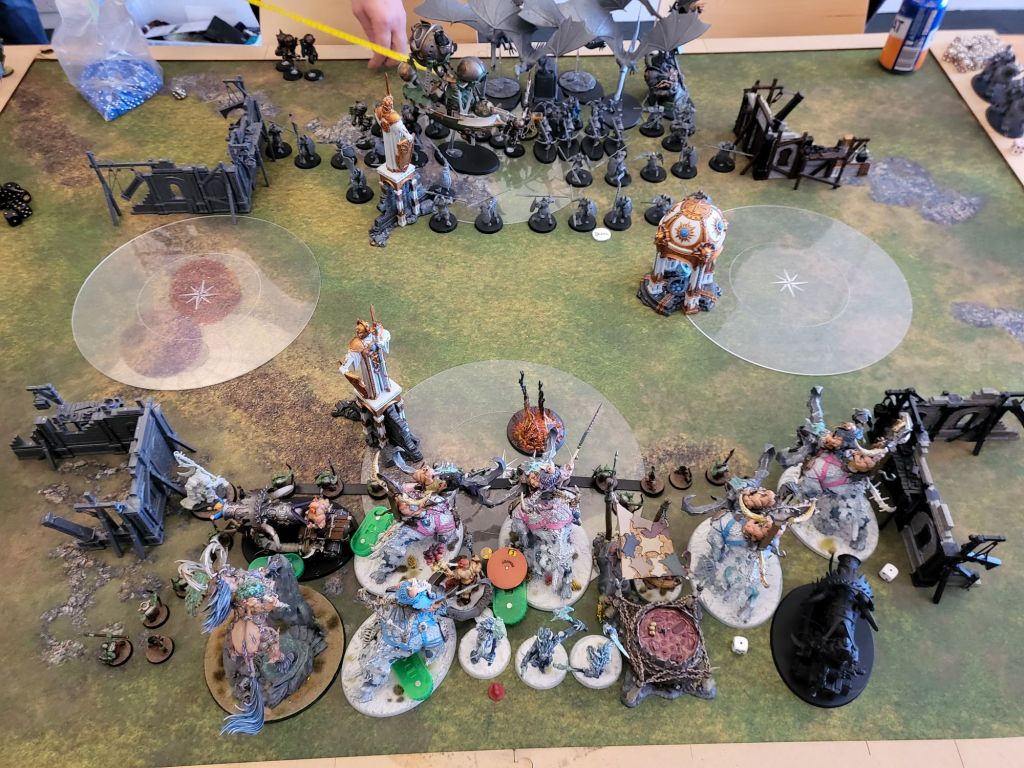
The Lists
You can check out my “Clean Energy” MSU Ironjawz list and how it plays over here. Jay’s Gloomspite was stacked up with layered debuffs:

So what’s going to win out? The unstoppable momentum of swarming Ironjawz with their layered +1s? Or the immovable object of -1 stacking Gits and their counterpunching, rezzing Troggs?
Place ya bets!
Round 1
Jay put me into bat, and I did muh thing: declare the Master of Magic Battle Tactic with a wizard out of unbind range, and use it to cast Hoarfrost on some Ragerz. CV8 on that spell, but I’ve got some PMDs to help me get there if needed. Only snake eyes can really stop me.

And so we launch straight into the ultimate test of character: I crack off a 6 and a 1 with my casting dice. Do you have the balls to pump in a PMD in that scenario? A 6 is a supercast, but a 1 is a Primal Miscast and sets off a fucking tactical nuke in the middle of my whole army. A Megaboss is not descended from fearful Gits, and so I pumped in the extra dice with thinly disguised terror confidence, cracking out the Not A One as needed. Thank Gork for that.

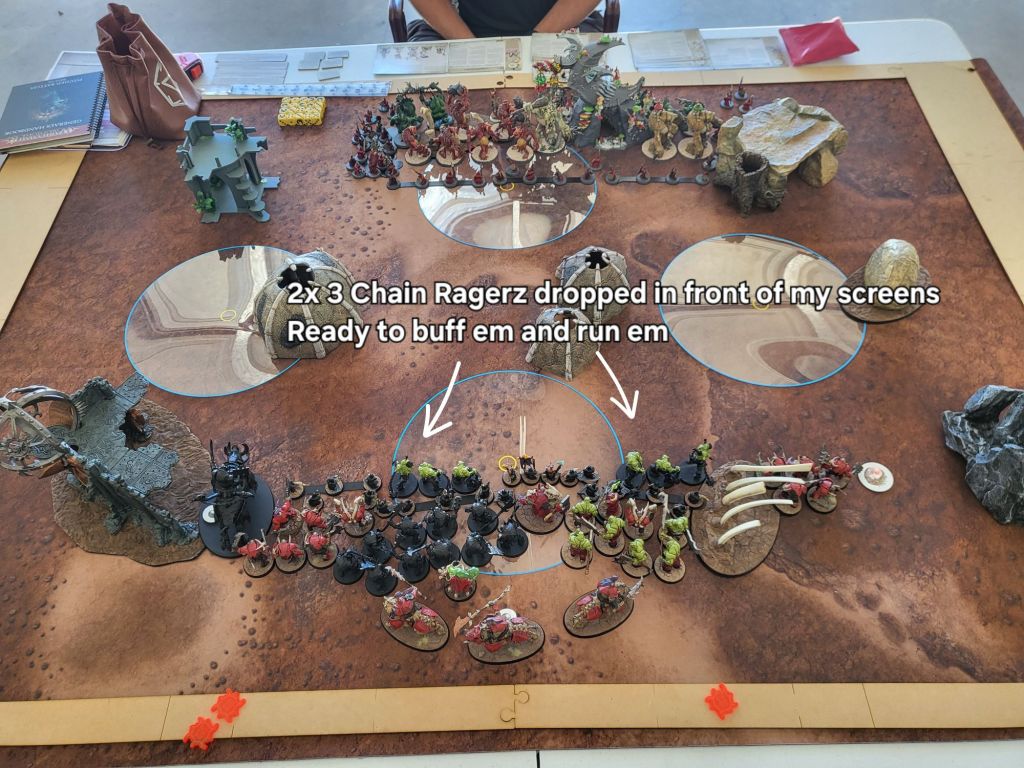
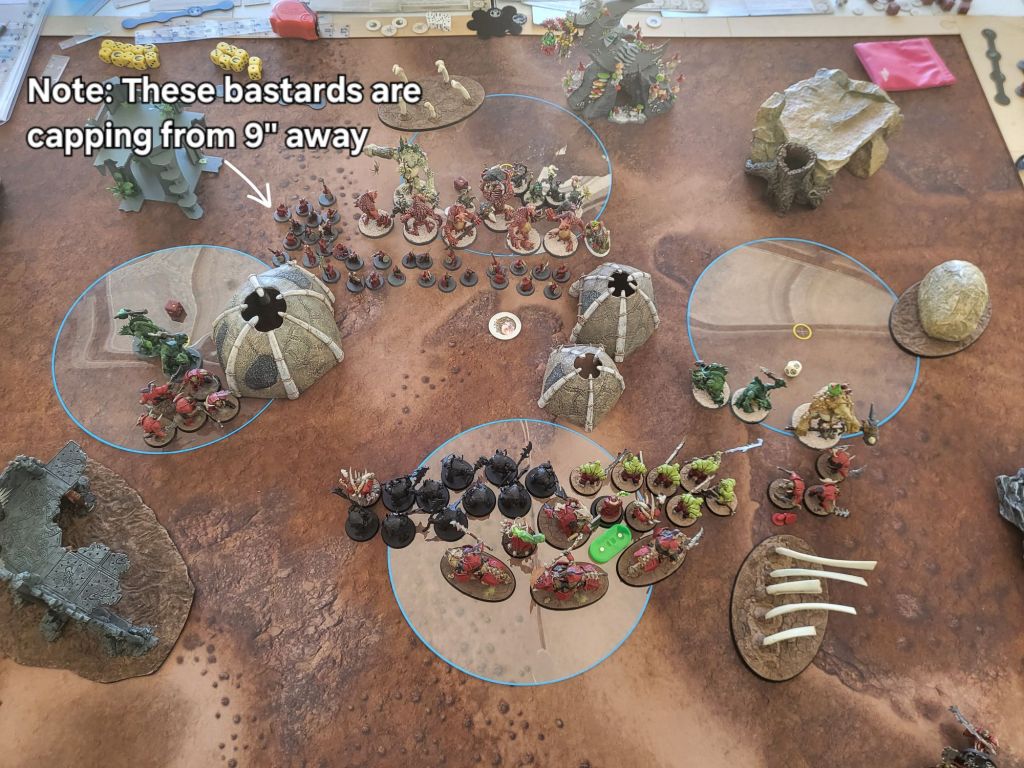
Two units of buffed Ragerz went flying 14” up the board, and one got into the Grot screen. They rolled OK but 40 Grots are 40 Grots, and they could only take a big bite out of the unit without popping it. Ragerz on the opposite flank didn’t make their charge.
Because I’m Mr Smart Warhammer Guy, I made my Megaboss strut up the board and into double CA-issuing range, safe in the knowledge that he could not be shot at and that he fights with Destroyer when he dies. Centre objectives secured, a bit of damage dished out, and two immediate threats that have to be dealt with. Well done me.
As we roll into Jay’s hero phase, he measures from Skraggalicious and confirms that Mr Smart Warhammer Guy here has indeed placed his Megaboss within range of that little bastard’s warscroll spell. Uh oh.
7 mortal wounds would pop him, but I get off the hook slightly and Jay “only” does 5 to him. So I get off with a warning, but that’s basically my heroic actions and boosted unbinds wrapped up for the rest of the game, trying to keep the prick alive. Some lessons, you just learn the hard way.
Anyway. Jay whacks some Ragerz on the head with his Troggs:


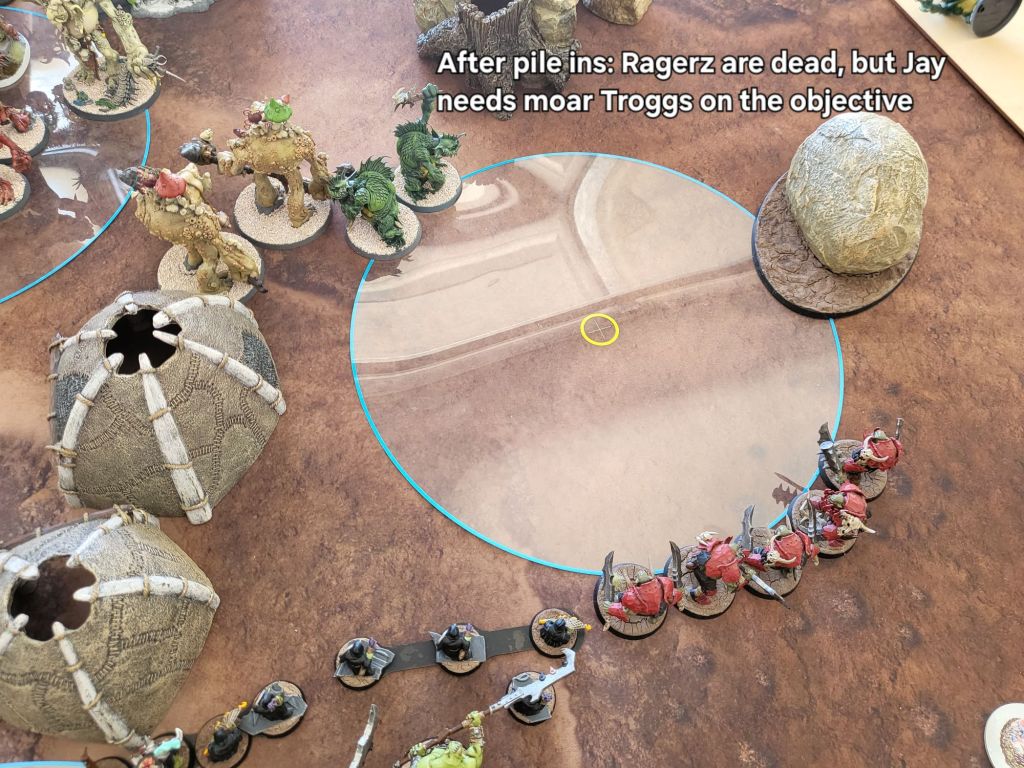
But Jay doesn’t quite get enough models onto the right hand objective, and I take a narrow lead into Prio:
Ironjawz lead 7-5
Round 2
I win Prio and ya know what? I’m feeling pretty set. My screens are up so it’s probably a good time to get the double turn out of the way now, rather than stepping out from behind those screens, exposing myself to a brutal double later in the game and then pissing and moaning on the internet about how broken the priority mechanic is. So I give it to Jay: You put me in first to double me, well here ya go, double me.
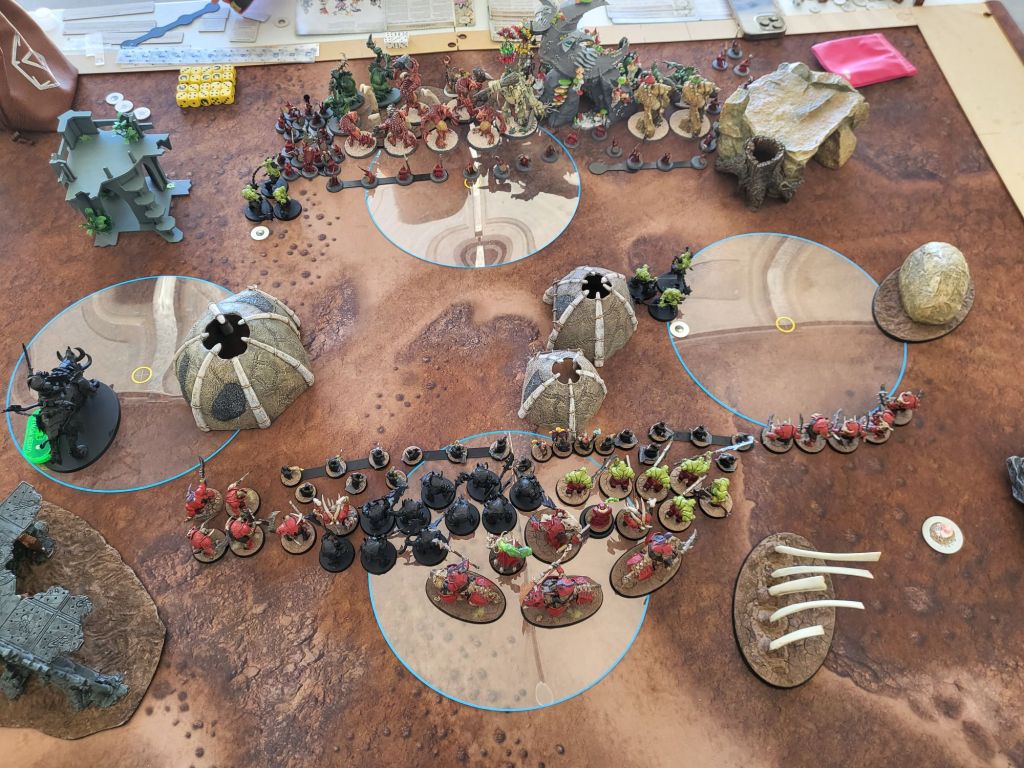
This is developing into the classic Border War “Tank ‘n’ Spank”: on my left flank, Jay 4+ rallies back a bunch of Grots so he’s got a 40-wound, neg 1 to hit block in place; while he pushes through with his Trogg hammer on the other flank.

On my left, the Fellwaters step in to chop down the Big Pig – they do get one Vomit attack through which borks his armour save, but the Brutes on that same flank countercharge into the fray which is low-key pivotal in the game. Jay is super keen to chop down my only Monster and protect his Shrine, but he’s now in a position where if those Fellwaters don’t swing first, he’s probably going to lose the unit. And yet if he does attack on that flank, I get to swing first into his Danks on the other side:

Jay fights with the Fellies, and down goes the Gouger. That’s my only Monster gone so it does mean Jay’s Shrine is safe. But it’s pretty costly, as the unbuffed Brutes on my right roll well and chop down a Dankhold over on that flank.
The remaining Dank and Fellwater Troggs had done what they needed to do – kind of – which was blowing up the Grots to get rid of the screens (and eliminating my neg -1 to hit from the game), while taking a bite out of the Brutes. Being forced to split attacks and losing one of his Danks meant that some Brutes lived, but getting plenty of his units into my territory did mean that Jay scored both centre objectives and his BT.
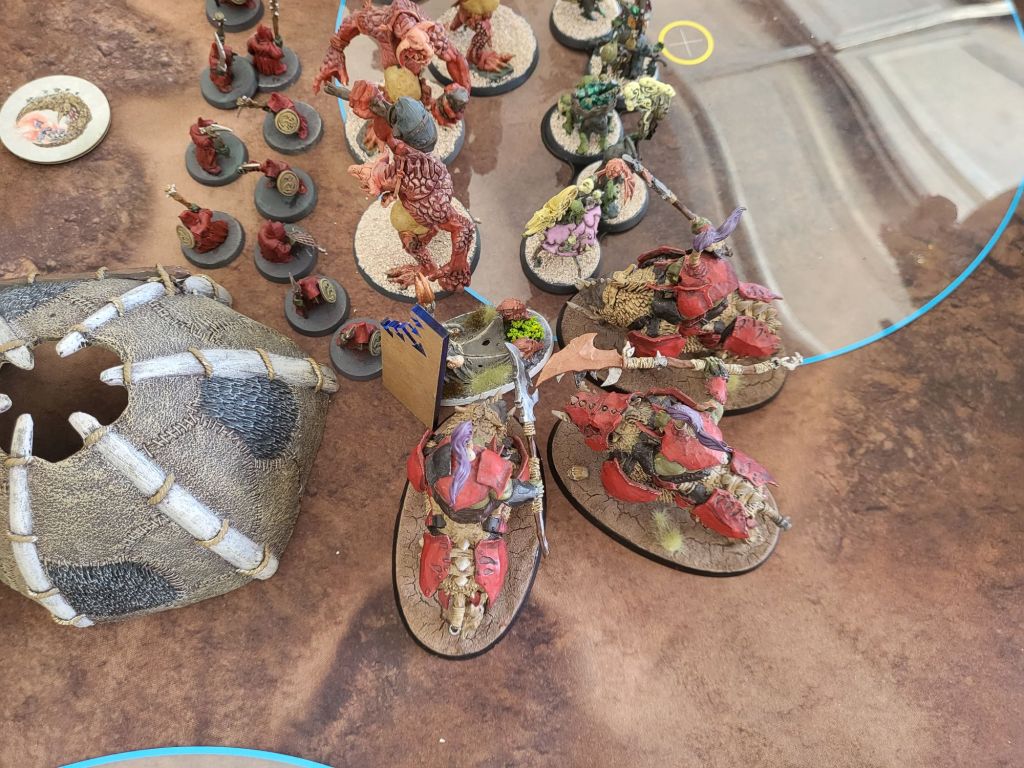
It was time for some of that trademark Ironjawz bullshit: buff the Pigs, teleport them into the backfield with Hand of Gork and make them land 12.1” away. This means they can issue themselves with Mighty Destroyers to move in 9” closer, so they’re 3” away from their target and Jay hasn’t had the chance to Redeploy. I also buffed the 6x Ragerz with the intention of knocking over the Troggs that were right up in my business.

Jay was kind enough to help me figure out how to get all the pigs around Skraggy without bringing the Netters into 1″ range:
The combat phase rolls around, and it’s Clobberin’ Time.
- BISH! The reinforced Ragerz split their attacks, and chop down the Dankhold and the Fellwaters
- BASH! The 3x buffed Pigs keep it really simple, and turn Skragrott into green paste
- BOSH! Brutes on my left flank pick up the last couple of Fellwaters
How’s that for a Smashin’ and Bashin’ chain! Jay’s left looking at the smoking ruins of his army and the best thing is, the mission-critical units I’ve picked up (Skraggy and 2x Danks) can’t even be summoned back. The narrow deployment bands in this mission allowed me to score Intimidate the Invaders too.
Ironjawz lead 14-12
Round 3
I got the prio here and doubled Jay back. He is set up with his screens intact, but it’s time to put the pedal to the metal.

Hand of Gork is used to lob some Brutes up onto the back board. This is quite important for a couple of reasons:
- If I’m about to chuck my whole army forward, leaving them exposed to a counterpunch, it’s another threat that has to be dealt with.
- That’s easier said than done for mid-paced footslogging Troggs. They really don’t want to be heading back the wrong way first.
- If Jay ignores them to deal with bigger threats, they’re scoring me the Waaagh! Grand Strat (Battleline in his territory).
- I might even hit a lucky long bomb charge off the teleport, getting them into the little Blizzard Wizzard to stove his head in.
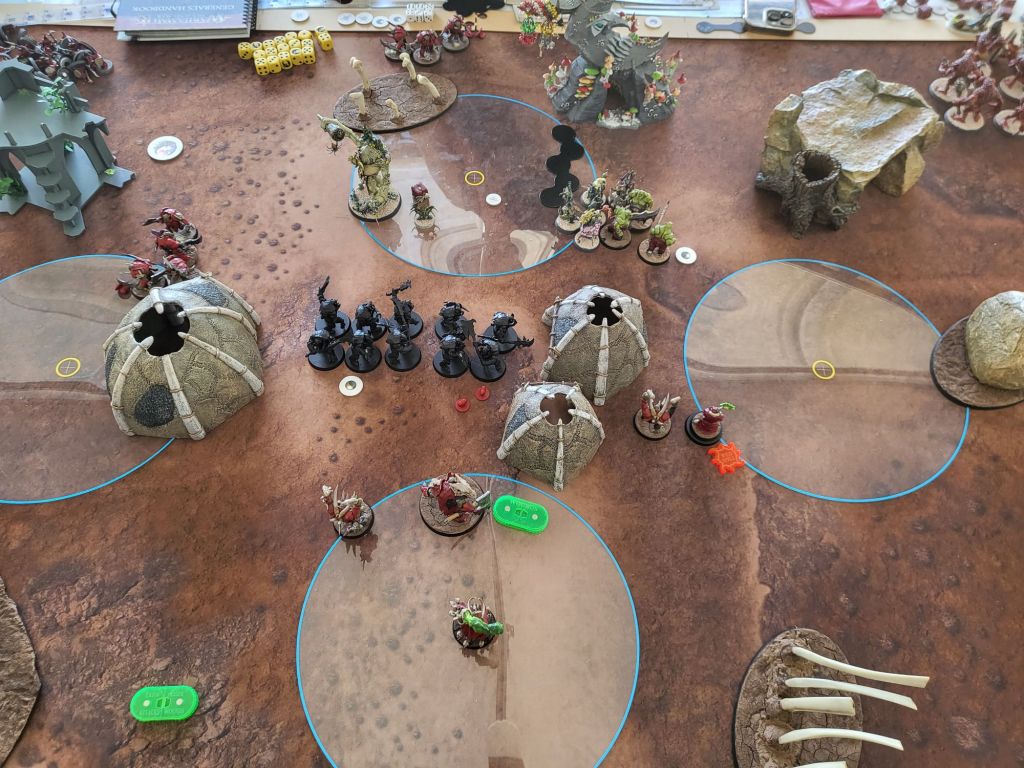
Back on the frontlines, we’re ready to move on from the “Fuck around” stage to the “Find out” stage. Run and charge again came in clutch on the Ragerz, as they lapped up around the edge to engage the 6x Rockguts. Meanwhile the Brutes all walked up towards the Grots and stamped them into the ground. Sometimes the simple ideas are the best.

End result: a lot of dead shit. I killed 5 out of 6 Rockguts, and Jay allowed his last one to flee, to try and summon them back. One on its own wasn’t gonna do much.
Ironjawz lead by heaps
Rounds 4 and 5
There is still a path to victory here for Jayden, but it’s very narrow and only getting moreso. Jay does still have a Blizzard Wizzard in position, with my army standing right in front of him waiting to get zapped. A couple of big 4D6 bombs, plus a couple of turns of rebuilding his army through the Shrine, could get Jay back into the game.
It wasn’t to be. Without the Acolytes dice, Blizzard is a tricky cast and Jay couldn’t manage it. Credit to the Dankboss, his final action was swaggering over to the Brutes like James Cagney staring down a death sentence with zero fucks given, and so his saga ends.

The Result

All that was left was to mop the Grot stains off our boots, spark up a fat cigar and pontificate on the internet about everything our opponent did wrong.
Good job, Ladz.
Reflections: Jay’s Army
It was Jay’s first game using the Danks and an experimental list, so there were a few learning points for sure. The first thing to say is that the debuffs just couldn’t keep pace with all the stacking +1s in my list. This ended up being a good matchup for Clean Energy.
In terms of in-game decisions, perhaps Jay did overcommit by engaging on two flanks on his double turn. In the end, Jay lost the Danks cheaply – and they don’t come back.
So my suggestion for Turn 2 in a similar situation would be:
- Still use the Fellwaters to clean up the Gougers on my left
- On my right: instead of pushing forward with the Danks, hold them back, and use the second unit of Fellwaters plus some magic to just clean up the 20 Grots
Jay could then swing first pretty safely into the Big Pig, because over on the right side, charging just the Grots (rather than also getting into the Brutes) means there’s bugger all damage coming back into his unit over there. I then have to spend my following turn dealing with the 2x minimum Fellwaters – both of which can be summoned back, and with plenty of turns in hand to do it. Meanwhile Jay would have all of his hammers in place and my army is unscreened, and without the -1 to hit from the Netters to protect them, your opponent will get insane value out of every swing.
The 40x Grots were a star performer in Jay’s army, stealing an objective from 9” away and forcing me to commit huge chunks of output to kill them (twice). One unit was dope, two would be even better and I feel like more people should be spamming the little buggers.
In terms of list composition, a unit of Sneaky Snufflers would be highly valuable, buffing either the 40-wound Grots or the Double Danks with a 5+ ward and perhaps an extra attack too. If you can’t fit the Snufflers in the list, I think you might be better served with a second unit of 6 Rockguts than running the Double Danks underbuffed.
One other sneaky option to consider in any debuffing Gits list would be an Allied unit of Daggok’s Stab-Ladz. They’re a really useful tool to have available: if you hit the 4+, the Neg 1 attacks really complements your Neg 1s to hit; and if you don’t, then it’s still a cheap-ass 70 point unit that can stand on board edges to secure BTs or zone out deep striking. Pretty spicy.
Reflections: My Army
As for my own list, the main dilemma is whether to include any Ardboyz in future now that they’ve had a much-needed points trim.
I could drop both small units of Brutes and the Grots for 2x 10 Ardboyz, with both packages coming in at 400 on the nose (with two Battleline included). I’ll probably give them a try, but honestly, I feel like they’re still too expensive at 200 points and there’s more value to the army in having the Grots plus two cheap Hammers in there. I’ll give it a crack at least.
Reflections: Warcoda
The Battleplan functioned perfectly well, and it was refreshing to have a bit of daylight in weighting between the Primary VPs and the Battle Tactics.
As a side note, we played the same mission a week later in a 4,000 point big battle, and we just ditched Battle Tactics entirely for that, on the basis that they need to be launched into the sun we felt the game might flow quite well without them. And whaddya know, it worked fine – better, in fact.

I’d have no hesitation in recommending Warcoda for TOs. I’d sign up to an event today that included one or more of these missions in the pack. So check it out, and if you do play any Warcoda games, let us know in the comments – especially if you try one of the other Battleplans.
Have a good weekend, nerds – see you on the other side.
*If you live outside Australia: For context, Mat is a former Australian Master and AOS Worlds Captain. Joel Graham has won more events than I’ve played in, and is the best player in Australia by the length of Gordrakk’s schlong.

If you’d like to help us continue our work, we’d love to have your support. All Patreon Tiers include Discord access, exclusive articles and regular contests. Our Tiers are priced to be within everyone’s reach, so please click here to join us today!


Must learn the ways of the Ironjawz…they have a counter-charge?! I have been on the receiving end of them in the form of massed Brute Ragerz (plus some Ardboyz, Warchanters, and Megabosses), but don’t remember a counter-charge happening. Just a bunch of hero phase charging, then piling in within 3″ of me, then killing rats. All my rats!
LikeLike
Haha. Yeah, they can countercharge specifically in Ironsunz subfaction. It was actually the first one in the game outside of the OG Fanatics.
Costs them a CP so you can switch it off with the likes of Geminids. But it does mean that a Megaboss can issue it multiple times to different units too.
LikeLike