

You know what people love talking about right now? Red flags. People love banging on about those things. It’s a bit like the whole pineapple on pizza thing – a silly enmity that we can wallow in, to release the steam from the genuine hostility that stalks social media.
Well frankly that sounds like fun, and I want to get in on it. My big red flag is that whenever someone starts whinging about the Priority Roll, I know that they’re a shit player. Hey, we all start somewhere – but when you’ve been playing Age of Sigmar for a little while, you’ll be faced with two paths you can go down. You can either piss and moan about how dumb the double turn is, or you can learn how to work around it.
And you know what? Any dickhead with two thumbs and a Twitter account can make that kind of big statement, and plenty have. That’s the easy part. What’s much harder is shouldering the challenge of articulating how exactly one goes about that. And luckily for you, Plastic Craic is here to regulate.
Why I’m Right and You’re Wrong
I can almost hear some arsehole spluttering Doritos at his phone screen right now, indignant at being told it’s his own fault he keeps losing. And yet, facts are facts.
I hear people saying all the time that this game just comes down to who wins Prio. And yet if that was true, I should be winning around 50% of my games in the long run, because it’s all just a coin flip – right?
Truth is, it’s rare that I go to an event and don’t go 4-1; and if you think I win 80% of all priority rolls, you’re dreaming.
And I’m just one person. Our boy Pat Nevan keeps on crushing event after event, 5-0 after 5-0, time after time. He wins virtually every game, but it’s not possible that he wins virtually every priority roll – so there’s obviously something else going on here.
Now the good news is, you’re reading this article, so you’re looking for positive solutions. You’re here to go deep into the practicalities of playing around prio, so let’s see what we can do to help.
Ready? Let’s go.
It Starts at Listbuilding
If you’re an improving player, do yourself a favour and put extra screens in your list. Layering screens into your lists won’t make you into a 5-0 player overnight, but it will give you a good buffer to work with in your games and remove a lot of feelsbad moments.
There’s a whole bunch of giga-damage coming into the game now, and the ultimate “joke’s on you” is to let them wildly overkill a bunch of cheap idiots, to leave themselves standing there flapping in the wind. Take the jab, and come back with the haymaker.
You can generally achieve that with one screen, but where multiple screens come into play is when you get doubled. It’s the difference between Chaos Chosen wiping your 80 point Hobgrots then ripping into the heart of your army, or Chaos Chosen wiping your Hobgrots then wiping another unit of 80 point Hobgrots, and then standing there exposed and about to get smashed into paste.
To give you a recent real world example, this is why the points increases killed off the Ironblaster lists overnight. You could fit 4 Ironblasters before, and you could fit 4 Ironblasters afterwards, so why did they instantly drop out of the meta in top-end play? The crucial (and crippling) difference was that you went from having two units of Gnoblars standing in front them to only having one, and that’s a bigger deal than it sounds.
There’s a reason why people were pumping hundreds of points into screens instead of something sexy: the Ironblaster list generally wanted to go first, and double screens enabled them to execute that plan. They could unpack their army, shoot off a critical hero or hammer unit, and set themselves up with two layers of screens (and a safe gap between them) to weather any potential double turn. Most things in the Ogors book trade poorly, with their bad armour saves, absence of summoning or enhanced Rally and expensive units – so once you’re into them they just die, and stay dead.
When your opponent takes their first turn, they’ll definitely kill 20 Gnoblars, so what happens next? Either you win Prio and execute your plan, or lose Prio and watch your army evaporate. There’s not much fat in the list to cut anything else, so competitive players were left with two options:
- Play the list anyway, hope for the best, and then piss and moan online whenever they lose Prio and therefore the game
- Move on to something else that is less skewed, and can be built to weather a priority roll going the wrong way
Maybe they’ll come back in the future, and as the proud owner of a few of those sweet models I hope they do; but that should explain why “the build” dropped off top tables worldwide as if flicked off by a single, invisible switch.
Screening: Next Steps
So you’ve set up a screen or two – how do you get them out from under your feet? Ironblasters shooting over the top of Gnoblars is an easy one, but what if you want to get those Gnoblars out of the way so your Gluttons can make the charge?
There are two tips here. First up, be aware that imperial weights and measures are some anachronistic bullshit 25mm is less than 1” (which is defined as 25.4mm). If you declare that your models are a full inch apart, this gives you 0.4mm clearance for your small bases to scurry between:

This will probably spin out some grubs who haven’t seen it before, so be prepared for the argument. But it’s fundamentally the same logic as 25mm bases fighting in two ranks, and if they’re lowering themselves to effectively denying that 25mm is less than 25.4mm, you’re not the one who’s being unreasonable here. Competitive etiquette would be to declare whether or not the models are a full inch apart when setting them up, because nobody can realistically eyeball 0.4mm, so if you fail to do that your opponent would be within their rights to force a precise measurement. So declare whether the are just over or just under 25mm and away you go.
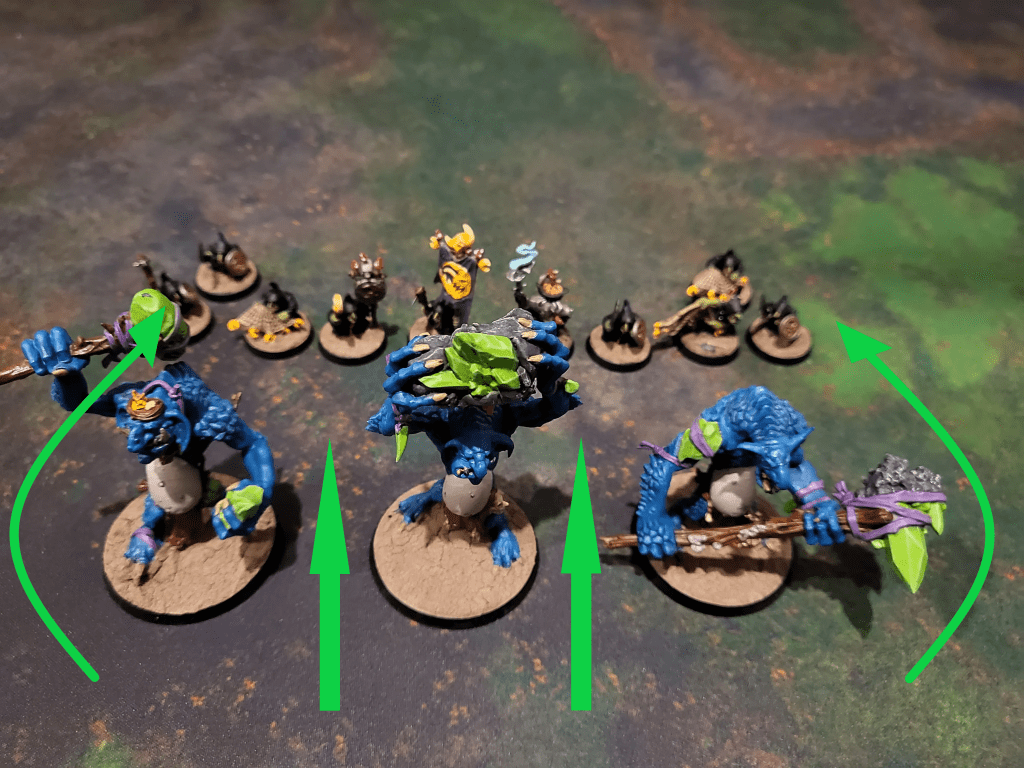
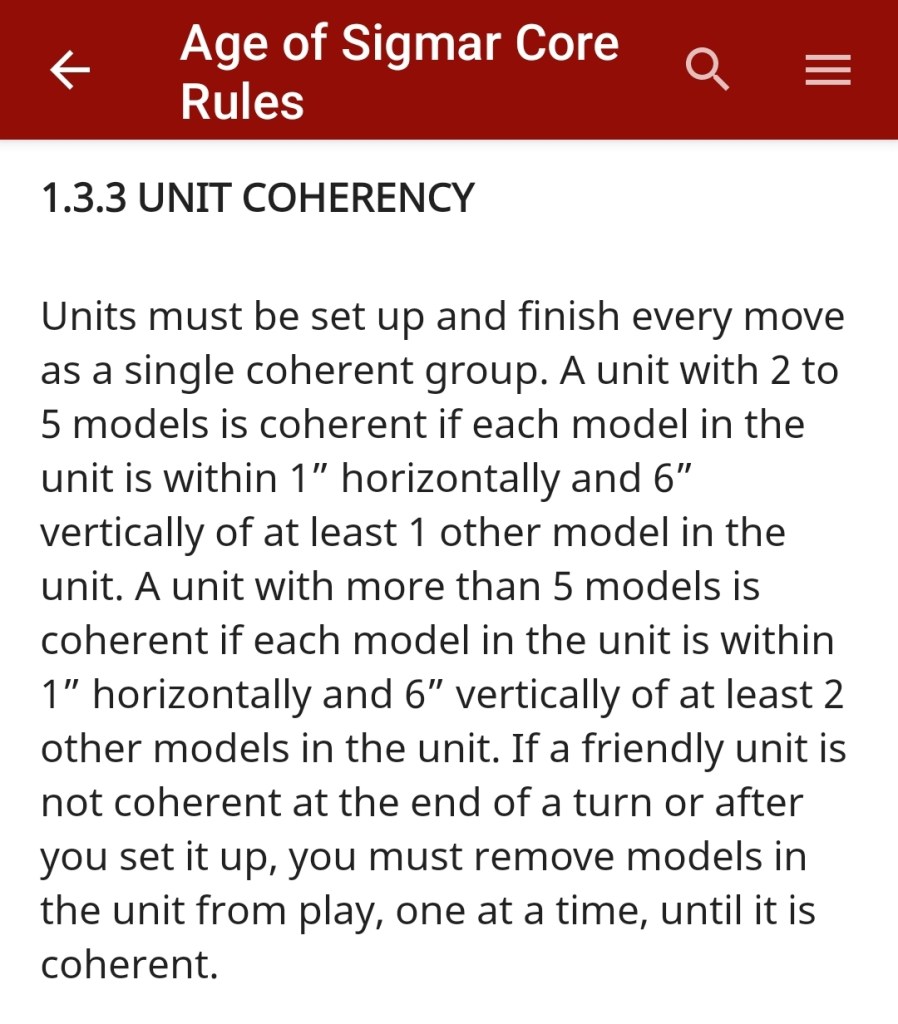
Second one to be aware of is how movement actually works. You have to end your movement in Coherency, but not necessarily remain coherent all the way through:
This means you can split a unit down the middle, run away from your own models and run back to them down the other side, like opening up an airlock:

I’ve seen people’s jaws hit the floor when you pull this one. It’s great for unleashing that tidal wave of Destruction after you win a big prio, but it can also be a good way to deploy against combat armies when you’re not sure who’s going first. If they take it you’re screened, if they give it to you then you’re ready to unpack your army. Let’s goooooo!
Flowchart It
The article would not be complete without stating the bleeding obvious: Build a one-drop army, go second, and you can’t get doubled.
You can build some very competitive lists using this kind of flowchart approach, if you understand your win condition and set up in a resilient position, but like any skew army it’ll be vulnerable to a hard counter. And I think we can aim to be a bit more ambitious than that in our approach.
Tagging is King
After setting up your screens, tagging is the biggest tool you have to protect yourself against the double. Repeat after me:
Tag as many units as possible if you’re going second in the round
This is quite simply a matter of positioning your charges, and subsequent pile-ins, to bring as many enemy units as possible within 3”. This means that if your opponent goes next, you’ve dictated what units they can target with their shooting; and similarly, you’ve prevented their key combat units from rampaging down the table because they would have to retreat (and therefore can’t fight or charge).
In the right situation, this can be a really compelling reason to give away the turn: when you’ve got them nicely locked down, give away the double and watch them squander it killing that one unit of your choosing. When they’re blocked up like that, a combat army needs a double to engage properly: one turn to retreat, the next turn to charge and fight. But because you’re the one who’s now on for the double, they’re kinda screwed.
A few things to think about here:
- Mobile, flying units are at a premium, because they can vault the screens and tag the unit of their choice
- Tagging the edge of units (not crashing into the middle of them) will minimize how much damage you cop on the clapback
- Durable units, who can wear a bit of damage and stay in the fight, are also clearly great at this. Nurgle made a whole meta out of flying, durable units earlier in 3rd Edition!
- You need to exercise your own judgment as to how much damage your unit can take and still hang around to tag – there’s no value in just throwing them in there if they die. This is yet another reason why the priority roll is a means of expressing skill (or at least knowledge and experience)
- This is exactly why competitive players get very excited whenever they see retreat + charge or retreat + shoot mechanics. It’s generally one of the most exciting things you can see in a new Battletome, along with the (less common) rules that prevent enemy units from retreating
- Sneaky extra movement is ideal for tagging. A couple of examples are Bloodtoofs within Ironjawz, who can charge (or pile around) to tag additional units at the end of the turn; and anything with a 6” pile in
And just as importantly: if you find yourself tagged, teleports are a great answer, unless they have a 3” clause (such as Hand of Gork). Save your best Unbind for the teleport spell if your opponent can phase out of combat, but really that’s why I enjoyed using the Bridge so much with Kragnos. The excitement comes from knowing you can jump up the board and then reliably nail a 9” charge with 3D6; but once you put it on the table, the satisfaction comes from knowing you have an answer to people trying to tag you and bog you down in combat. Fly across that Bridge and run wild, you untamed stallion.
Tagging and Bagging
Living the absolute dream for a tagger is when you can tag your opponent’s hammer unit behind their own screen. I’ve done this loads of times, and it’s fuggin’ glorious: charge the screening unit with your own chaff, pile that chaff in to within 3” of the deathstar unit sitting behind it, and then they can’t reach your over the top of their own crap. They either have to stand and watch while you have an interminable pillow fight, or retreat and waste a turn. Glorious.
Corner running
A maneuver that will consistently help you win games is running cheap little units into the corner. This is way more powerful than it sounds.
You’re not contesting the objective, but you’re threatening to. Think about what that does to your opponent’s turn. Their ideal turn would often look something like: tap and go the objective they’re standing on, plough their blunt-force trauma block of troops down the table and smash something. Whoop de doop.
That’s leaving the objective empty, so your handful of cheeky Spider Riders or whatever can sprint onto it and cap it on the cheap, potentially for the long term if your opponent is footslogging around.
So what they actually have to do is step backwards to engage with your light skirmishing unit, no doubt brutally overkilling it. Even that should be seen as a win for you: you’ll start feeling better once you have the mindset that you’ve “consumed” one of the five turns of their centrepiece unit. If that’s a 500 point unit, and you’ve eaten up 20% of what they’re doing for the entire game, you’ve got your 100 points back that way.
And now they’ve moved further back away from the action, and now the front of their objective might well be open for you to scurry onto. Honestly, any time you make your opponent turn back and go “the other way” that’s a big win for you, and the key is not using those fragile units to contest the objective (and probably lose them on your own turn), but instead to threaten the objective and effectively to kite your opponent’s units.
And of course, it’s not always literally running. Instead of teleporting a hammer unit in front of your opponent in the early game, and praying you hit lucky with that 9” charge, you might use that teleport to place a far more disposable unit into the corner. Corner running ties in with tagging too (as we’ll see in great detail with a practical example below), because quite often this corner running will come after you initially charge your opponent as a springboard.
Let’s say you’ve charged an enemy unit and then you win the double. You’re going to have a decision on your hands: do you stand and fight, or retreat back out? I totally get that the default temptation is to stay in combat, rather than retreat and lose a round of output from melee, shooting or both (e.g. in the case of Fellwaters); but unless you’re confident you’ll blow up the enemy unit, that’s not going to help you win games, especially when there’s a hidden cost that you have to use your first combat activation to effectively protect your vulnerable unit.
By definition it’s a judgment call, but at least be aware that having a unit off in the corner is more poweful and valuable that getting it killed on your own turn. And if that sounds patronizing, please understand that I’ve seen people leave their own units in unfavourable combats again, and again, and again.
Learn When to Embrace The Insanity
It’s not just a matter of mitigating the damage from copping a double turn to the face – you also need to think about leaning into the whole thing, and maximizing the damage you can inflict with a well-timed double.
I’ve taken some bloody good scalps with Ironjawz over the years, including for example Corey B’s 5-0 Tzeentch; and one of the great eras of kicking ass with underdog Ironjawz was late 2nd Edition, into the rightly-feared Seraphon lists.
Crash into the screens, park your tanks on their lawn and then you’ve got a big old roll-off on your hands. You as the IJ player will have copped some damage on the way in, but you’ll still have enough gas in tank to rip out their jugular if given half a chance. Both armies are right out there in the open, and whoever wins prio is gonna demolish the other. Believe me, this is utterly terrifying for the kind of player that tries to jockey S-Tier Order filth to consistent wins.
Now the haters will say that this is a prime example of the kinds of games “ruined” by priority, but you know what else is a non-game? A combat army getting zapped from across the board by shooting and magic, so it’s inevitably whittled down to a sad stump by the time it gets there, 100 times out of 100. Giving Ironjawz a puncher’s chance into Seraphon is a truly wonderful thing: giving yourself a coin flip isn’t a bad place to be in, when on paper you should have about a 5% chance of getting up via normalhammer.

The same is true of the low-key filth Skaven builds right now, with Thanquol and a Warbringer: they can afford plenty of screening Clanrats, so a linear combat army couldn’t beat them without the potential of a double. They’d be licking their lips when they see a combat army trudging across the board, and yet I’ve won the Skaven matchup against top players with the likes of Ogors and Bonesplitterz loads of times.
What this isn’t
Please don’t take this as licence to zerg rush your opponent at every opportunity – turning the game into a coin flip is only advantageous if you start out as underdog. I give you neither encouragement nor permission to push all your minis into the middle of the table at the top of a round, just “to see what happens”. Sometimes it’s your best bet; other times you’d want to trade away their screens first with Gore Gruntas before you hit that big red button. This is where you need a good understanding of what both players’ armies are capable of, and in the case of Skaven especially, knowing when not to engage because they’ve got Death Frenzy up.
Priority is the opportunity, the skill is in knowing when and how much to lean in.
Doing it on Work Time
Speaking of Death Frenzy, any Tech that lets you play on your opponent’s turn is dynamite:
- Countercharging units such as Ironsunz, Glottkin and in their own way the Bloodtoofs enable you to wipe units on your opponent’s turn that they hadn’t accounted for. For example you can clean up screens and be good to go whether or not you got the turn, and better yet, engage with a shooting army that thought it could just sit there and safely ping you off;
- Fighting on death is solid gold. Skaven are the archetype but it’s also the reason why Grinkrak is worth every one of his 190 points in Gits. Retributive fighting to wipe your opponent’s unit on their own turn is the classic Heads I Win, Tails You Lose
- For Shootcucks, you’ve got Unleash Hell. I’m well aware of how to play around it, but I still don’t think it should be in the game; while it is, maximizing Unleash is a good way to face down a double. The fundamental failure of this rule is that so many powerful shooting attacks in AOS just want to do mortal wounds, which aren’t really impacted by the penalty to hit; Rockguts are the latest in a lengthy Rogues’ Gallery, albeit with a low ceiling on how much damage their shooting can ever do; Thanquol and Sentinels are two far bigger culprits. More generally, good baseline stats are a strong start (for example Fellwaters hitting on 3s instead of 2s is still fine; likewise Namarti Reavers offsetting the penalty), along with bespoke tech such as The Last Word
Using the Handbook
Not so much technical advice, but still something to take into consideration: the dev team are well aware that priority can be hugely impactful, and have taken proactive steps to address that in 3rd Ed especially. One extra CP is a thing, but we’ve also got Missions that give specific bonuses for going second, such as removing objectives; and people are really sleeping on the double Heroic Actions at this point in my experience.
As an aside, it’s why I actually like Twists and Turns, even in a competitive setting: yes priority is a massive roll, but so is every roll for the objectives being switched on or off. There’s a degree of counterplay in how you position yourself to attack or ignore the various possible combinations of objectives each round, there’s a risk-reward element in gambling on how it can turn out, and most importantly, it introduces a huge amound of inflection points in the game. Every objective roll can feel like a little Prio, and taken as a body of work it creates a beautifully complex rolling puzzle.
Planning Ahead
Beyond the whole screening and tagging thing we’ve talked about, there are plenty of other ways to plan ahead for a potential double. One great example right now is using Redeploy to shuffle a screen laterally in front of another unit. You can boost your chances of success with rerollable Redeploys (Gobsprakk, Snarlfang Riders) or having ways to Redeploy multiple units (Megabosses, Vulcha Boss, and at time of writing Leadership of the Alpha).
I’ve been known to use Redeploy just to blob up, for example shuffling a reinforced unit of Fellwaters around so that wherever they are charged, the whole unit is going to be in range to fight with their 2″ range; similarly, you can often bring a hammer unit with 2” range up closer to your own screen, so they can hit over the top and bring the pain that way.
Planning Ahead – Special Cases
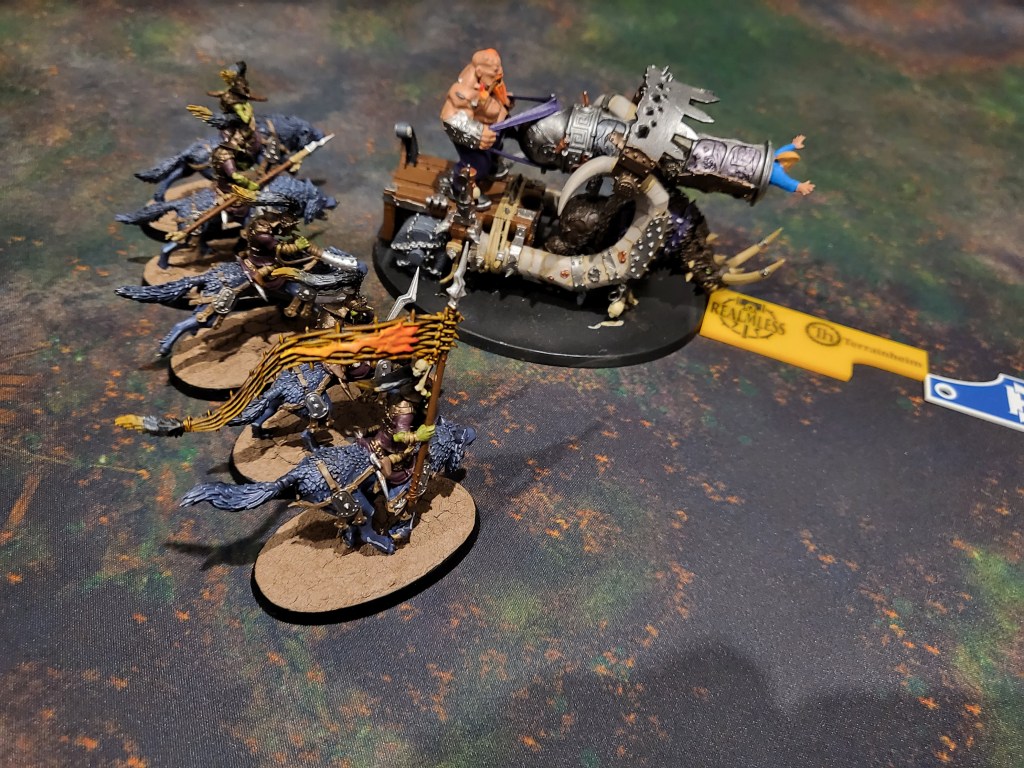
In a game as complex as Age of Sigmar there is an entire galaxy of shit you can pull, but one thing I’ve been enjoying recently is the Trogboss’s unique Heroic Action to wander around in the Hero Phase.
- Charge fighty Unit A so that you finish your charge positioned 6.1” away from shooty Unit B, and thereby avoid triggering Unleash Hell from Unit B. Then pile around Unit A to be within 6” of Unit B
- Why bother? If you go next, this gives you the opportunity to walk out of combat with Unit A and wander into Unit B, so you’re now in combat with them and they’ve never had a chance to Unleash
- I managed to pull this one off against FEC in a tourney last weekend, circumventing the anti-bravery shooting from Crypt Flayers, and fuck me it felt good.
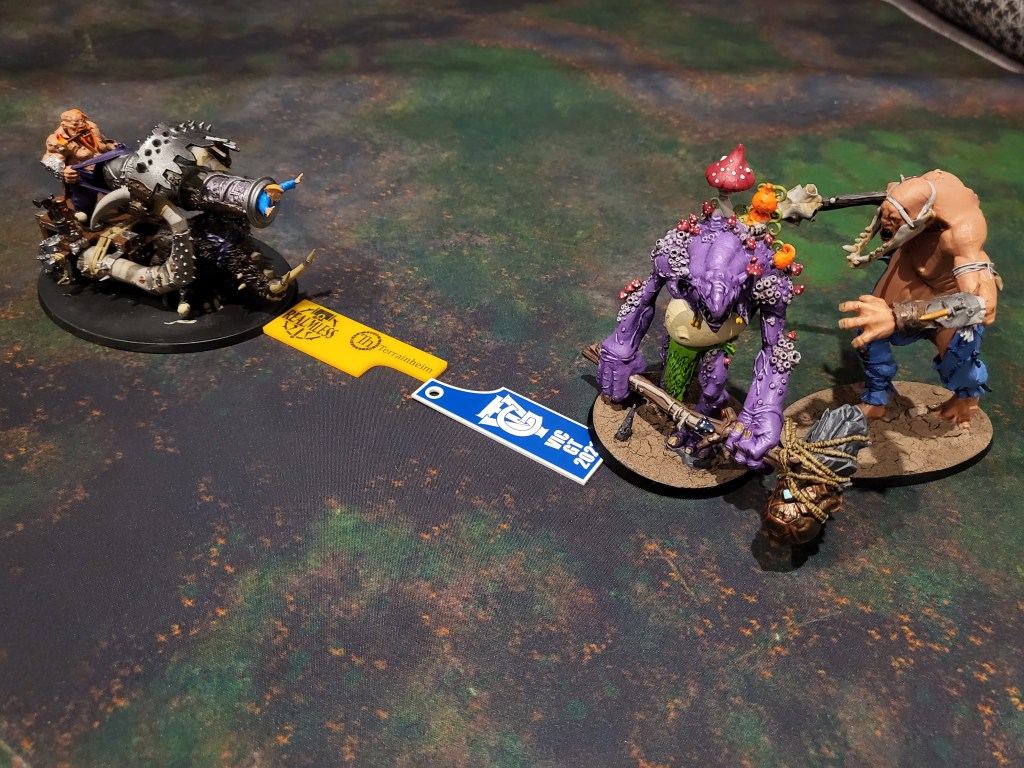
I didn’t grab any photos at the time, so let’s run through a staged reenactment using some models from my own collection to stand in as a scary Unleash Hell unit, and a not-in-any-way-scary unit you’re always happy to charge:

If you fail to plan and stuff up your distances, you can either end up copping an Unleash Hell on the charge, or more likely finding that you are a little bit too far away from Unit B to wander across to it. Planning ahead puts you in a really strong position to maximize the double, and that’s what will separate you from the mid tables over the long run.
Knowing When to Give It Away
You can set yourself up by putting on defensive buffs and debuffs that last until your next Hero phase: a prime example of this is the Fellwater “Covered in Vomit” rule that massacres your opponent’s Save roll until your next Hero phase.
The flipside of this would be that when your opponent has all their buffs up, they’re standing on top of the mountain – it can only get worse for them from there. Put them through another Hero phase and all those buffs vanish, so they’re back to checking ranges and casting spells to try and get back up there.
I’ll go back to Skaven as a prime example – for melee armies, there’s often no point in even engaging with a unit that has Death Frenzy on it. Put them through another Hero phase, and give them the chance to fail it (or have it Unbound).
When there’s a key objective you need to remove, when you have their key units tagged, when they’re buffed to gills, when you have your own defensive buffs up and you want to keep it that way: give away Prio, use the Unbind Heroic Action and clench. You’ve got this.
When You Do Find Yourself There
If you get doubled, please use the Heroic Action to get an extra Unbind – this one is heavily underused. Just think how good it feels when your opponent tell you that they’ve got no Unbinds, and then flip that around. How scary does it feel when you’ve got one you “shouldn’t” have? You’re certainly making their life harder and giving yourself an out.
A brief Interlude
Hey Heroes, its your old pal and Plastic Craic contributor Patrick here. Pete asked me to pitch in with any tips on the whole priority roll thing. His advice is fairly solid, demonstrating that even a stopped clock is correct twice a day. In AOS you need to accept that you’re going to get doubled and it’s going to suck balls, so plan accordingly. Priority rolls do decide games but it happens less frequently and later in the game as you improve. It’s a feature of AOS 3 that the closest games are often won by going second in turn 5 to deny your opponent’s Grand Strat. That said the main piece of advice I can add to Pete’s is…
Keep your distance
It may be a hangover from WFB or just a natural part of tabletop toy soldiers but there is a strong inclination to push armies into the center of the board and duke it out. This is by no means a bad practice, particularly if you’re fond of foot slogging melee armies and you need units in a position to influence the game, but it’s also a good way to get smashed in melee on a double turn. When you get first turn in a battleround, it’s vital to have a clear idea of where you need your army to move to in the next turn, and how far your opponent can move their army. AOS in the early turns features a lot of units being wiped out by mega damage so don’t stand any closer than you have to. If you are sending a unit off to attack/sacrifice, be sure to put your screens up behind it. Which sounds obvious but a surprising number or people don’t do it, move too close to the enemy and then get rolled up in melee on the double.
A classic scenario to engineer is that you push onto an objective in the bottom of turn one and take it, with the rest of your army screened at a safe distance. Your opponent takes it back. Next priority, most of their army is out of reach or arriving in dribs and drabs. No matter who gets the following turn the bulk of your army will be up and about at the end of it.
Of course none of this works if your opponent has 60 Sentinels shooting you off the board. Or KO, or teleporting Sylvaneth, or null deploy BOC or etc etc. If you’re playing melee, closing as fast as possible and prayers to the dice gods are often your best option. AOS is a dynamic game. A plan that wins against one opponent will fail miserably against another. I’m not even sure the priority roll can be “mastered” but the idea is to try to handle it rather than pissing and moaning about how you were robbed yet again. Dammit Pete is right, again, twice in one day come to think of it.
Putting it in Practice
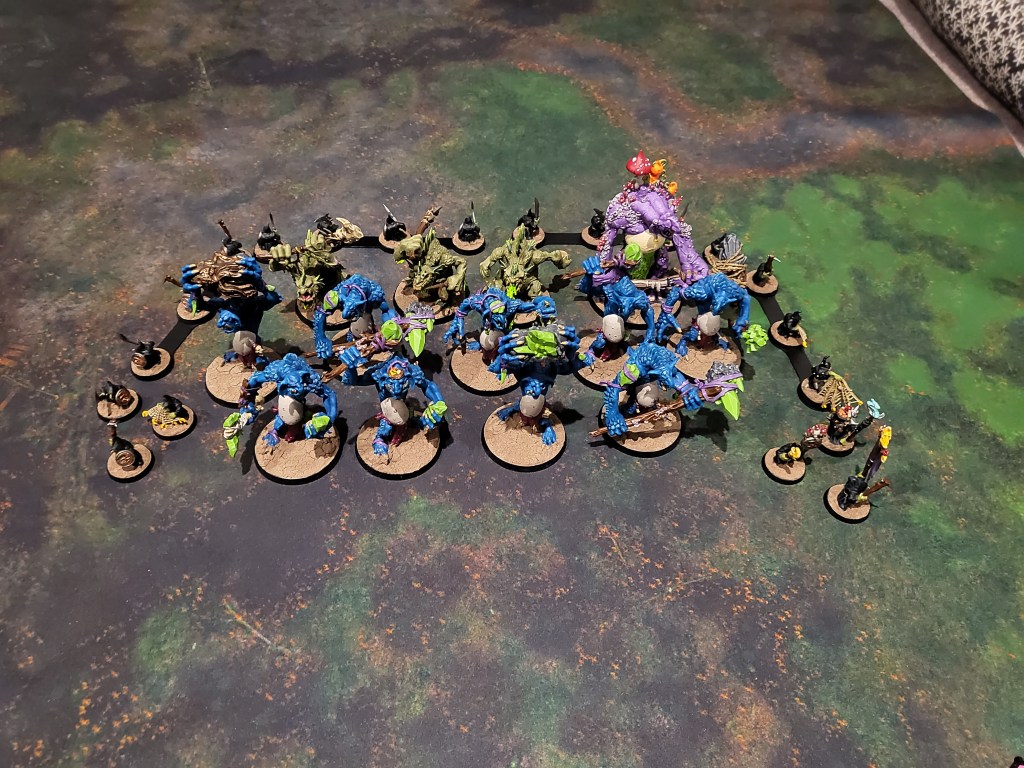
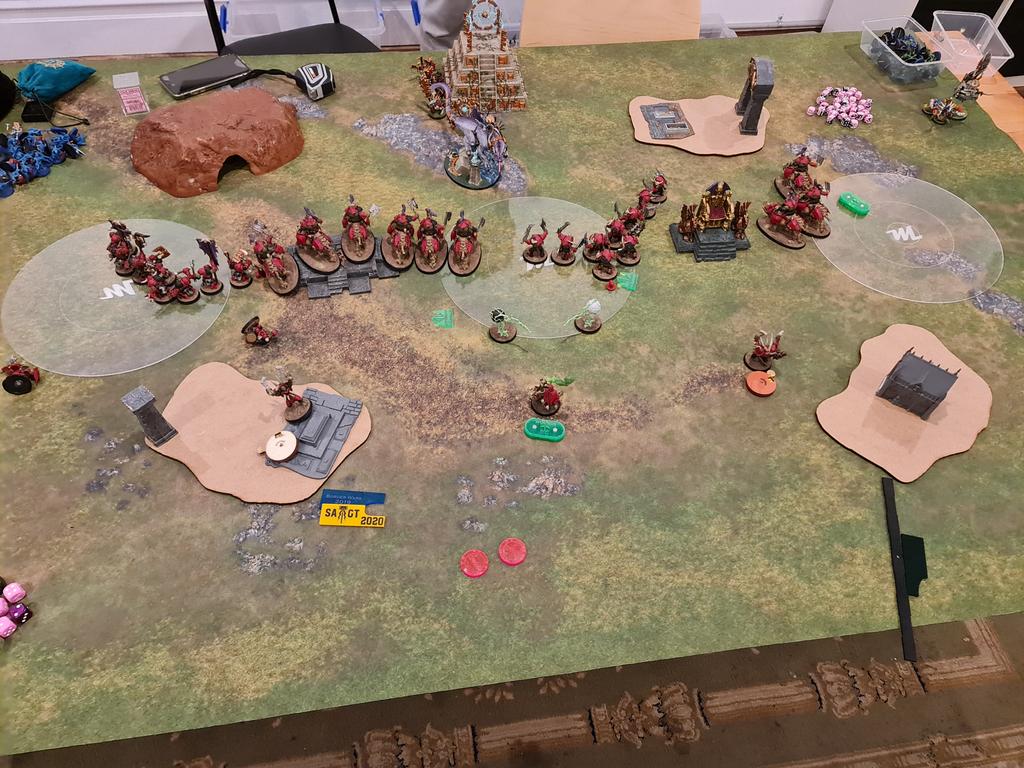
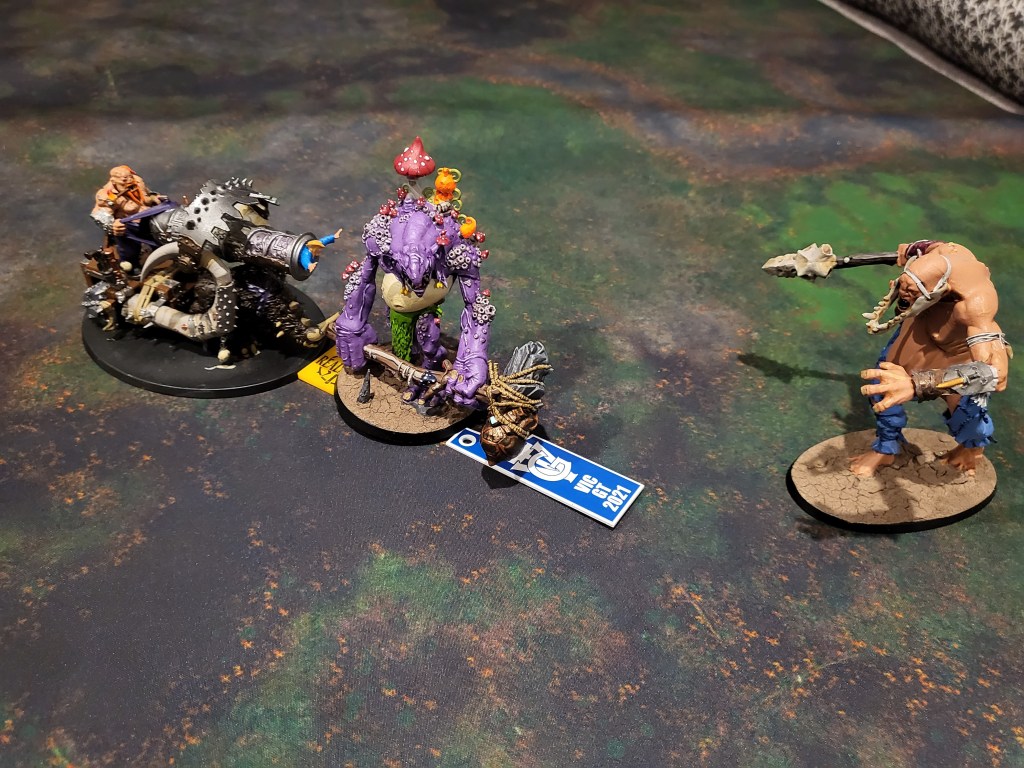
Here’s a practical example from the recent Vic GT. My Troggs vs the legendary Dan Trotter’s FEC on Ours for the Taking, and it’s my turn at the bottom of Round 2. Dan is a stalwart of the crack Geelong scene, and he went hard down both flanks with his twin 9-man Crypt Horror and Crypt Flayer anvils; whereas my army was heavily pivoted towards my left flank (opposite the Flayers) and the centre.
The upshot of this is that we’re trading blows on the left two-thirds of the table, while Dan’s Crypt Horrors have already cleaned up my “home” objective largely unopposed and I’m not going to get it back in a hurry. I’m looking at the table and thinking that I need to crush and overwhelm Dan’s Flayers to stop them Mustering back multiple 4-wound models every turn, and that means keeping the Crypt Horrors occupied on the other side for as long as possible with the lowest possible investment.
Essentially I’m looking at creating a brutal mismatch with the bulk of my forces to overwhelm the Flayers with swift and savage overkill; otherwise you just get bogged down as they keep regenerating. But I also need to prevent Dan from banking his gains and pushing in with the Crypt Horrors to crush me in the centre – the longer I can hold them over there, the happier I am.
I sent across 3 Fellwaters to engage with those Crypt Horrors and because this is the bottom of the round, I know we’ve got a big prio coming up. Now I’m well aware that 3 Fellies aren’t gonna wipe 9 Horrors, so the plan is to charge the edge of his unit and engage as few of Dan’s models as possible.
Fellwaters are ideal for this purpose:
- I can leverage their 2” reach to put only one model nearby to Dan’s unit, and minimize the number of models he can pile back into me
- Combined with the -1 to hit into a unit that natively hits on 4s, this should hopefully be enough to keep the unit alive and in combat with Dan’s Crypt Horrors
- Also worthy of comment is that the Covered in Vomit debuff lasts until your next hero phase, so if your opponent gets the double (or you force it on them), their save will still be borked. Whereas if you take the next turn, the debuff disappears.
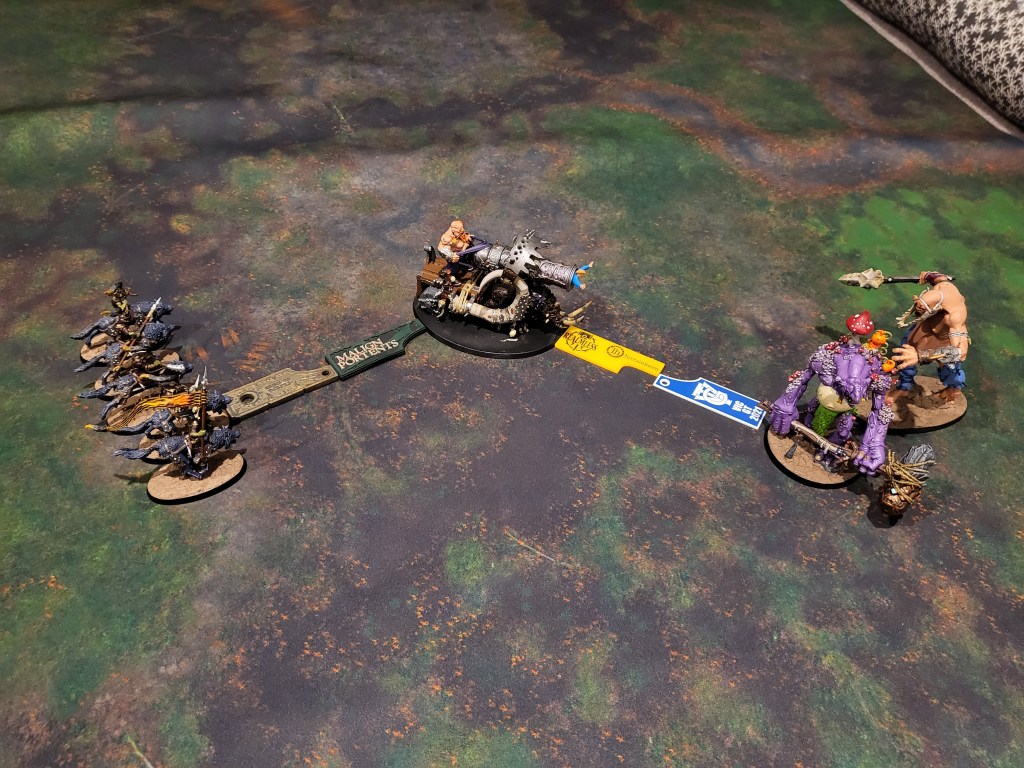
As expected, I kill a few Crypt Horrors and the ones Dan does get back into combat roll pretty well to kill a couple of Fellwaters in return. This leaves one model in the unit, so Skraggy issues IP from 18” away and the upshot is this:
- If I go next, I can retreat that Fellwater out of combat and run him into the corner. This will in turn force the Crypt Horrors to step off the objective and move even further away from the rest of the action, allowing me to consolidate my gains elsewhere on the board and have my army set and ready to tackle them when they come.
- If Dan goes next, he has to waste another full turn overkilling one idiot, with a disproportionate chunk of his army securing one single objective. Meanwhile he loses the attrition and VP war everywhere else on the board
It’s pretty much a “Heads I win, Tails you lose” scenario, and put me in a great position going into the big roll off. As it happens I did win the prio and took it, to clean up the Flayers and secure a dominant position; I also brought my Rockguts across to shore up the centre for when the Crypt Horrors eventually got back into some kind of position of relevance.
I will just gloat mention that on this occasion the Rockies also happened to nail a hilariously long charge into the Horrors, which essentially sealed the deal there and then. But fundamentally it wasn’t the long charge that put me into a winning position – that just got me there quicker. Allocating your resources, tagging and retreating, these are the methods that make priority rolls a manageable risk instead of something that happens to you.
And you know what the best bit is? There’s some absolute doughnut out there reading this, and spluttering that I only won that game because I got the double. You can lead a horse to water, right? There’s always gonna be people who just don’t get it, and that works for me – we’ll just keep smashing them.
In Summary
It is difficult to articulate how you can make a game flow to your advantage, which is why most people don’t bother trying. Age of Sigmar is a dynamic game and there honestly is no substitute for experience: there are multiple points in this article where I’ve emphasized the need for knowledge and judgment, which is also known as “skill”. If you’re tagging, you need to have a good feel for how much your unit will bend before it will break. If you’re corner running, you need to know when that’s a better bet than using the unit to screen or fight instead. If you win the roll, you need to know when to take it and when to give it away.
All of these are reasons why the priority roll should be seen as an instrument of skill expression, not some random “Win” button that haphazardly ruins games. Hopefully what this article has done is given you some really practical tools to start looking at the table in a different way, with the question of “how will the next turn look if I don’t get Prio” sitting there quietly at the back of your thoughts, and informing your actions. Good luck, and Gorkspeed.
Further Reading
Can you imagine the play patterns if you knew you were going first and third? No thank you. If you’re still on the fence about the priority roll I would encourage you to read this piece which focuses on how priority shapes the game for the better, whereas this article is intended to provide a toolkit for making it work to your advantage.
What’s Next
And in the spirit of sitting there quietly at the back of your thoughts – the intention is that this article will feed into an ongoing series, with the Plastic Craic team posting worked examples from real life games – similar to the one with Troggoths above. When we make a play that was specifically geared towards an upcoming priority roll, we’ll grab a photo and write it up on here.
Over time that will build up into a body of work that gives you a real insight into making the priority roll a weapon in your arsenal, rather than something that happens to you.

If you’d like to help us continue our work, we’d love to have your support. All Patreon Tiers include Discord access, exclusive articles and regular contests. Our Tiers are priced to be within everyone’s reach, so please click here to join us today!


I can’t find the words to describe how good this article is!
LikeLike
What an excellent read!
LikeLike
I’m still trying to figure out painting and have hardly played but this was such an interesting read. Thanks for taking the time to write it!
LikeLike
I can’t count how many times I’ve had to have this discussion about how the prio is not a coin-flip-game-decider. Thank you so much for this brilliantly written article.
LikeLike