

by Peter Atkinson
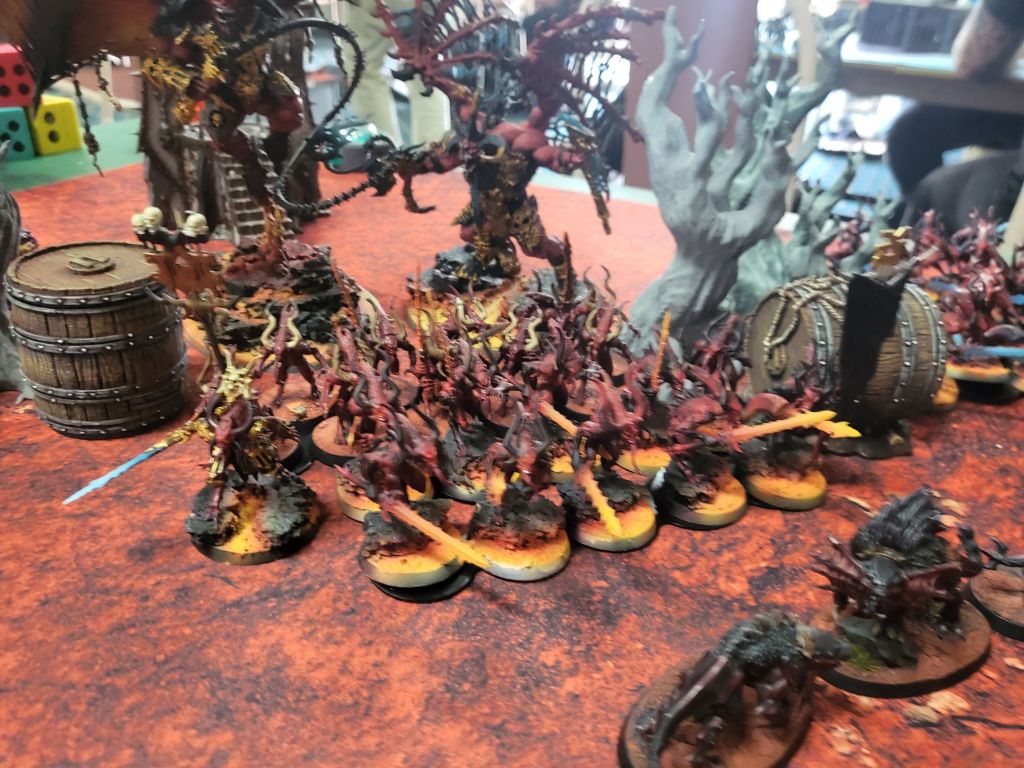
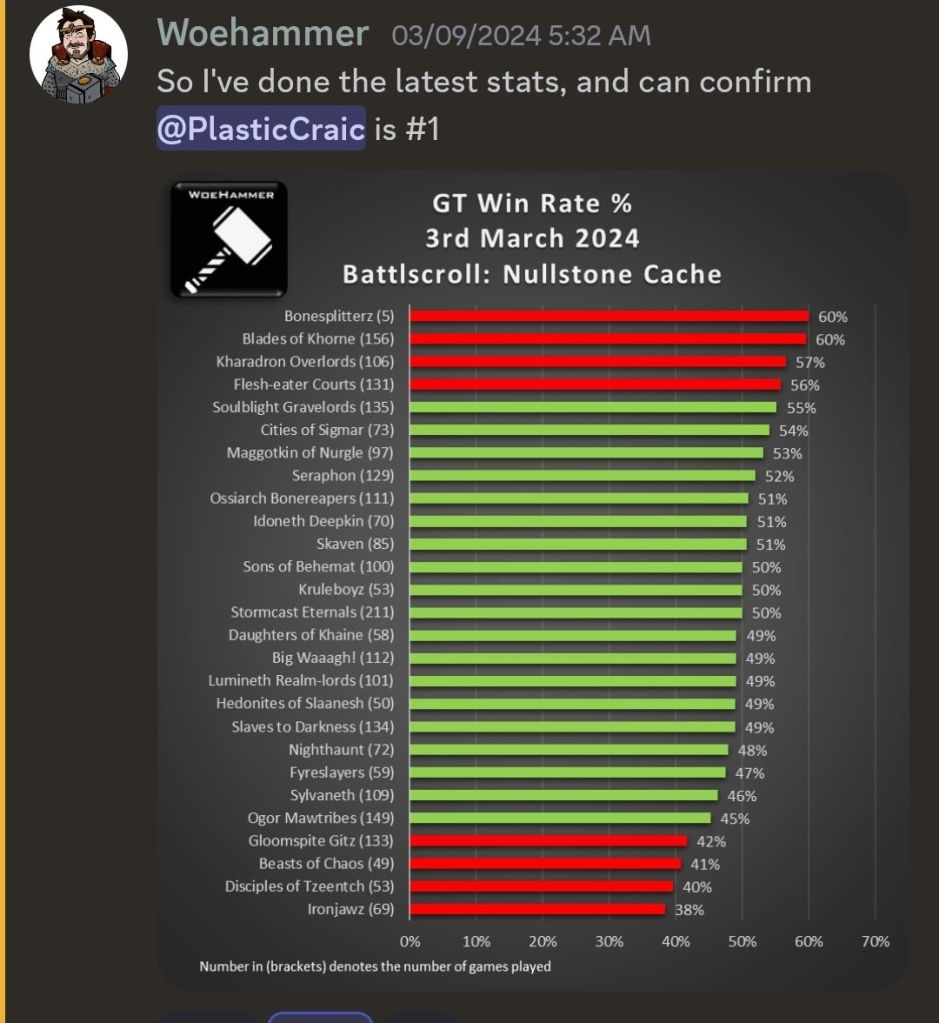
Well I’m glad I cashed in my social media chips on the Saturday night. I took my favourite army to Summer Smash two weeks ago – gotta play ‘em while I still can – and (spoiler alert) I was cruising at 3-0 after Day 1:
I crashed back down to earth on Day 2, finishing up 3-2 overall, but I’ll take that as a good result in context. My goal for the event was to send off Bonesplitterz with a bit of dignity and I’m going to call that “mission accomplished”.
What we’re not going to do here is to get lured into five rounds of “Then I did this, and then I did this”. The plan is to keep a laser focus on how the list works and goes about winning games, using the matchups as illustration and learning points.
Let’s get into it.
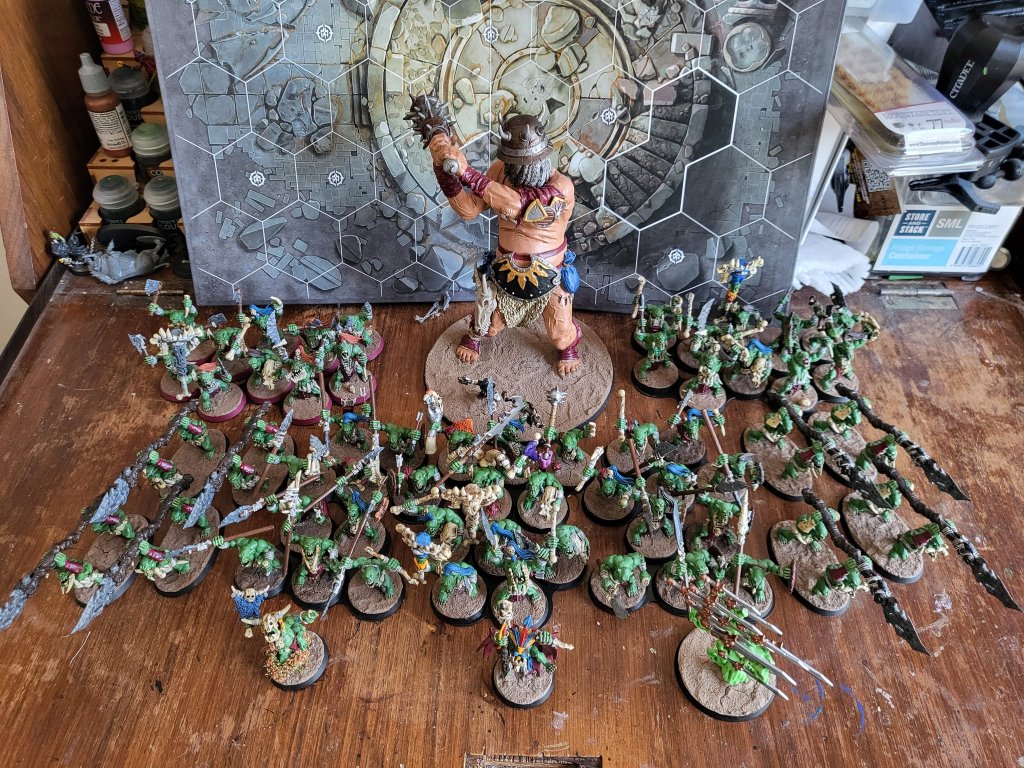
The List
Essentially it was a 1-drop with the Mercenary Gatebreaker and a big tarpit block of Savage Orruks. I went with Drakkfoot over Icebone, because my experience is that the former is a good bet. When it matters, it really matters, far moreso than the tiny amount of sprinkle mortals you get from Icebone.
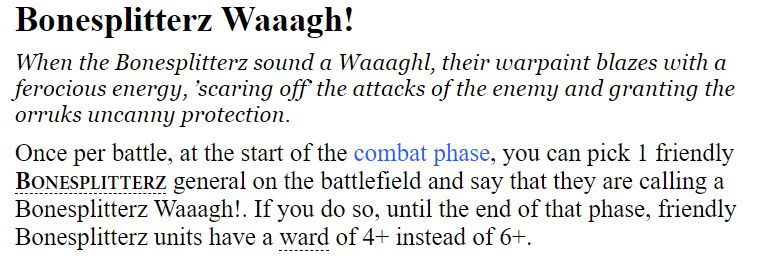
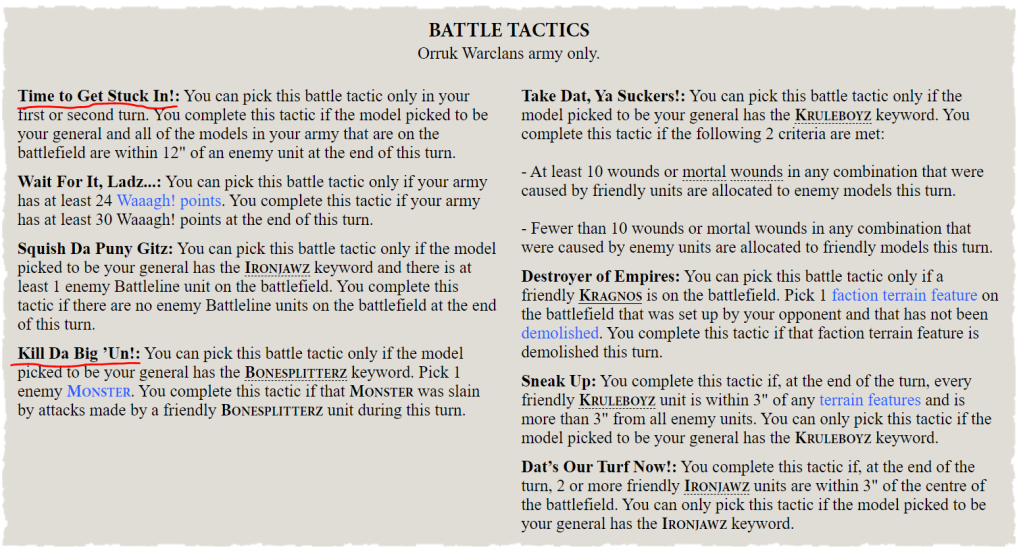
Given that this is likely to be the army’s swansong, the list name was borrowed from an iconic Bonesplitterz rule:

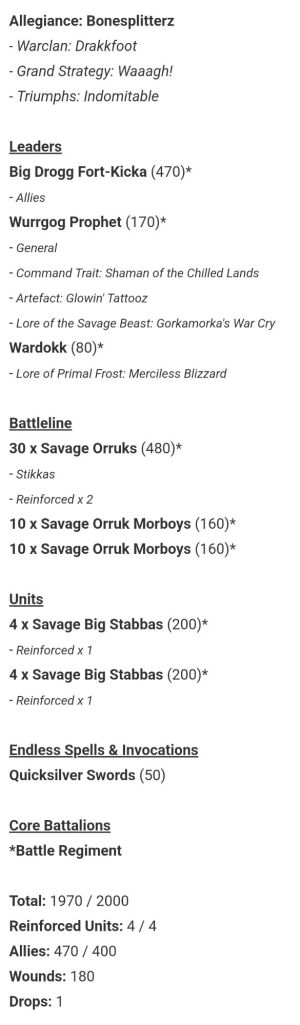
Swords was there to maintain the Ward-switchey-offery theme, as well as giving access to the Magical Mayhem BT, which is important given how few BTs of their own Bonesplitterz have.
My approach to winning games with Bonesplitterz
I’m going to cover this once at the start, because I think that’s going to give you as the reader maximum value. There’s a few strands to how I play Bonesplitterz and attempt to craft a win condition, which is common across most games I play with the army.
Overall strategy
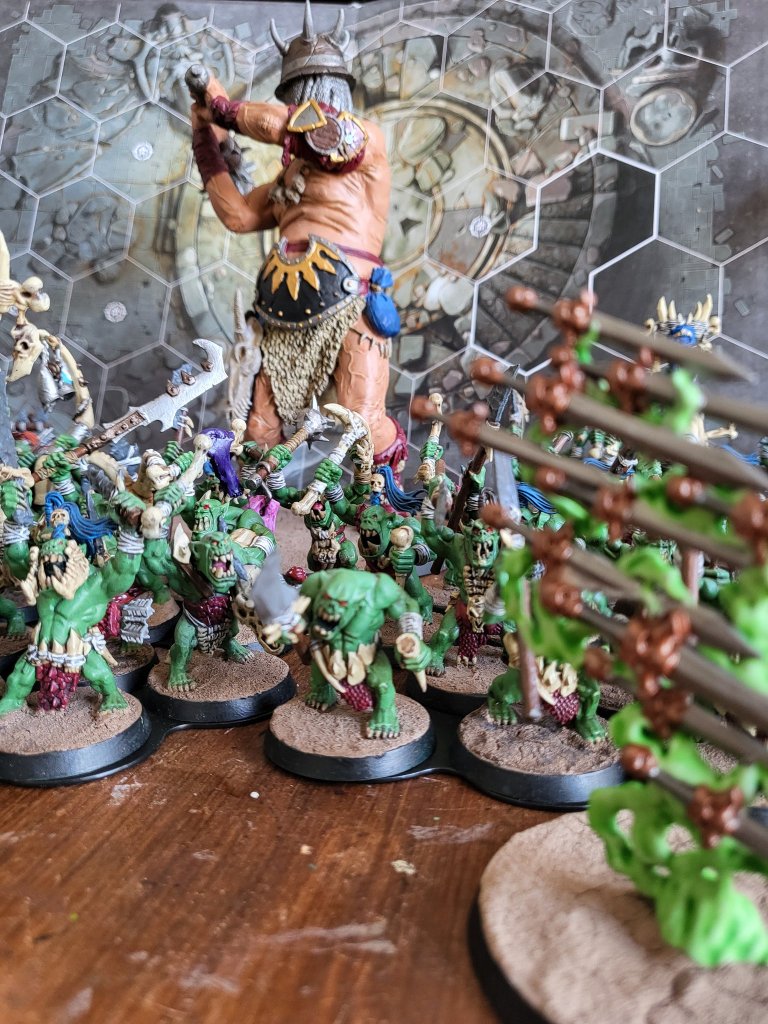
This army is incredibly tough for one turn only with its 4++ ward:
Before and after that it’s way more fragile than it looks on paper. A respectable wound density masks bad armour saves and low bravery, and the army has zero recursion; Big Drogg and the Savage Orruk block are true anvils, but only under the right circumstances. So our strategy is to play a patient game, wrack up the passive Battle Tactics early on and draw our opponent into what they expect to be a defining, cataclysmic confrontation – that turns into a grim and bloody tarpit.
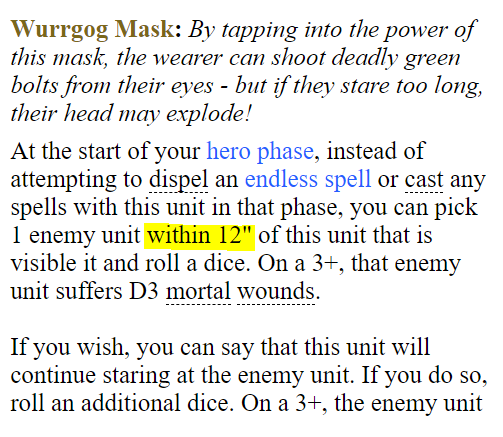
The idea is that they go full send, we pop the 4++ ward and then they’re locked right in our kill box. The whole point is that we actively want to get key parts of both armies bogged down in combat, so it opens up further Battle Tactics to us, and they’re standing right in front of us, ready to unleash a barrage of magic, melee and Wurrgog staring.

Fighting over the top
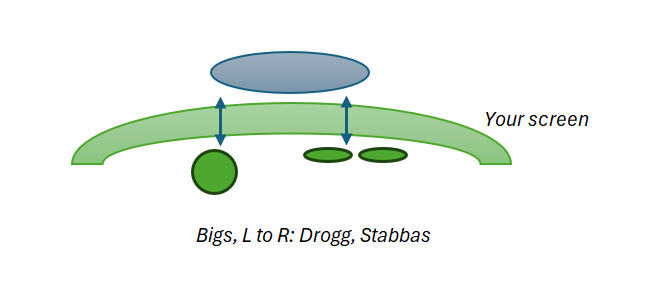
The crucial stat in KO players’ underpants this army is 3”. That’s the melee reach on both the Big Stabbas and Big Drogg. So your basic deployment is to castle up, set your combat units 2.1” back from your screens (and just as importantly, declare this intention to your opponent and show them what you’re doing, in case some models get knocked). Then when your opponent engages with your screens, they’ve had to bring your combat units within 3″, and they can pile in and hit over the top (illustrated in the technical section at the end).
This is important for a couple of reasons:
- You don’t generally have the concussive hitting power to blow up tough units in one swing. Big Drogg might get lucky and spike, but with his key attacks hitting on 4s, it’s a mug’s game to rely on that.
- While Big Stabbas are really good, they’re hardly PCBs / Boingrots / Chosen / take your pick. The unit is good, but not “100 damage per swing” good. So you’ll need to chip away a lot of “free” damage on your opponent’s turn to make serious inroads.
- Having multiple units drawn into combat can segue into scoring multiple Battle Tactics to us (and speaking of segues…)
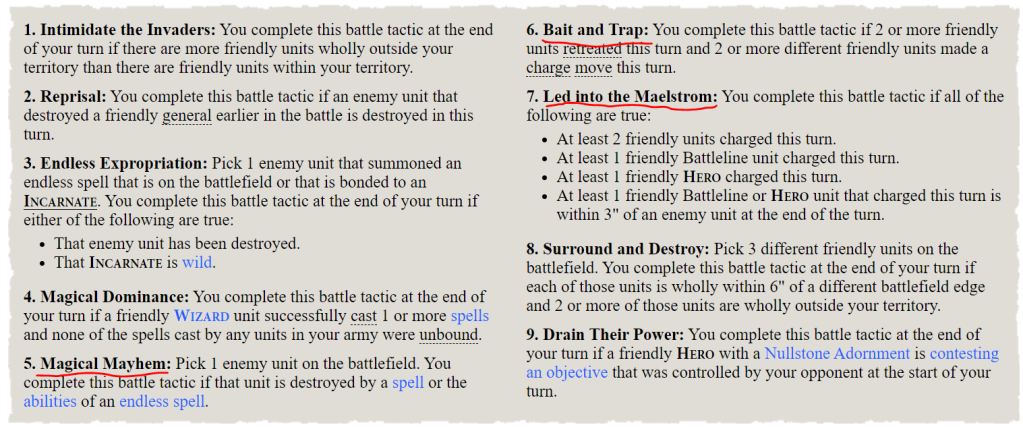
How I score BTs
This army is desperately short of faction BTs, so finding a way around that is a major part of the challenge here. Like every other flog, I normally go for Master of Magic early on. My preferred cast is either Mystic Shield or Hoarfrost, depending on how many PMDs I have on hand to force it through, and the preferred targets are either Big Drogg or the Savage Orruks. Most commonly I’ll put it on Big Drogg first and pivot to the Savage Orruks later in the game, once he’s gone off on maneuvers. Shoutout to my guy Mikey Gilson in the Bonesplitterz WhatsApp for emphasising just how good Drogg is when he’s hitting on 2s instead of 4s.
I wrote above about locking multiple units into combat. This opens up a range of tactics to the army:
- When multiple units are tagged, it opens up options for Bait and Trap.
- It also means their units are standing right in front of you, ready for Lead into the Maelstrom.
- By half-killing Monsters, it puts them within reach for Kill da Big Un.
- Note that this works with attacks only. Your actual main way of killing Monsters (staring them off with Wurrgogs) doesn’t score this BT, but what you can do is to stare them down to a couple of wounds remaining, then reliably clean them up with Big Stabbas.
- Remember that the Wurrgog staring happens at the start of the hero phase too, so you can see how that goes then select your BT afterwards, safe in the knowledge that it’ll be an easy one to pick up.
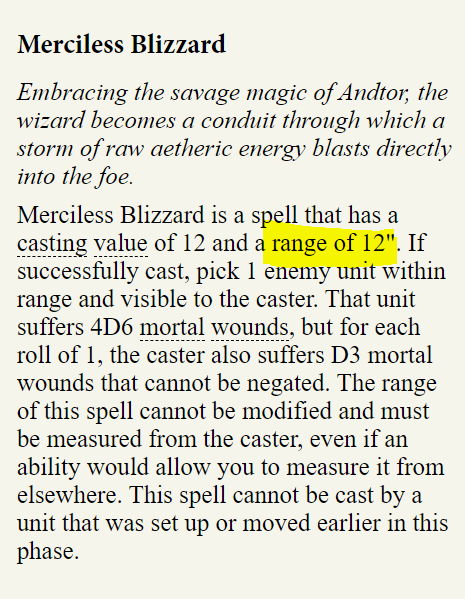
- A unit that is weakened is also vulnerable to being blasted off by Magical Dominance: you’ve got Blizzard if you’re feeling frisky, Quicksilver Swords is generally the preferred option and even Arcane Bolt if you hit Desperation Station (or just stare them down to 1 wound remaining first).
- Those pre-weakened units are also easier to stare off with the Wurrgog (at lower risk to himself), so fighting over the top helps you in the attrition game too, especially if it makes the difference between keeping your ‘Gog alive for another round of funtimes and him committing suicide by mask.
- Remember that we’ve got two ways of healing him (Heroic Recovery and Wardokk dancing), both of which occur in the same window and both of which get exponential value from each wound healed behind that 4++ ward. Keeping him alive on even 1 wound can be clutch.
So the deployment helps you fight better, the fighting helps you score Tactics better and all facets of the army support each other in the push for victory.
I’ve mentioned this before, but I love taking a BT cheat sheet to events these days. You really don’t want to be mucking around flicking back and forwards between your book and the GHB in round 4 when your brain is fried.
What you do away from the table can be just as important as your choices at it. If I only tell you about scoring BTs by moving this unit left and the other unit right, I’m selling you short: a major factor in consistently scoring secondaries with a shit army is putting yourself in the best possible position with the best possible preparation. I took a printed copy of this to the event with me and it was worth its weight in Aelven souls.
Round 1: SBGL, Patrick Leung (No Reward Without Risk)
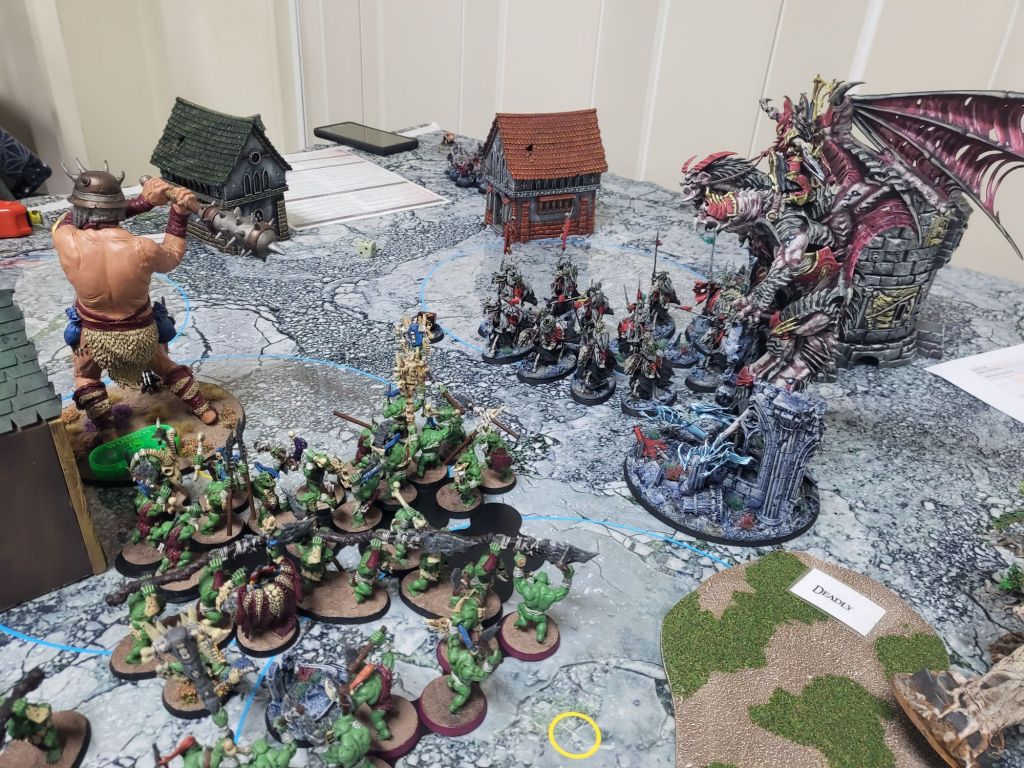
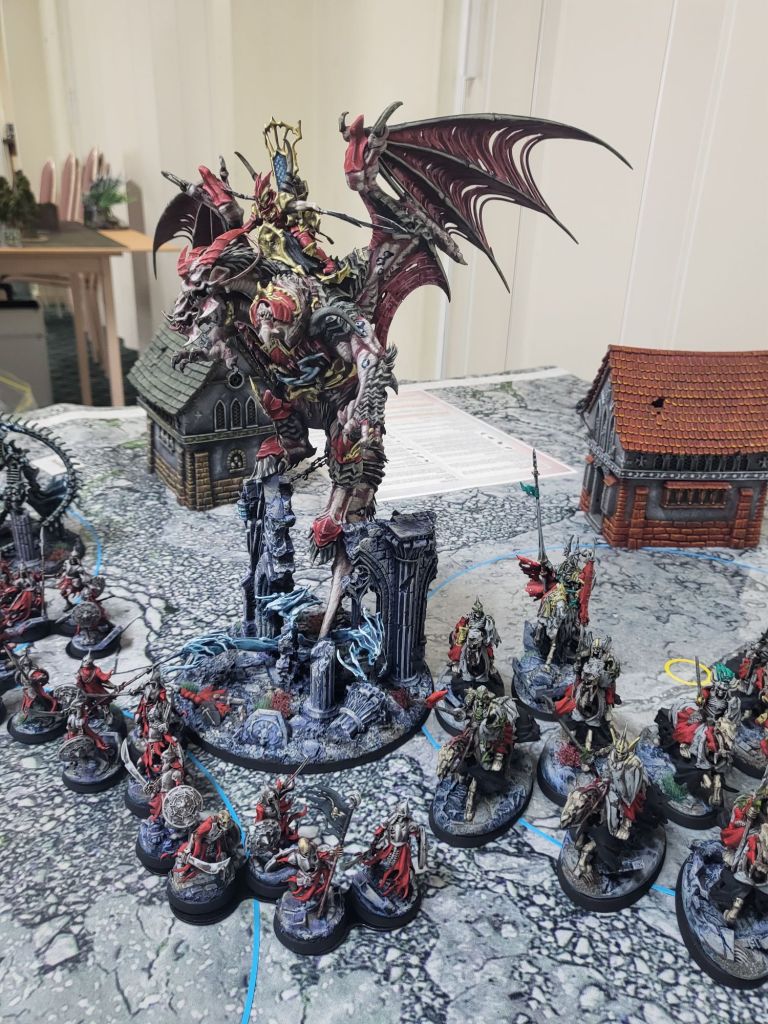
I know Paddy from the MCP scene, so I already knew his army would be sensational, and it did not disappoint. The centrepiece was a custom VLoZD based on Archaon, but with all three Mortarch dragon heads on there. Just sensational.
Black Knights and their mate are better on the charge, so one of my goals was to get ‘em tagged if I can. Ideally 2.9” away, so only 1 or 2 models max can pile in, and I did manage that.
As our armies wheeled around the central objective and each other, we slowly maneuvered into the point where my Wurrgog had his beady eye on the Vamp Lord. Fucking SHOWTIME, let’s go!
Starey McLaserface managed to stare himself off, not for the last time this weekend. So that, um, was not ideal. But we still had one chance to deal with the prick of a thing – Patrick debuffed the crap out of my Gatebreaker with negs to wound and minus attacks, so it was time to show them what a Big Boss is made of.
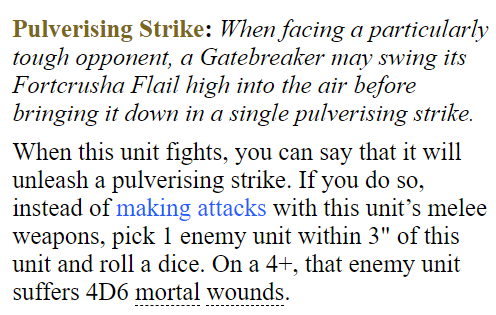
On 4D6 you’re averaging 14 damage, and there’s a 50:50 chance you do nothing whatsoever, so that’s 7 average damage overall which is a piss poor return for a ~500 point combat monster.
And yet.
It does give you an out. When you’re minus one attacks, minus one to wound, hitting on 4s and can’t issue yourself All Out Attack, you can just say nah mate, we’re going turbo. Your opponent tries to play Surehammer, and Destro brings the chaos whether they like it or not.
So off we go. Shit or bust. Can he hit a 4+?
We can hit a 4+.
That’s half the job done. Next question, can we spike?
HELL YEAH WE CAN SPIKE.
This is the stuff dreams are made of, right? When you read the ability, you imagine exactly this scenario. Fucking BANG!

So we’re now in a position were my Savage Orruk block has been taking a battering, but getting wiped slowly enough (and with enough bricks lobbed over the top from 3” weapons and magic) that we’re getting on top of the attrition war. That mad spike really ripped the heart out of Paddy’s army – the Vamp Lord was fair set to run rampant through my forces given half a chance.
I’ve been running Big Drogg for a while now and it’s easily the biggest moment he’s given me, with a clean win on his resume now. Major win to the Splitterz.

The pies on sale at lunchtime were as hot as the centre of the sun, but a sporting venue (even a drinker’s sport like golf) seems to have underestimated how many pies a bunch of fat wargamers could work through on a weekend. A couple of hours into Day 1, I got the last pie for the whole weekend in the whole venue. I mean in my head, that basically puts me at 2-0 now at this point.
Round 2: FEC, Paul Gordon (Nexus Collapse)
Paul was running a ton of Ghouls along with the Morbheg Knights and Ushoran, and he was happy to Alpha me with his wee men safe in the knowledge he could use their recursion for his second wave. The general idea would be to trade his screens for mine, but his come back for another go while mine don’t.

Bonesplitterz love having the kitchen sink chucked at ‘em though, and they stood up like men. Paul lost roughly as much as I did first turn when it was Ghouls into Savages, but I saved the Waaagh for the Morbhegs and Ushoran arriving in turn two as the main event, and that’s when I popped my 4+ ward.
Ushoran does not like getting hit with Quicksilver Swords, lemme tell ya. Big heroes like that pay through the nose for 5++ ward – as they should – and biting chunks out of it with a 50 point spell felt pretty bloody good. The Morbheg Knights are your classic glass hammer, and when Starey McLaserface stared them off, that was one of his three big scalps for the weekend (along with “Himself” and “Himself again”).
It was my first taste of the wild recursion FEC can bring – I’m gonna say it’s a little overtuned, but eh. The boardwide buffs annoyed me more, and it was funny to see that prick with a wig hop down from his throne and run for his life when Drogg broke through at the top of the board. I can’t complain about my dice in this one though and Paul was probably the best opponent I played against this weekend, the latest in that steady pipeline of 40K players who flow through from the larger scene to the better game. We were shooting the shit inbetween rounds and I’m hoping to see Paul at plenty of events in future.
Drakkfoot was really impactful here and the screen ‘n’ zap strategy was in full flow. Another major for Team Green.
Round 3: FEC, Dan Brown (Poweflux)
Ah, good old Dan. Corio’s little ray of sunshine himself. On his latest comeback tour, Dan was my second consecutive game against FEC in general and Ushoran in particular, but this time with a bunch of Crypt Horrors to do the heavy lifting.
Dan pushed hard down my left flank and the Horrors absolutely smoked Big Drogg in a manner that was borderline embarrassing. But it did mean his heroes were up in my kill box, and as I managed to target them down, the recursion got harder and harder for Dan to implement.
The Wardokk-Wurggog Dance ‘n’ Stare double act was in full working order in this one. Starey McLaserface stared himself up to 6 wounds taken, and I healed him up a few times (through a combination of Heroic recovery and Wardokk dances). Then stared back up to 6 wounds taken again, and rinse and repeat.
Deep into the game, we had one of those “Are you sure that’s right?” conversations as Dan asked me how many wounds old Starey had on him and I told him that despite being up to 6 wounds taken twice in this game, he was only on 2 wounds taken. Must admit, this combo would be triggering as fuck to play against when it works well.
Dan will be the first to tell you that he gets irate about AOS, and the rumbling started as soon as I told Dan I was going to attempt Merciless Blizzard. I hadn’t even rolled the dice yet. When I cast it on a high roll it went Richter, and then when I spiked massively on the 4D6 damage, Dan went supernova and quit the game on the spot.

Dan’s a good fella and someone I could easily spend a lot of time drinking with over a weekend event. He’s also a man after my own heart, as I discovered when we got on the Melbourne Bitter together. I always respect a man who drinks the Melbourne, and Dan was certainly bitter.
So I finished the day 3-0, which was pretty wild for this army and way better than I’d hoped. And because I was keeping track, at this point I’d lost 14 out of 15 priority rolls. So if that’s an area of your game you’re still struggling with, go take a look at this article I wrote a while back, because you’ll win a lot more games once you embrace it.
I had a few beers through the day but nothing extreme because I was designated driver the next day, so I was in bed by 11pm after doing some homework on my Round 4 matchup.
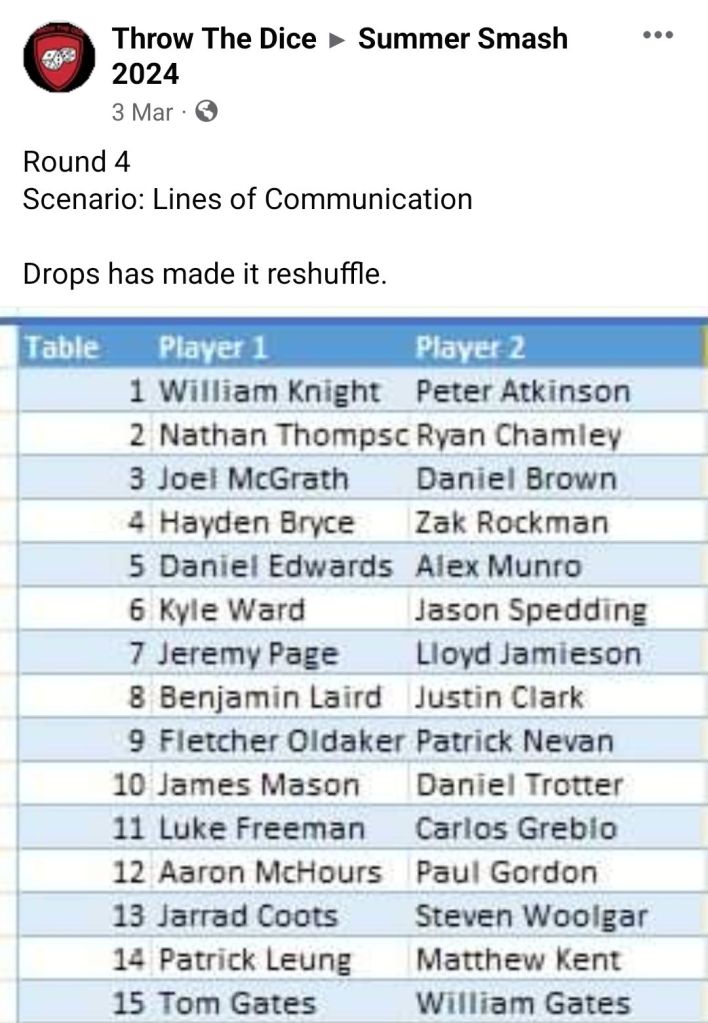
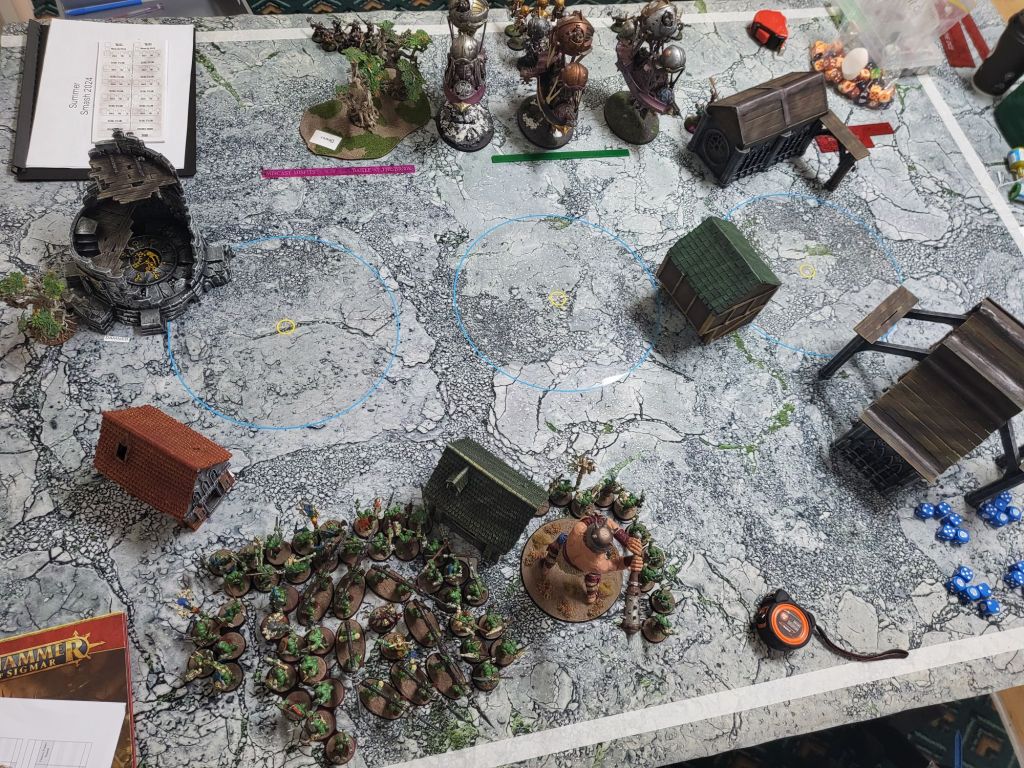
Round 4: KO, Will Knight (Lines of Communication)
So this is your reward – you win a few games, you end up on top tables and you have to play against KO. Yuck. Everyone seems to be running Barak Zon these days, and because KO are still a couple of hundred points undercosted, you’ll generally see some absolute luxury of an ally splashed in there by the KO player to give the illusion of spice. At this event it was Ellania and Ellathor, at my next event (with Spiderfang) it was Ionus, and both times I reckon the KO player couldn’t believe their luck that here they were on top tables, but up against some bin tier army.
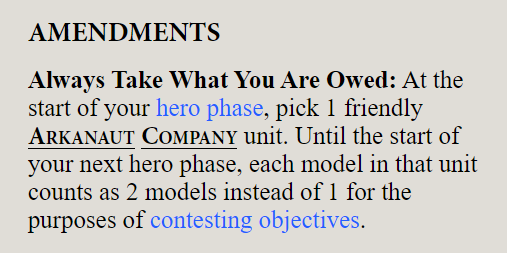
Lines of Communication meant that if I kept losing every important Prio (which I did), I could at least disrupt CP efficiency in the movement phase (which I did). But the laser-fast movement isn’t really the half of it; amongst the many ways in which GW have overcooked KO, it’s the Battle Tactics that they should be reflecting upon. KO can just sit back, ping away and watch the VPs roll in. It’s certainly a lot easier than playing Warhammer.

So the game develops as the Arkanauts run onto an objective and naturally get a couple of VPs for that too.
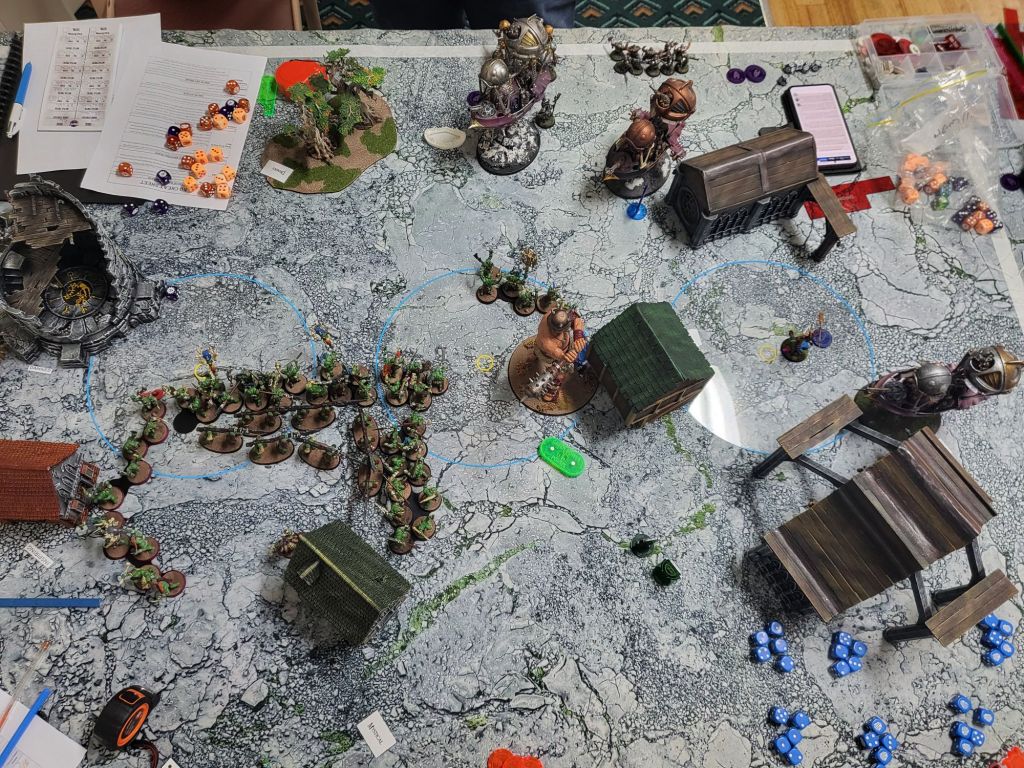
Anyway. Will spent his first couple of turns chipping wounds off the Mega, but I had knocked over the Arks and was in an advanced position on the table, fair set to smash off the big damage units before they’d done anything of note. At which point Will would struggle to make any real headway into my army as well as falling way behind on primaries.
So I’d put Will into a position where he had to commit, and in came the fully-loaded Frigates. My Waaagh wards weren’t great this time, but Will still didn’t make quite enough headway to deal the killing blow. I popped Will’s balloon boys on his own turn with the remaining Big Stabbas I had hitting over the top, followed up by the Wurrgog staring down Brokk in the subsequent hero phase.
Show time, and Will was looking pretty glum as we had a big Prio coming up. I felt like I’d worked into a position where this Prio was either game on, or game over: win it and I’ve got him on toast, lose it and the path to victory for me narrows significantly but is still there. Will got the Prio and around we go again, so that by the time my hero phase did come around, I needed a big one.
If the Wurggog could stare down a Frigate I would still be in great shape. I’d failed every spell cast up till now which meant the Voidstone Orb was still available, but I’d also got two good damage spells up my sleeve (Blizzard and Swords) so even drawing out the auto unbind from the Orb would be handy at this point.
Starey McLaserface wasn’t having a great time of things, but I was no longer in a position where I had any wiggle room to work with – if I didn’t make serious inroads in this hero phase, I was sunk. Ultimately I had to keep pushing the staring even as the 1s kept rolling in, and the denouement was that the Wurrgog blew up before the Frigate did.
These things happen and that ability is dicey by design, so you have to take the bad outcomes with the good. Will fist-clenched a “Yes!” when my bad rolling got him off the hook, which isn’t the reaction I’d expect from an experienced player and community leader, but he did apologise so it’s water under the bridge. I’m not relaying this to hang the guy out to dry but it is part of the story of the game, so I’m not going to leave it out – the fact that Will burst out celebrating my bad dice tells you everything you need to know about how far my Splitterz has pushed his KO in this game. I had a couple of things go my way on Day 1 so you just have to roll with it, but regardless of my own opinion on how the game went, Will’s actions should tell you that he was staring down the barrel of defeat until my dice got him off the hook.
I think I might have won the last Prio but it was too late by that point – my opportunities to do the damage I needed had come and gone in a series of failed miscasts and failed staring. I needed a good hero phase or two in the middle of the game, and it never came. Will went off to the big dance to face Nathan Thomspon and his Fyreslayers, but the semi-randomised missions put Round 5 on Frigid Zephyr which meant KO couldn’t fly and couldn’t shoot, and Nathan took out the event.
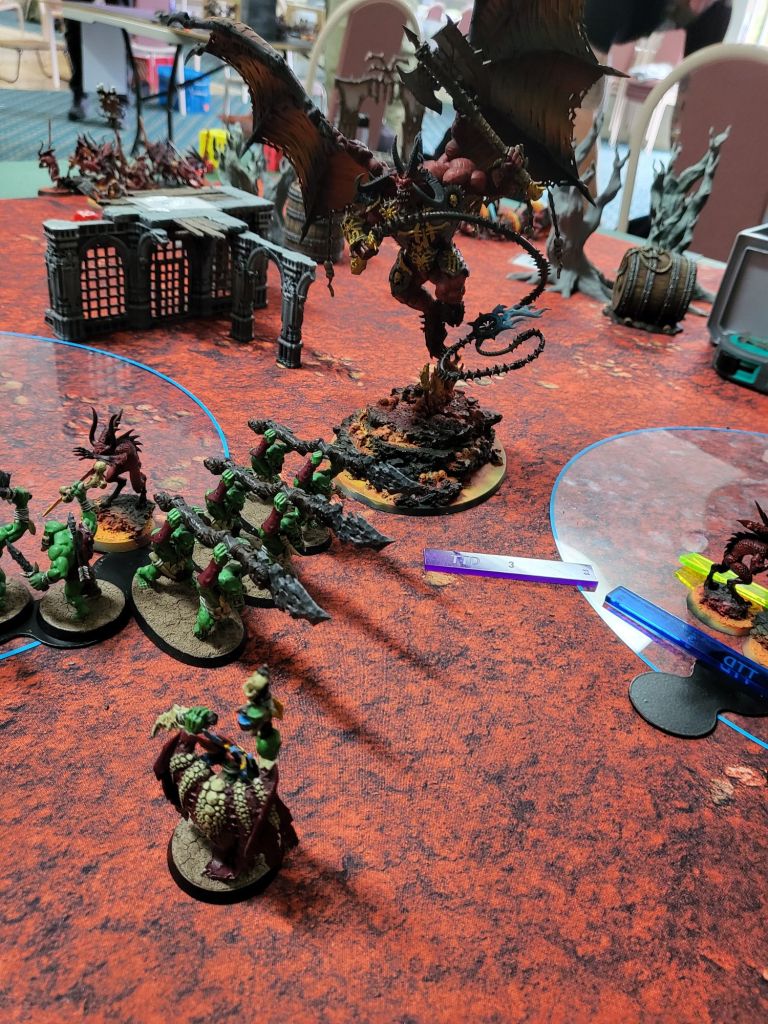
Round 5: Khorne, Dan Edwards (Frigid Zephyr)
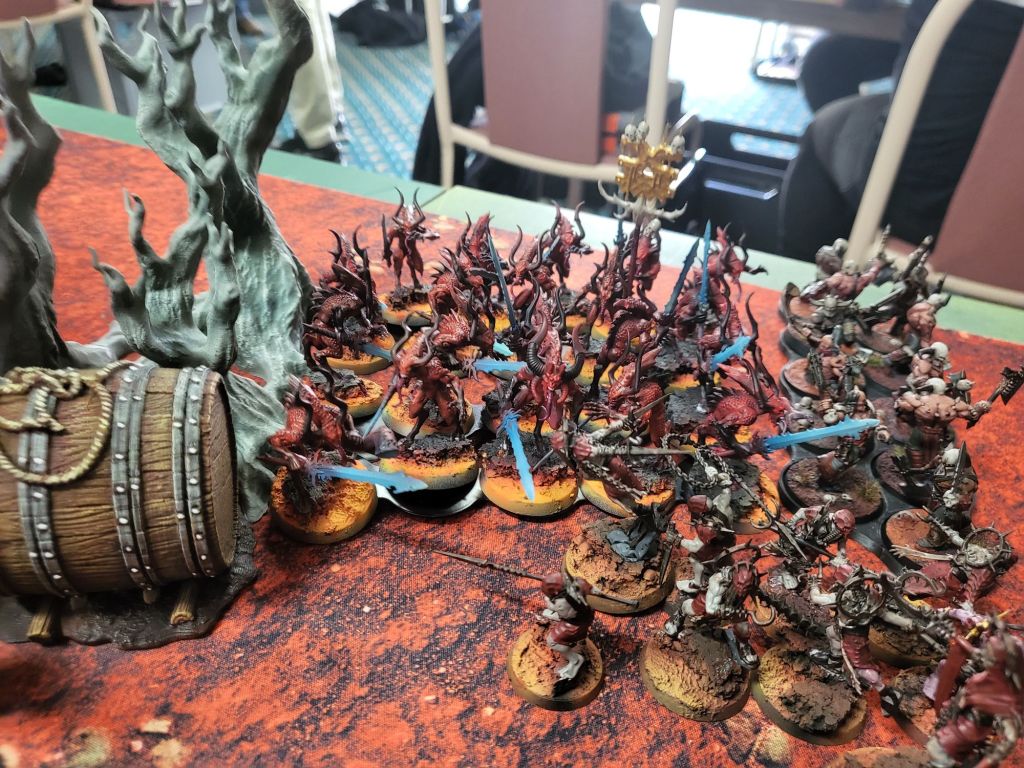
Round 5 brought me Khorne, and their tournament-crushing netlist. Skarbrand plus the Bloodletters are good for about 100+ mortal wounds per game and the Blood Tithe movements helps them to deny you BTs (generally by tagging units in combat after you’ve declared they need to charge or to be someplace else). I got a good vibe from Dan right away, and I knew we were in for a good tactical game.
This is where I decided to move away from my own blueprint. Khorne can strip wards, which is a massive deal for my army – it would just melt in a single good turn of combat. So there was nothing to be gained by sticking to the formula, drawing Dan’s whole army into my castle and relying on my Waaagh turn to bog him down; without the 4++ ward, Daemons go bang and that’s me done.
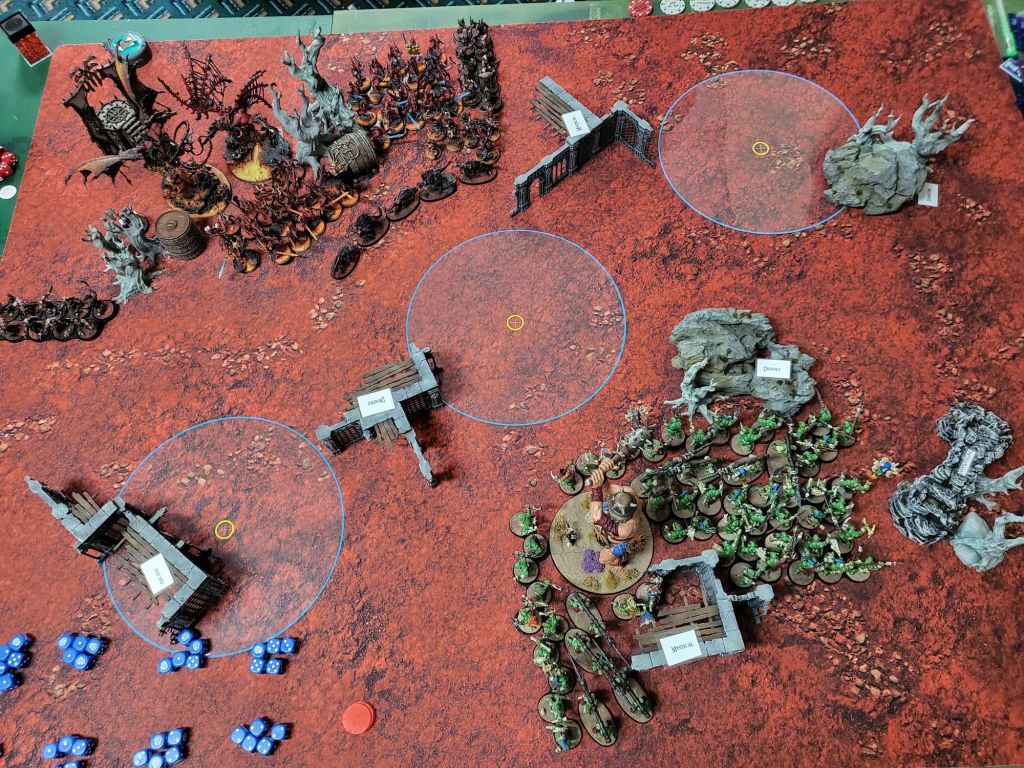
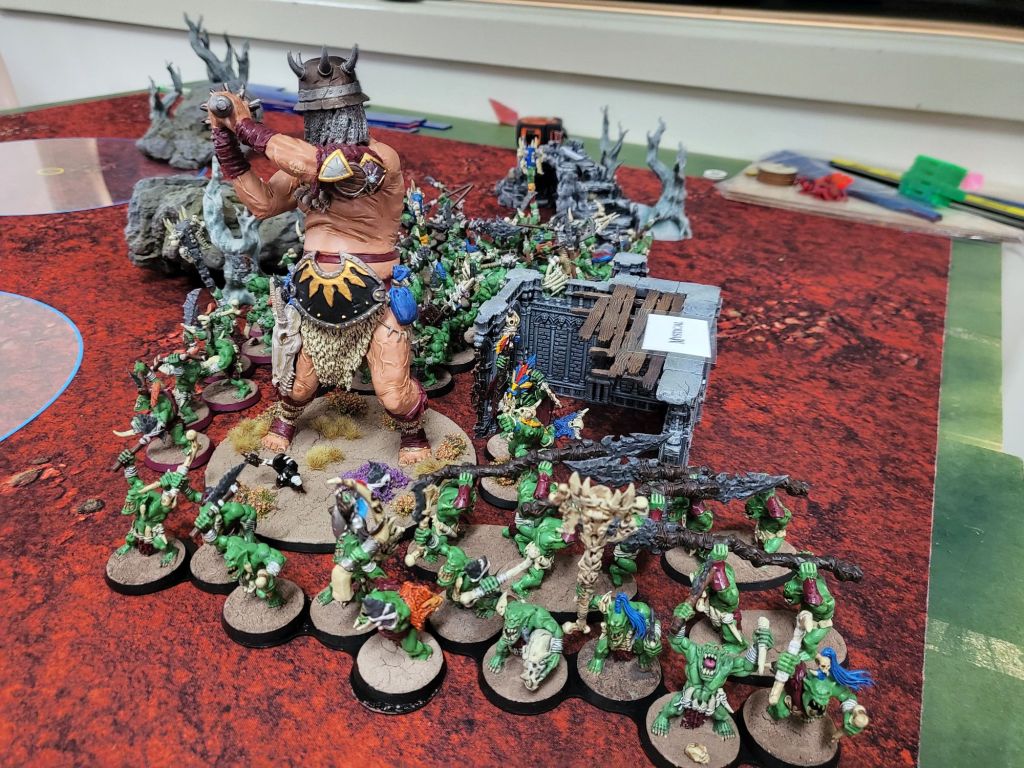
So the strategy was to split up Dan’s army, so at least one major damage dealer was pulled away from the Ward-stripping Bloodthirster and they’re not operating in tandem to decimate my forces. For this reason I pushed the Savage Orruks up to the top of the board, and castled the rest of the army. The Savages would have to operate for the rest of the game independently (no Mystic Shield or Hoarforst), but if they can tank the top edge for a while, it means the portion of my army that has its ward stripped at least faces a lot less output from the rest. And that’s exactly what happened.
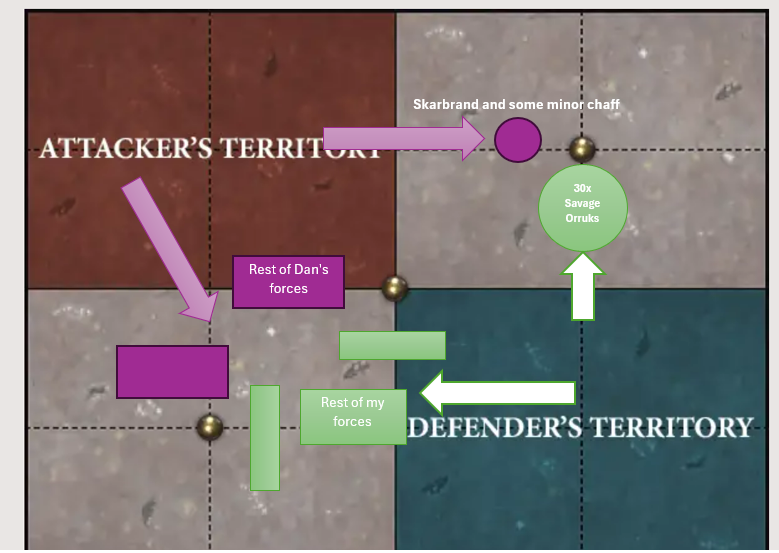
The long story short is that the Savages slowly got whittled down, but crucially, slowly enough that I wasn’t losing control of the objective. Dan had the centre for big parts of the game with his Bloodletters, but as they were dying off, I was gaining the upper hand there. Bottom objective switched back and forth as Dan dinked and dunked with chaff and I knocked them off it.
It was a top, top game but we did time out (for the only time this weekend) – we had to play out Round 4 and finish it up there. Dan was ready to shake my hand if I won Prio: his Bloodthirster would be toast and then he’d have nothing left that could kill my wizards and secure his Grand Strat.
But Dan got the Prio, and there was a path to victory that opened up for him: if the Bloodthirster could kill both of my wizards in this turn, he’d get Slaughter of Sorcery and edge it by that much.
So after securing Prio, Dan still needed a few outcomes to fall his way: kill the Wardokk in shooting, nail the charge and kill the Wurrgog in combat. The Bloodthirster shot off the Wardokk first of all, then he still needed a long-ish charge (9″ from memory) into the Wurrgog…
He failed the charge.
…Then made it on the reroll. We rolled out the combat just in case the Thirster whiffed, but he didn’t, and he battered the Wurrgog for an epic ending to an epic game. With Slaughter of Sorcery secured Dan had edged ahead on VPs. Fuck that was a good game!
See, I told you Prio was shit! It all came down to one roll!
Nah mate. I could have actually avoided the whole thing by fucking off the Wardokk into a corner two turns earlier, and not leaving the window open for Dan to smoke both heroes at once. Yes, I would have loved to win the Prio and secure the 4-1 with Bonesplitterz, but moving an 80-point hero right instead of left was entirely within my control.
I’m very comfortable with how I played across the weekend and equally comfortable identifying a mistake I made. Across the weekend, this is the big one that stood out – if you see Slaughter of Sorcery as the Grand Strat, you can take action in the mid game to make life harder for them. I had kept him nearby to heal the Wurrgog if needed, but we all make mistakes and that was mine.
Orcarus
So yeah, I did the whole flying too close to the sun thing.
And that’s OK. I said before the event that I wanted to send the Bonesplitterz off with a bit of dignity, and mixing it up one last time against top players running the top armies on top tables felt like an honourable send-off. If the Savages went out on their back, then that’s how the greats do it.
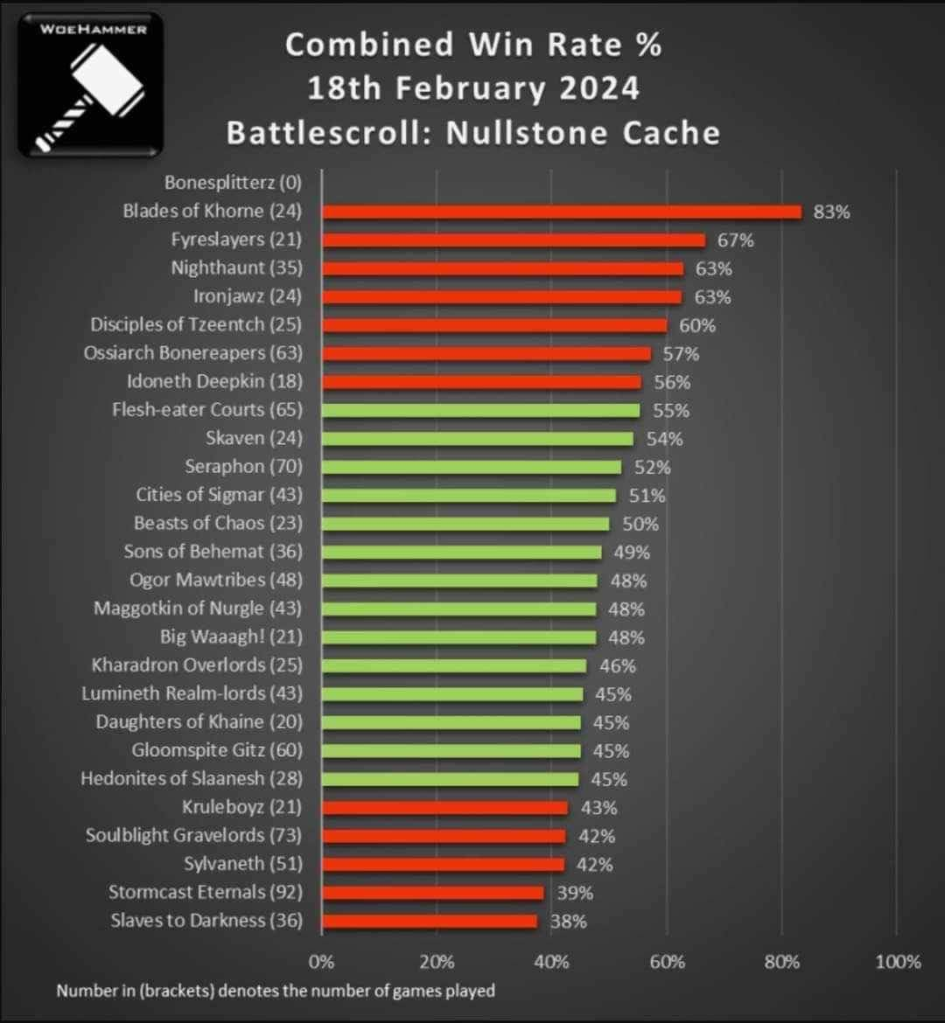
The army did turn out to have one last trophy in it, as I picked up Best Destruction at the event. That’s a pretty solid outcome when it meant finishing ahead of Zak Rockman and his Big Waaagh list for example, which had just 5-0’d Cancon a couple of weeks earlier.
I would obviously have loved to win the event but that’s not a realistic target for Bonesplitterz with the state they’re in. I guess I’ll have to settle for taking a faction that nobody else had the balls to play and making them objectively the best army in the game.
The Atkinson Effect
Before:
After:
Lol. I’ll take it.
Closing thoughts on the event
Glad to see Tricky Dicky back organising events, and the venue was dope. All the golf guys day drinking in the sports bar after their morning round were super welcoming, and they were asking us loads of questions every time we went through into the bar. That place is a gem and I’d go back annually for sure.
The players weren’t asked to put their armies on display and I was never asked for my best opponent vote, both of which are disappointing and could be room for improvement if the event runs next year. For what it’s worth, my own shadow votes are:
Coolest Army
Paddy Leung and his Soulblight. That Vamp Lord was next level:
Best Opponent
Paul Gordon (FEC, Round 2). Hopefully a person we’ll be seeing plenty of in 4th Edition now that he’s jumped across from 40K. Great fella.
Technical Summary
To wrap it up, let’s look at a couple of techniques you can take away to use in your own games.
Screening off shooting
Firstly, how can you use screening units to screen your heroes from shooting (as well as from being charged)? The concept of movement has completely broken down for KO in particular, as not only can they pick up their models and set them up 9″ away with Flying High, they have an absolute barrage of hero phase moves, run and charge, retreat and shoot and extra movement buffs all on top of their generous flying base move. So you have to assume they can go from anywhere on the table to anywhere they want.
If your goal is to protect a foot Hero, who can’t be targeted from outside of 12″ due to Lookout Sir!, you will need to place them 9.1″ back from the front edge of your screen:
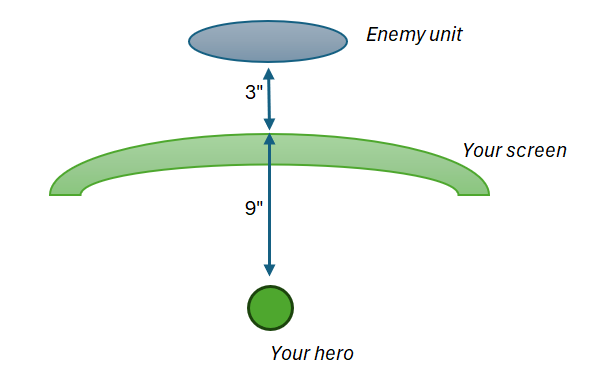
When they move up to be 3″ outside of your frontline, they’ll be 12.1″ away in total and unable to target your wee man in shooting.
Then if they do go on to charge you, you’ll automatically be within 12″ in your next hero phase:
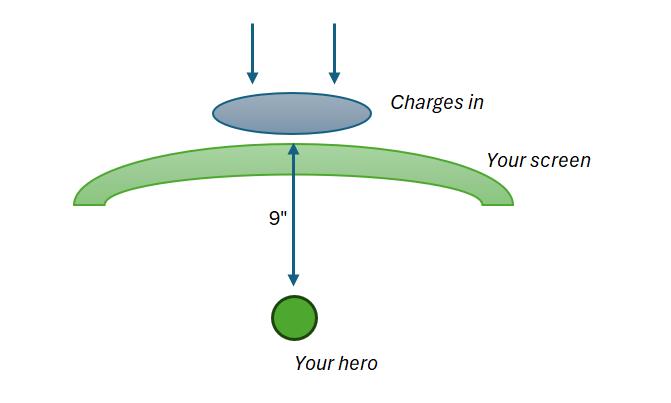
So the good news is, by definition they’ve put themselves in range for a lot of your hero phase output. In the case of Bonesplitterz that’s going to include The Staring, but every army currently has access to a pretty significant damage spell and this is a technique I’ve been using in Spiderfang too, to get enemy units in range for having a crack at Blizzard.
Fighting over screens
Secondly, to illustrate how this army fights over the top of screens, you need to set up 2.1″ back from the front of your own screen (and tell your opponent that this is what you’re doing to avoid any debates later). The 2″ part of a combat gauge will help here, and you’re looking for that “nook” where they’re more than 2″ back, but less than 3″ back:
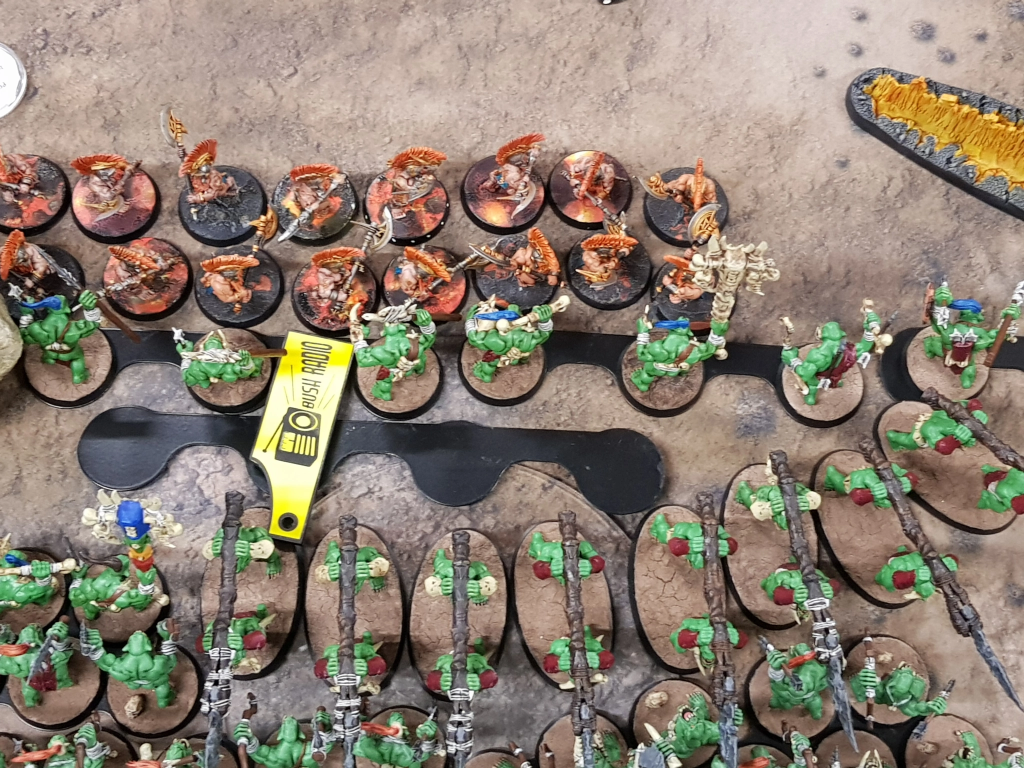
The goal is that your opponent cannot hit the front of your screens without bringing you into combat, and then you can pile in and fight. It’s easy in this army because the melee range on the combat units is 3″, but I regularly do the same thing with Brutes hitting over the top of Ardboyz with their 2″ range after piling in, or even 1″ range (which is 25.4mm) hitting right through a Grot screen on their 25mm bases. If you’ve been brought into combat, you should be able to engineer a situation that lets you pile in and fight.
Do you even want to pile in?
If you’re in a losing fight, and your goal is to lose it slowly, quite often you are better off not piling in at all, because it makes retreating harder in the next turn. Prime example was the Savage Orruks fighting Skarbrand. Yes he’s only on a 4+ save, but Savage Orruks are just embarrassing with 2 attacks on 4s and 4s, zero rend, damage 1. So they were never going to kill him (or anything else tougher than say 10 Hobgrots).
They didn’t want a bar of him. So the goal is to keep your models on the table, keep controlling the objective and keep Skarbrand out of the game as he slowly deals with them while scoring 0 VPs. In that context you’ll be retreating in your own movement phase to deny your opponent a free turn of output in your own combat phase.
This is where piling around to get your own attacks in, because you “might as well”, can fuck you pretty hard. You’ll be making some kind of U-shape around your opponent’s base and depending on other units and terrain, it can get really tricky to end up 3″ away from everything when you’re wasting movement sliding alongside their base first, without getting directly away:
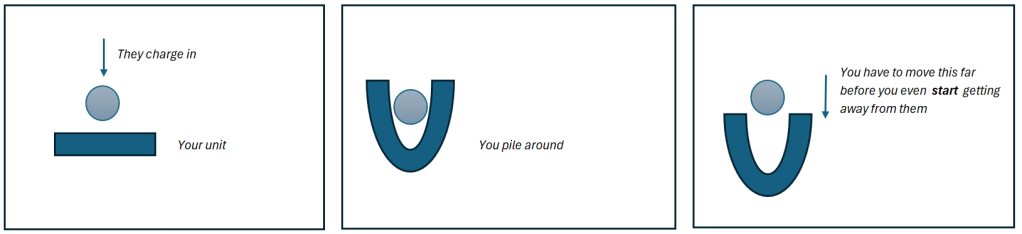
So with a tarpit unit that is only there to exist on objectives, my best tip is to ferociously avoid the temptation to pile in because you “might as well”. You’ll often regret doing that, rarely regret not.
So I hope that was a useful read! I’ve tried to cover a few different angles on how the army operates, from engineering a win condition at the highest level right through to specific technical advice on the placement of individual models.
I massively enjoyed running the army. Bonesplitterz themselves are still cool, interesting and fun; what got old pretty quickly was how badly served the army is for Battle Tactics, and you’re really playing a different game to everyone else in that regard. Other armies get VPs just for turning up but you have to work so bloody hard for every drop of water.
Eh. If competing on top tables with Bonesplitterz was easy, everyone would be doing it, wouldn’t they? If you’ve got a Bonesplitterz army on the shelf, and you’ve got a tourney to play in before 3rd Ed winds down, do yourself a favour. Take them for one last spin and give them the send off the army deserves.
If this article has been helpful, you could consider joining our Patreon, where we publish additional articles and chat a lot of shit in our Members’ Discord.

If you’d like to help us continue with our work, we’d love to have your support. We’re the Age of Sigmar specialists, publishing regular AOS articles, including Patron-only posts on that platform. Please click here to join us on Patreon.


Masterfully written as usual. Thank you sir!
LikeLiked by 2 people
Glad you enjoyed it 😊
LikeLiked by 1 person
Such a good write up! Bonesplitterz were fun to play with when I had them, and always fun to see and read about.
Regarding the one guy’s enjoyment of your bad dice, always better to not take offense at that and let it sluff off; it’s clear that even if they’re not cheering it out loud, every opponent would be glad about it their own head.
It’s not a chess-match, and we all pay to be there and compete. Just like football players for either type of football who yell at stuff, and can continue to be sportsmanlike and friendly otherwise during the game.
And while I didn’t cheer any of my opponents’ bad rolls last Thursday or yesterday, I DID curse their many spurts of absurdly 90th-percentile-of-probability good rolls with clenched fist and loud swear words and did the same to my similarly bad spurts of rolls, telling them they’re going in the trash before I leave, which made them afraid and then they rolled much better afterwards.
When Lumineth make like 30 or so out of over 40 ward saves and the same on MW from sun-metal weapons in a single turn, one is apt to question the legitmacy of the enemy dice, even when they’re all transparent and/or old GW made dice. I want some too! But he wouldn’t sell after that game.
LikeLike