

by Seanzor
Back in HOBBY AESTHETICS: BUILDING A FOUNDATION AND TOOLING UP I worked out how to use a bit of computer wizardry to size up models for kitbashing and converting. Once you’ve got that all settled and you’ve bought a pile of plastic sprues: now you’re at a crossroads. Do you let your memes stay dreams? Or do you slice open that shrink wrap and go on a tear? Well I’ve knuckled down for the past month or so and finished a bunch of building for my newest project – Rack City PD (Cyberpunk Kharadron Overlords). The next part of the slog is to paint it all. But let’s talk a bit about working through the process, problem solving and keeping motivation (especially around book changes, rule changes, edition changes).
Set the Stage
For a long time I wouldn’t be nearly as deliberate as I am now when I sit at the hobby table, probably because I didn’t treat hobby time with as much regard as I do now. So before the building process – especially a prolonged one (I built a whole 2000 point army here consecutively) – I go through and remove all the paints, brushes, palettes, water cups, everything from my immediate work area. I don’t want cross contamination of plastic shavings in my palette, or paint on my bare plastic etc etc. It’s a good time to deep clean all your painting stuff and makes it easier to clean up during / after the building. I like to make sure I’ve got a cutting mat out front and center and lots of space to maniacally pick up and put down sprues, chopping things here and there. Line up clippers, pliers, saw, glue, sculpting tools, hobby knife and files ready to just go wild. I also like having some containers to put clipped pieces into, as well as some with dividers for completed models so I can keep it all sorted.


I use an insert from a Really Useful Box as my “project tray” to keep various parts separate, which makes working in the lounge with the missus a workable prospect.
Deliberate Work
If you haven’t already, now is the time to make a plan of attack. If you need to open up some boxes to give yourself an idea of how difficult the builds will be, definitely do that just so you’re prepared for how to tackle what you’ve got ahead of you.
For my KO army build, I had a general list of models I wanted / needed to build:
- Admiral
- Navigator
- Khemist
- 20 Thunderers
- 6 Endrinriggers
- 2 Frigates
- 1 Gunhauler
To build that I had:
- Necromunda Goliath heads (40-ish purchased from eBay bits companies)
- Votann Kahl
- Iron-master
- Grimnyr
- 7x Boxes of Thunderkyn
- 2x Boxes of Hearthguard
- 2x Imperial Guard Valkyries
- 1x Corvus Blackstar
- 2x Kharadron Overlords Vanguard Boxes
- One NOS Gunhauler I had picked up. Also Necromunda 32mm bases, some 3d printed basing bits, plastic tube & plasticard. Also some Necron stuff from an older 40k box – to make some proper weird weapons.
Also some Necromunda 32mm bases, some 3d printed basing bits, plastic tube & plasticard. The spice in the dish was some Necron stuff from an older 40k box – to make some proper weird weapons.
So my plan of attack looked like this:
- Sort, clean and assemble all of the Goliath Heads I wanted to use (Primarily Gas masks / Rebreathers) to cover at least 26 of the models – Thunderers & Endrinriggers.
- Build the Heroes out using the Kahl, Iron-master and Grimnyr boxes. Mixing and matching to synchronise with loadouts on the warscrolls and creating cool, thematic looks for each one. This would set the look and feel I would carry through the rest of the army.
- Build half of the Thunderers, leaving weapons off as a subassembly to paint the model properly and to do the weapon conversions to match all 5 weapon types. A bit of a slog, but as good a time as any to fit this in. Used Thunderkyn + Goliath heads.
- Build the Gunhauler using Corvus Blackstar + Gunhauler, which would serve as a proof of concept for the ships to an extent. Setting their look and feel.
- Build other half of Thunderers.
- Build the Endrinriggers, using Hearthguard and adding parts from the Endrinriggers in the Vanguard boxes. Then the Goliath full gas mask heads. This was a fun one to figure out.
- Build Frigate 1 using Frigate Balloons, weapons + Valkyrie.
- Build Frigate 2.
- Add basing materials.
- Clean up bases.
- Paint (I am here now).


Thunderers + 5 Different Weapon Solutions
Creating and Solving Problems
Big builds that use multiple kits and lots of bashing also have potential for a lot of problems to show up in various forms… whether it be committing to cutting up a piece (then after getting the rest of the model together, you’d have rather it be all connected again) or potentially you need to source a singular piece from a big kit…or gosh there are so many possible problems that come up. But you need to be mentally prepared to tackle them and sometimes it’s more important to come up with a finished solution than a perfect solution. One of the biggest killers of a conversion project is a lack of progress for a long period of time.
I find the best thing to keep nearby and stay familar with is green stuff / milliput / other epoxy putty, plasticard and sprue goo. Those three things will get you through a lot of tough spots. A bit of green stuff with some sculpting can achieve almost anything, from sculpting faces to fur to filling large gaps…there’s a huge skill ceiling to the stuff that can be mastered with time. Plasticard can be used as structure underneath green stuff as well as being suitable for sculpting flat surfaced / angled pieces. You can build entire vehicles with plasticard, boxes, weapons, etc. Thick plasticard can be carved away to build things as well, including weapons, guitars, etc. Then there’s sprue goo…without going too far into the specifics of this stuff, it’s a combination of taking chopped up bits of HIPS (grey GW plastic) sprues and putting them into a dedicated container of plastic glue. Then after it has liquefied in the plastic glue, use the grey goop and fill gaps, smooth out details you want to “erase” and just various different fun uses. With these three tools you can build models and parts from scratch right there at the desk, and mastering them will let you solve most of your problems.
*Special mention as well for 3D printing / computer-based sculpting. There are so many great resources for both of these endeavours, so if you’ve got the time and technology there are a lot of things you can solve with these.

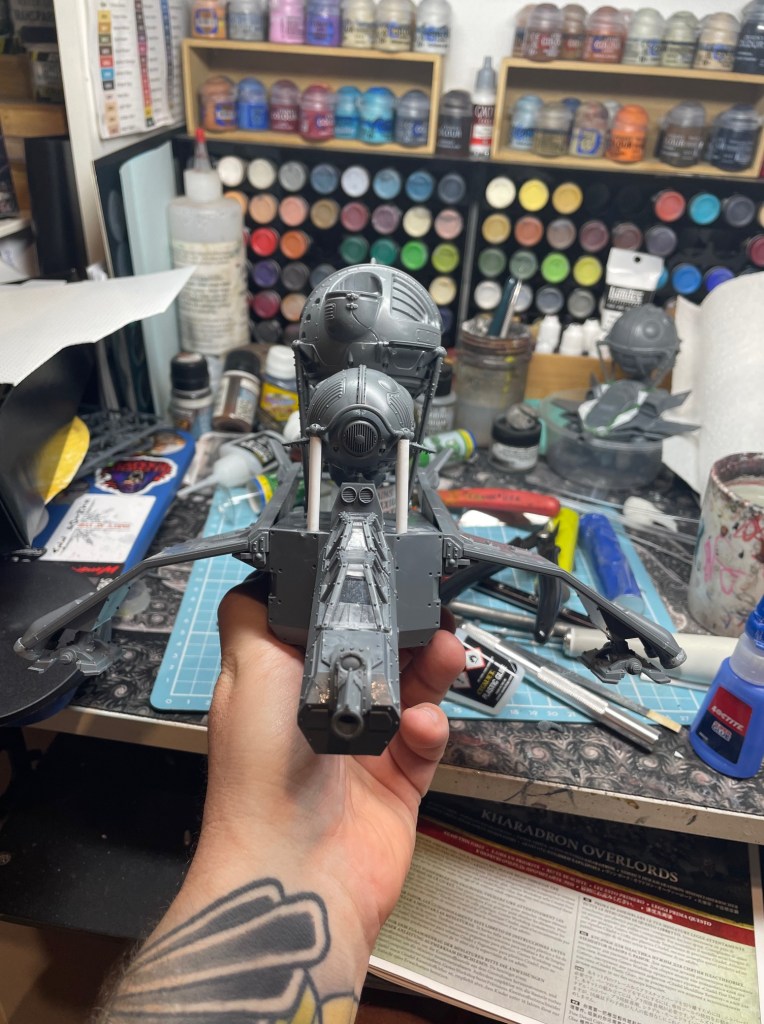

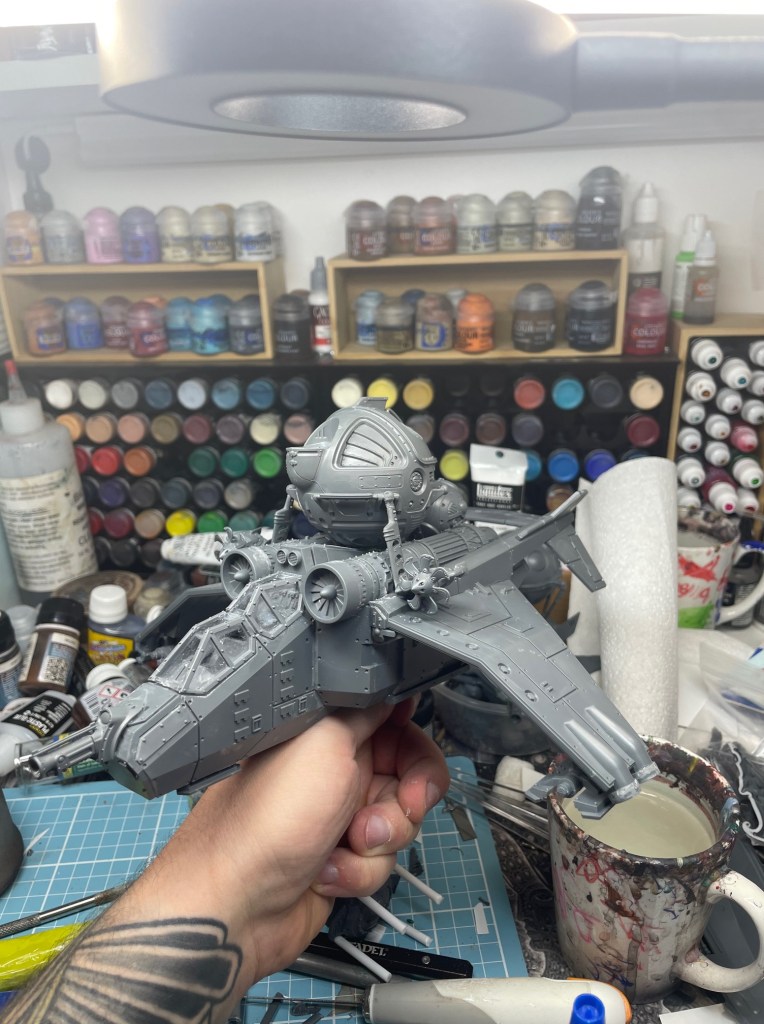
I had tried to fit all three Frigate balloons on the Valkyrie, but I wasn’t loving it so I removed one and went lower. Much happier with the outcome. Also cut out a section of the Valk tail to make it feel a bit more stunty and cohesive.
Keeping the Motivation
This seems to be a common conversation with hobby projects whether it’s the building phase, converting phase, painting phase or even the playing phase. But it’s important to recognize that motivation is very rarely just some magical thing that will appear in your dreams at night to propel you into the next day. Motivation will come when you show up at your hobby table, put in some work and start to see some outcome. Make sure you’re doing things that will yield results. If you’re bogged down in a big build that is just not making you feel happy or content, you could revisit your plan of attack to pick out something that gives you a quick win right now. You might even need to switch to a different project for a bit to get some easier wins or any wins at all. Then you can swap back to the big build and do something on there to get a win. Sometimes the wins take a few hobby sessions, so be realistic, but get those wins.
Make Shit Happen
I love a good converted project. I can paint a factory standard, unconverted model to the best of my ability, make it look epic and there still isn’t the same feeling of accomplishment that I get from an doing a nice big custom build. There’s a lot of drudgery you can find yourself in if it’s your first rodeo, but just keep these concepts in mind and I think there’s a lot of places you can go. For the moment I am working through painting this wicked KO project. Look forward to seeing what you lot come up with, make sure to share it along on the socials or join the Patreon to be part of the hobby conversation on our Discord!


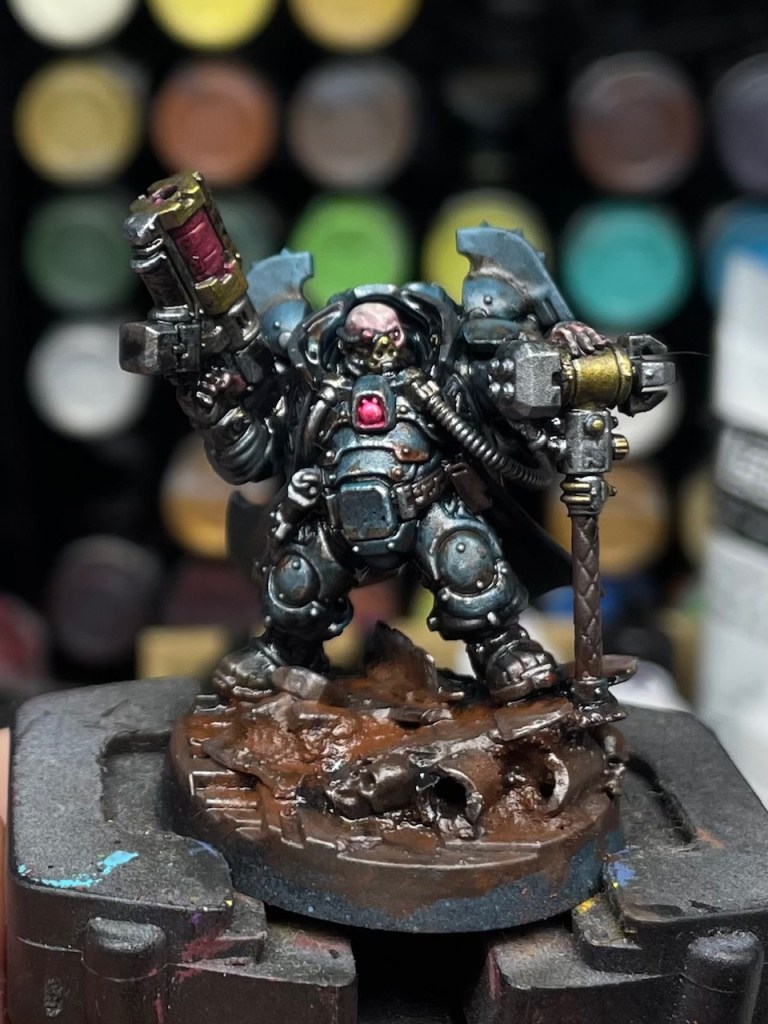
Some of the stages of painting underway currently…Airbrush prime + some details, blocked in colours, oil / pigment wash stages. Getting wins where I can!
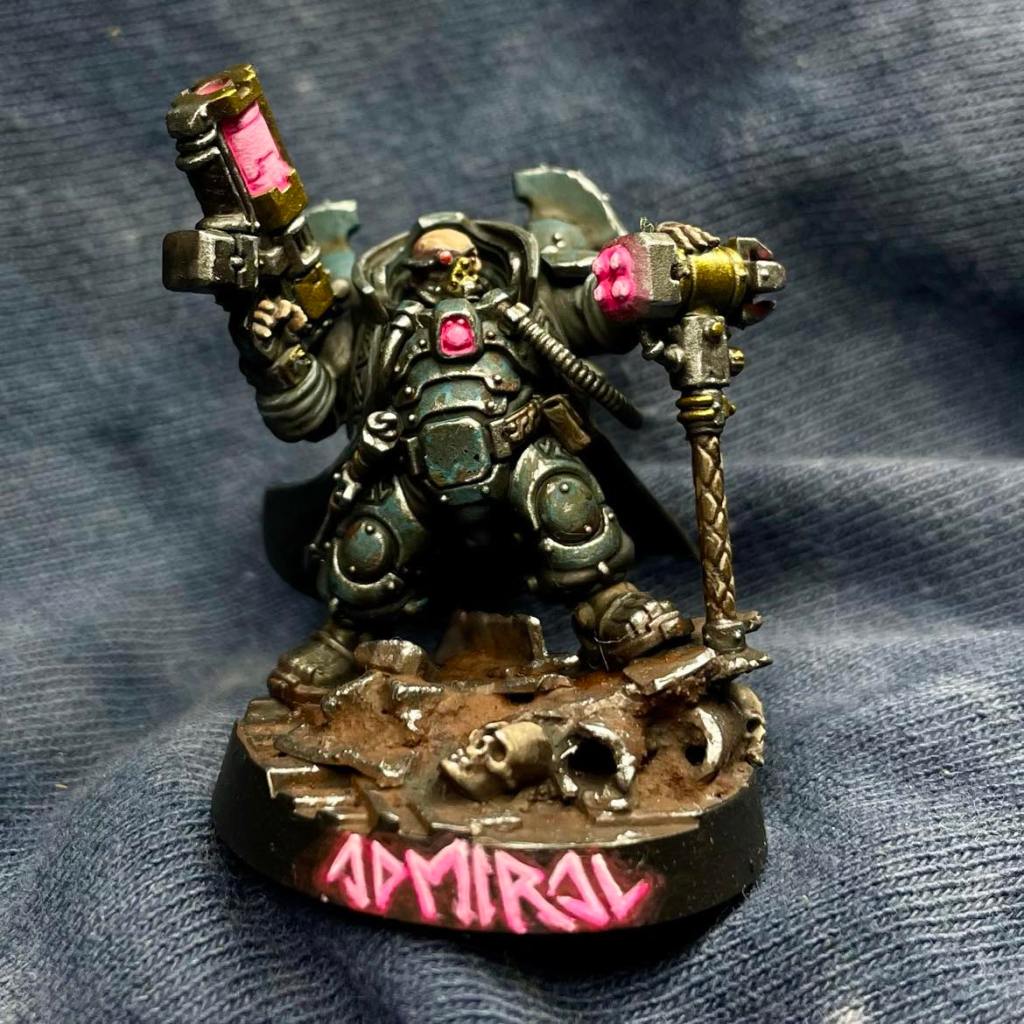

A done Admiral.

If you’d like to help us continue our work, we’d love to have your support. All Patreon Tiers include Discord access, exclusive articles and regular contests. Our Tiers are priced to be within everyone’s reach, so please click here to join us today!


Lovely article about conversions.
I was wondering, when you create your sprue goo in the citadel bottle, does it still run out through the normal metal tube inside of it, or do you have some other way of taking it from the bottle and putting it on the model? I’m new to the hobby and would like all the advice I can get.
LikeLike