

by RussellCroweAOS. Not that Russell Crowe though, Russell Crowe the AOS guy
G’day Destrosexuals, and welcome to another episode of “How to overcommit to an over-large project on too small a timeframe”. I’m your host RussellCroweAOS and let’s dive into what it takes to convert monsters in the Mortal Realms!
I thought I would try something a little different for this article and break it into two parts. Part 1 will give an overview into my process for planning and executing conversions, and Part 2 will dive into the army itself. If you’re not interested in “How-To” hobby content and just want to whack-ya-mole to the army photos, skip right ahead to Part 2!
Part I
Hogwarts, A History
I’ve been converting & kitbashing models since jumping back into the hobby during Covid. I cut my teef on 40K Orks, which reignited my love for both greenskins and ‘kustomisation’.
This is an important aspect of my journey to highlight, as this particular army is underpinned with the belief that “if you believe something enough, it will manifest”. This is an incredibly freeing setting to begin a journey of learning to create. Less rules = more creativity.
I highly recommend you stop reading and quickly watch this 90s excerpt from John Cleese.
“While you’re being creative, nothing is wrong; there is no such thing as a mistake” – John Cleese
Pretty powerful words…words you really have to believe when you’re cutting a $350+ kit into 10 pieces, I tell you that!!
The Process: Inspiration > Actualisation > Implementation
At the heart of creativity is ‘an inspiration’. This can take many forms; a beautiful artwork, a book, work from a fellow hobbyist or even a moment in a game. My creative process usually starts whilst reading through lore from battletomes, exploring the art of the Old Masters or perusing Instagram / Pinterest. I’m not an insanely organised person, however I do find having a few inspo-folders on my phone has been super helpful so I don’t have to dig through endless apps to find an old gold nugget!
Once I happen upon my inspiration, the next step is actualisation. What does it take to bring this idea to life? Is it viable? And most importantly, can I afford it?
During this phase I like to consider a few key elements that (in my humble opinion) seperate a good design from a great one:
- Story
- Silhouette
- Flow/Dynamism/Movement
Story – pretty self explanatory and this article is already long, so I’ll save mansplaining this
Silhouette – bit of an interesting one, but it is an integral component of all eye-catching models. What silhouette does it cast? If you look at any of your favourite designs from the GW range, I think you’ll find this to be one of the uniting elements across them all. It’s that unspoken, rarely articulated design principle that makes a model just hit. Go check out the ‘God-models’ from any range/universe, you’ll see what I mean. The silhouette is working best when it is a representation of the story the designer is trying to convey.
Movement/Dynamism/Flow – Movement is the very essence of life. We move until we die, simple as that. A model with more movement feels more alive. Dynamism is the most visceral representation of movement. Models that are dynamically posed draw you in, they make you believe the Story. If you need evidence of the complete lack of this, go have a look at every Space Marine Lieutenant ever designed and report back. Tactical rock, I’d be more interested in a tactical cock.
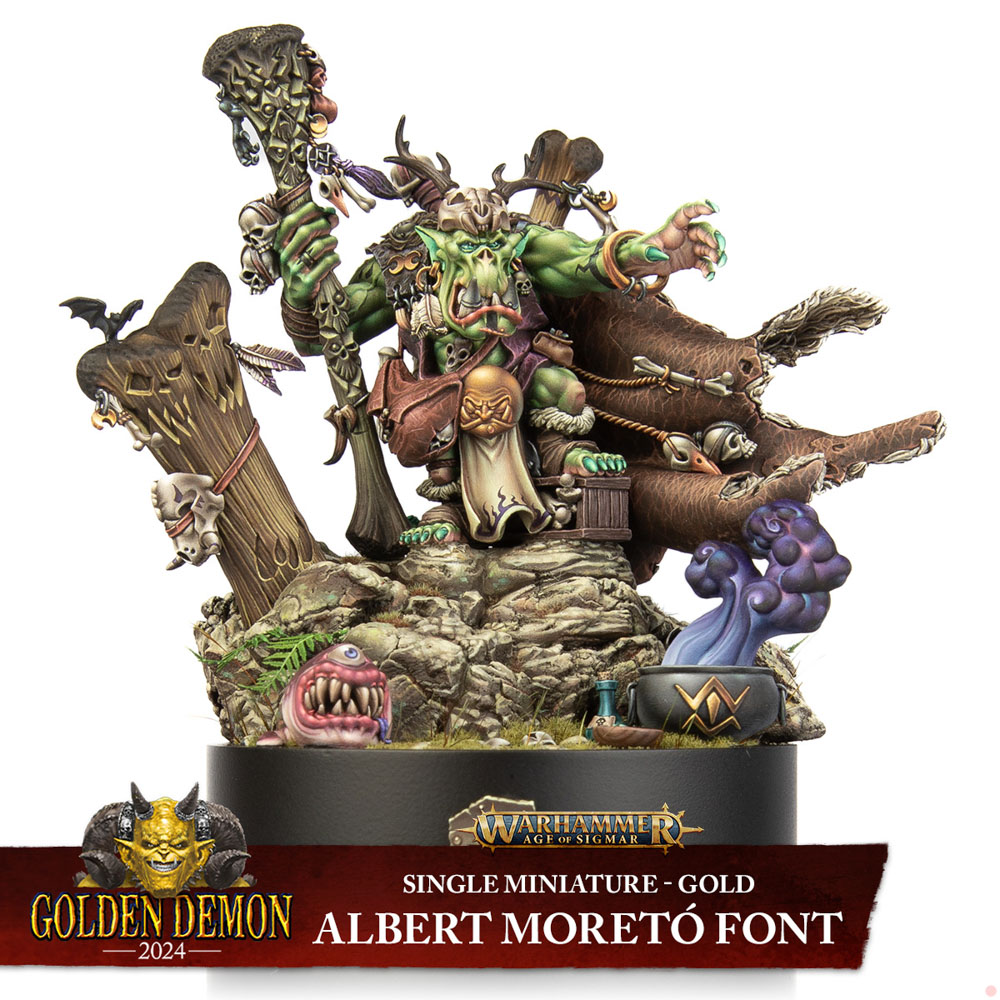
Flow is the overall feeling a model has1. It is the culmination of all three aspects working in harmony. If you’re after a perfect demonstration of all these at work, check out this “Young Nazgob” conversion by Albert Moreto Font. It is an absolute masterclass of miniature conversion2.
My favourite models harness all three of these factors in varying balance, I think you might find that yours do too!
So we’ve got our inspo, we’ve considered a bunch of concepts, now it’s time to get to work! Implementation phase is where you get to put your ideas into practice. The most important thing to remember here is to have fun! Whilst it can be stressful to cut up big miniatures, at the end of the day you can always glue the plastic back together. In my fairly extensive experience, it’s pretty hard to actually mess a model up (don’t ask me about the time I turned a Be’lakor into a Cubone…)

To reconnect with John Cleese’s commentary on creativity above, being able to harness your ‘childlike playfulness’ is integral. Creativity without fear, that’s why we’re here. I have learned more from my conversions that “haven’t worked” than the ones that worked exactly how I thought they would. Once you realise that making the mistake isn’t the failure, the failure is failing to learn from it; everything becomes a lot more enjoyable 🙂.
We’ll save the talk on hobby materials and my go-to tools for another time, but for the sake of brevity (heh), let’s move on to the main event – Brodd’s Stomp!
Part II – Brodd ‘n the Boys
One of the first Age of Sigmar kits to grab my attention was the Mega Gargants. The battletome art is fantastic, and the variety of bitz on the actual kit is even better. The scale of the model is also ripe for going to town on customisation too. Online you can find a raft of kitbashes that folks have done using bits from across the Mortal Realms for their Megas. Skaven bells, Bloodthirster weapons & Stonehorn tusks have all been pilfered in the name of the Hobby Gods for Mega-conversions – and with good reason, they all look great!
Inspiration
For this project however, I wanted to address my major gripe with this kit – their stance. If we take the principles I shared above of Silhouette and Flow/Movement/Dynamism, we can immediately see the Story that GW has for Mega Gargants – big, dumb, pigeon-toed brutes lumbering aimlessly across the Mortal Realms, driven by hunger and the desire to smash. I hate this. In my eyes, anything thriving in the Mortal Realms has to have a LOT more chutzpah than that.
HeyWoah articulated this perfectly in a recent show with Vincey V. At the time of recording, Destruction as an alliance was in a huge funk. They have consistently had the worst performing armies for years at this point, and the inherent flaw in Destruction stems from the Alliance’s portrayal in the lore; the drive that unites these factions is too shallow, too one-dimensional to allow for rich game design to flow.
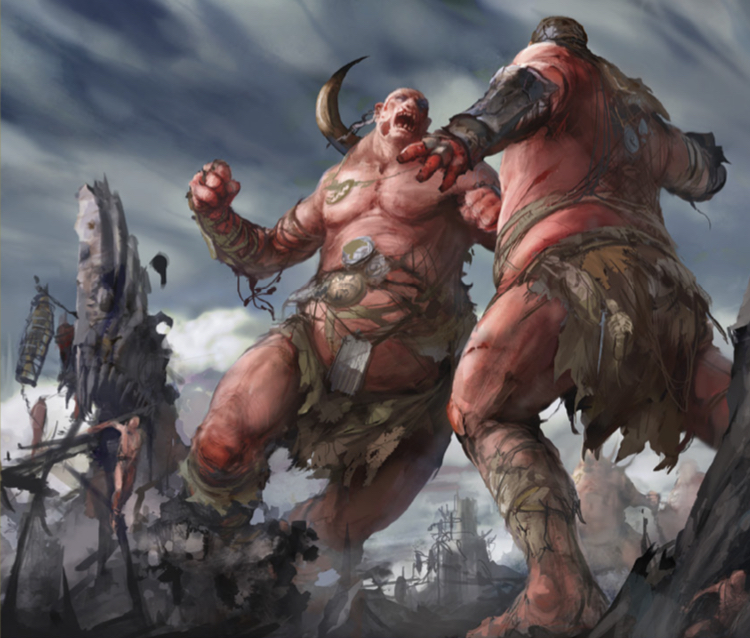
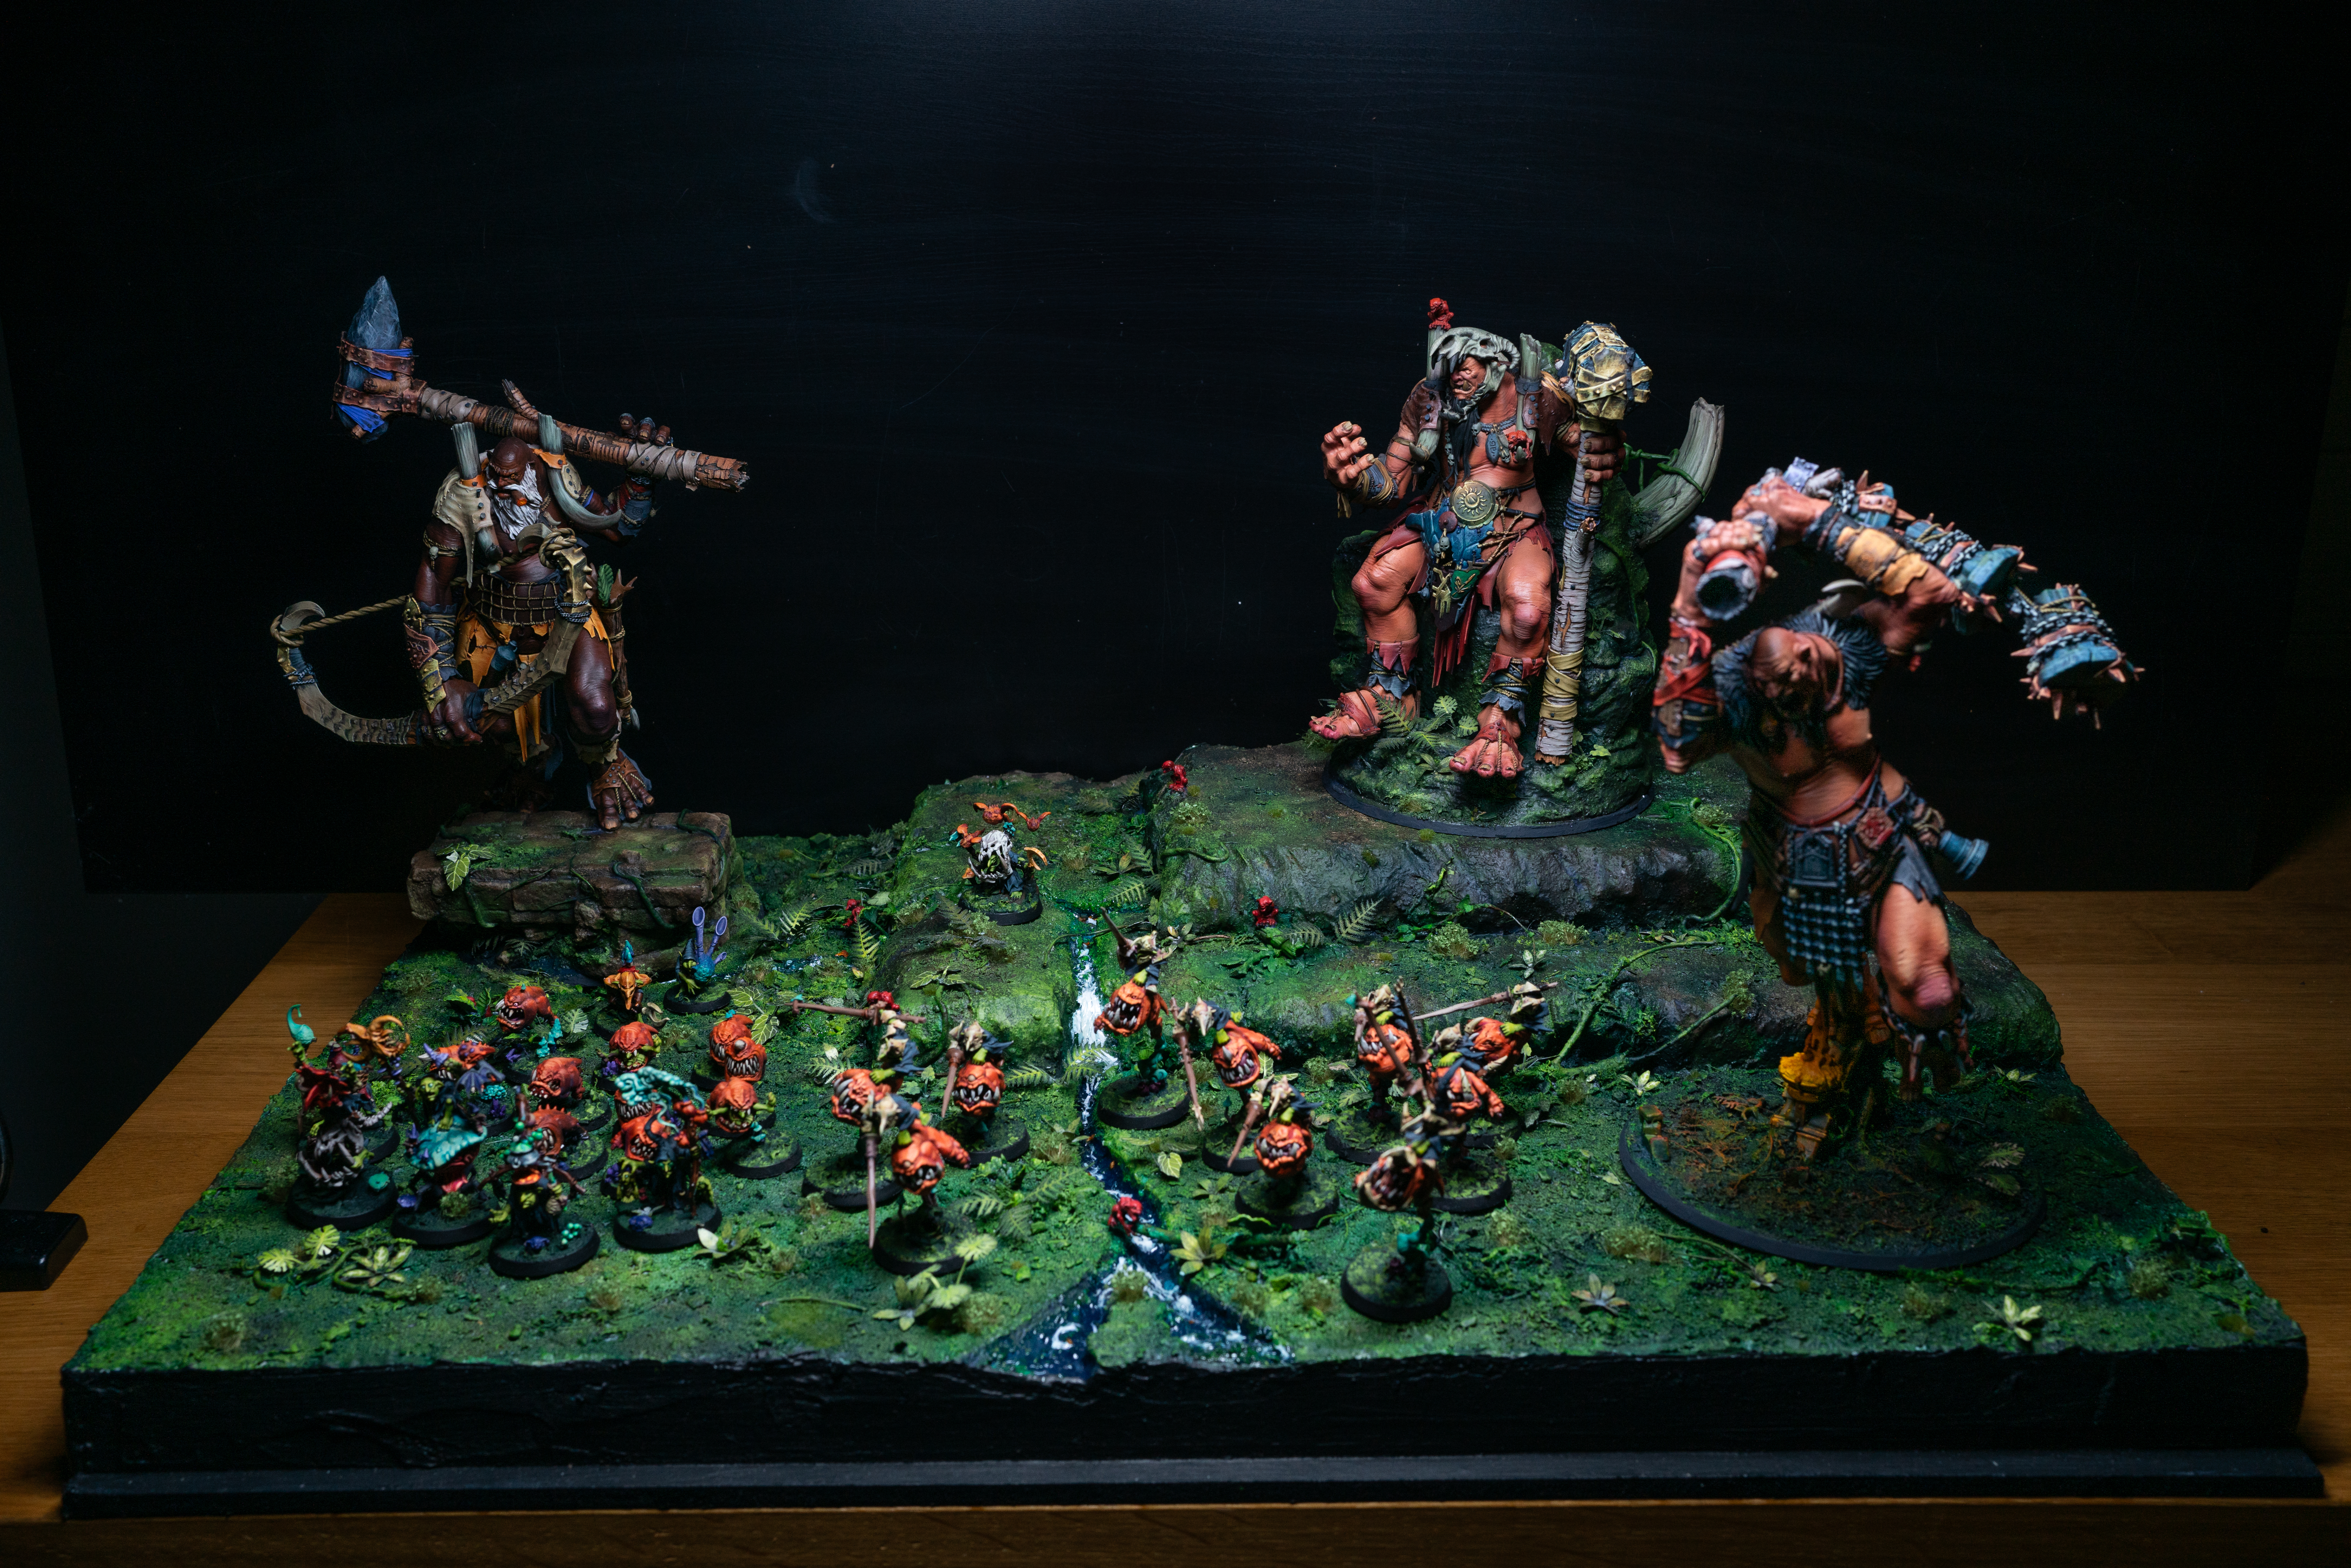
Now don’t get me wrong, I’m not suggesting for a minute that Megas are intelligent beings on the level of Teclis3, however the thought of a smouldering cunning, a brutal and explosive show of strength and an ability to exploit their environment to maximise Destruction speaks highly to me. My goal was to find this in the art/lore and bring it to life in the miniatures…
…and find it I did! Look at these big bastards. All of the explosive brutality you could want, and more.

Now having just finished a big Ironjawz project…
https://plasticcraic.blog/2024/08/30/meet-the-best-army-on-show-at-aos-worlds-nic-wrights-ironsunz/
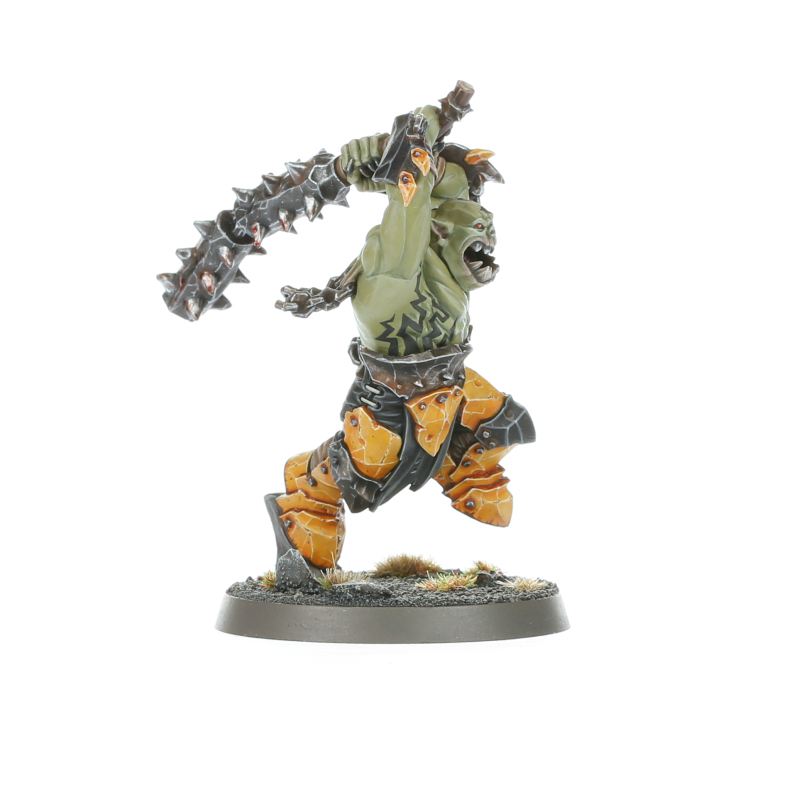
…I was also completely fuelled by the incredible Brute Rager sculpts. One of the abilities the Gatebreaker Mega Gargant has is the “Pulverising Strike”, a single insanely powerful smash; this Rager felt like the absolutely perfect illustration of this!
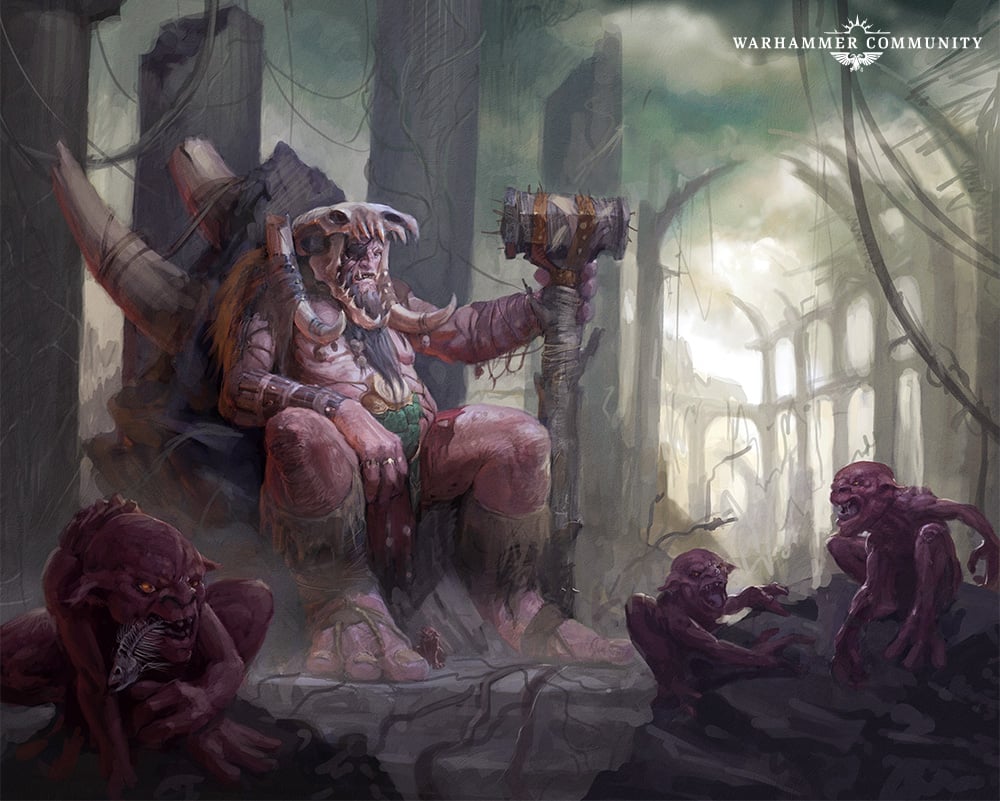
Finally, King Brodd himself. This is the artwork that actually kicked off the entire project. Such an epic scene, and honestly, I’m just a slut for any character sitting on a throne. I didn’t love how flaccid/flat/deflated Brodd looked on the throne, but knew I could correct this when it came time to bring it to life.
Actualisation
This stage was the most difficult step of the entire project. I’m a big believer in planning as much as possible when working on this scale; “measure twice, cut once” as my old man used to say.
I quickly found out why there were so few images of re-posed / heavily converted Mega Gargants online: the kit design is terrible for it. The torso and limbs are all hollow, so the plastic walls being only about 1.5mm thick means pinning for structural integrity and reposing is super difficult. Not only this, but I discovered halfway through converting my first Mega that the ‘monopose’ body of the Megas has a really gnarly corkscrew at the waist/torso and shoulder, which if unaccounted for ruins the Flow of the model. What a bloody nightmare! Nonetheless, I’d just dropped hundreds of Australian Dollarydoos on boxes & boxes of these pricks, and with a 6 week countdown timer until Sydney GT, the race was on!
Implementation
I used a few tricks I’d picked up reposing Stonehorns and Magmadroths in previous projects, as both of these kits have similar problems with pinning due to the thinness of the hollow plastic frames. The main trick with reposing Megas was to identify the pivot point in the joint, cut it using a hobby saw and then create a ‘rib cage’ with wire. I would then super glue these into place inside the hollow components and activate the superglue with bi-carb soda, which instantly fuses with the superglue to create a crazy-hard cement. Once the limbs were locked in place, I stuffed the hollow cavity with scrunched up aluminium foil so I could then gap fill with Milliput. This is a classic technique clay sculptors use when making models from scratch. Create a wire armature, bulk out the frame with foil and then apply modelling compound (putty/clay) over the top!
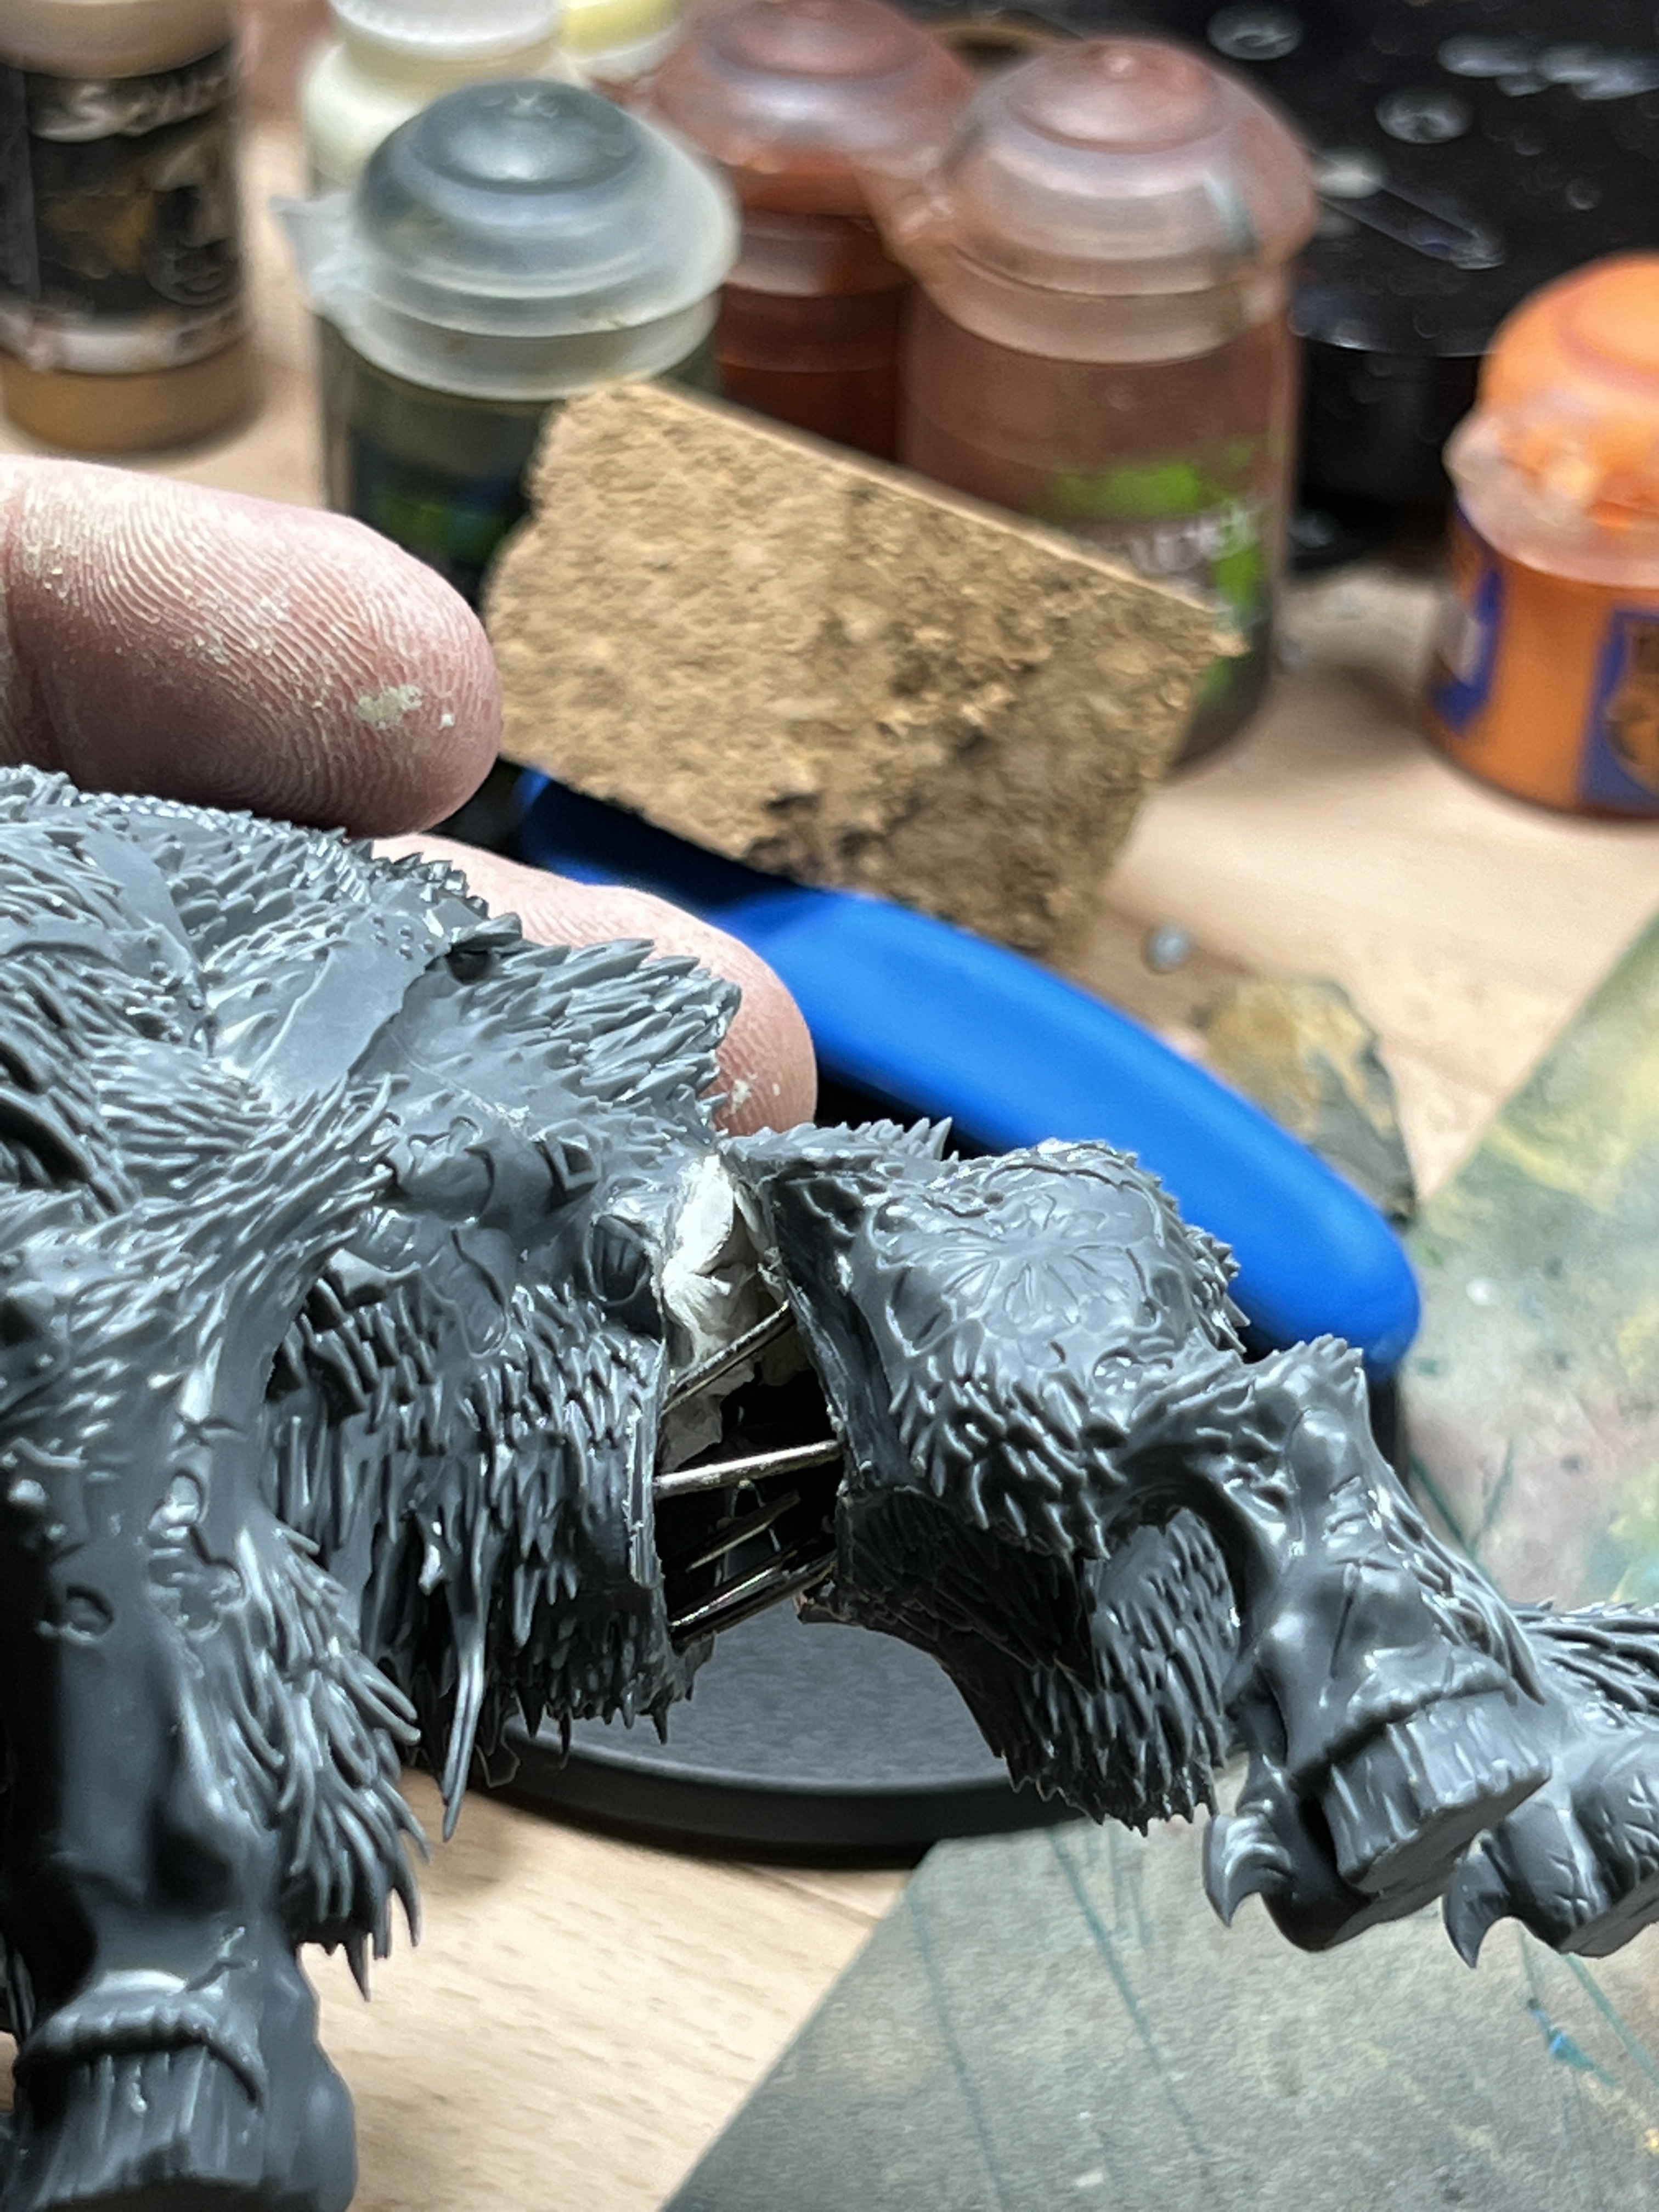
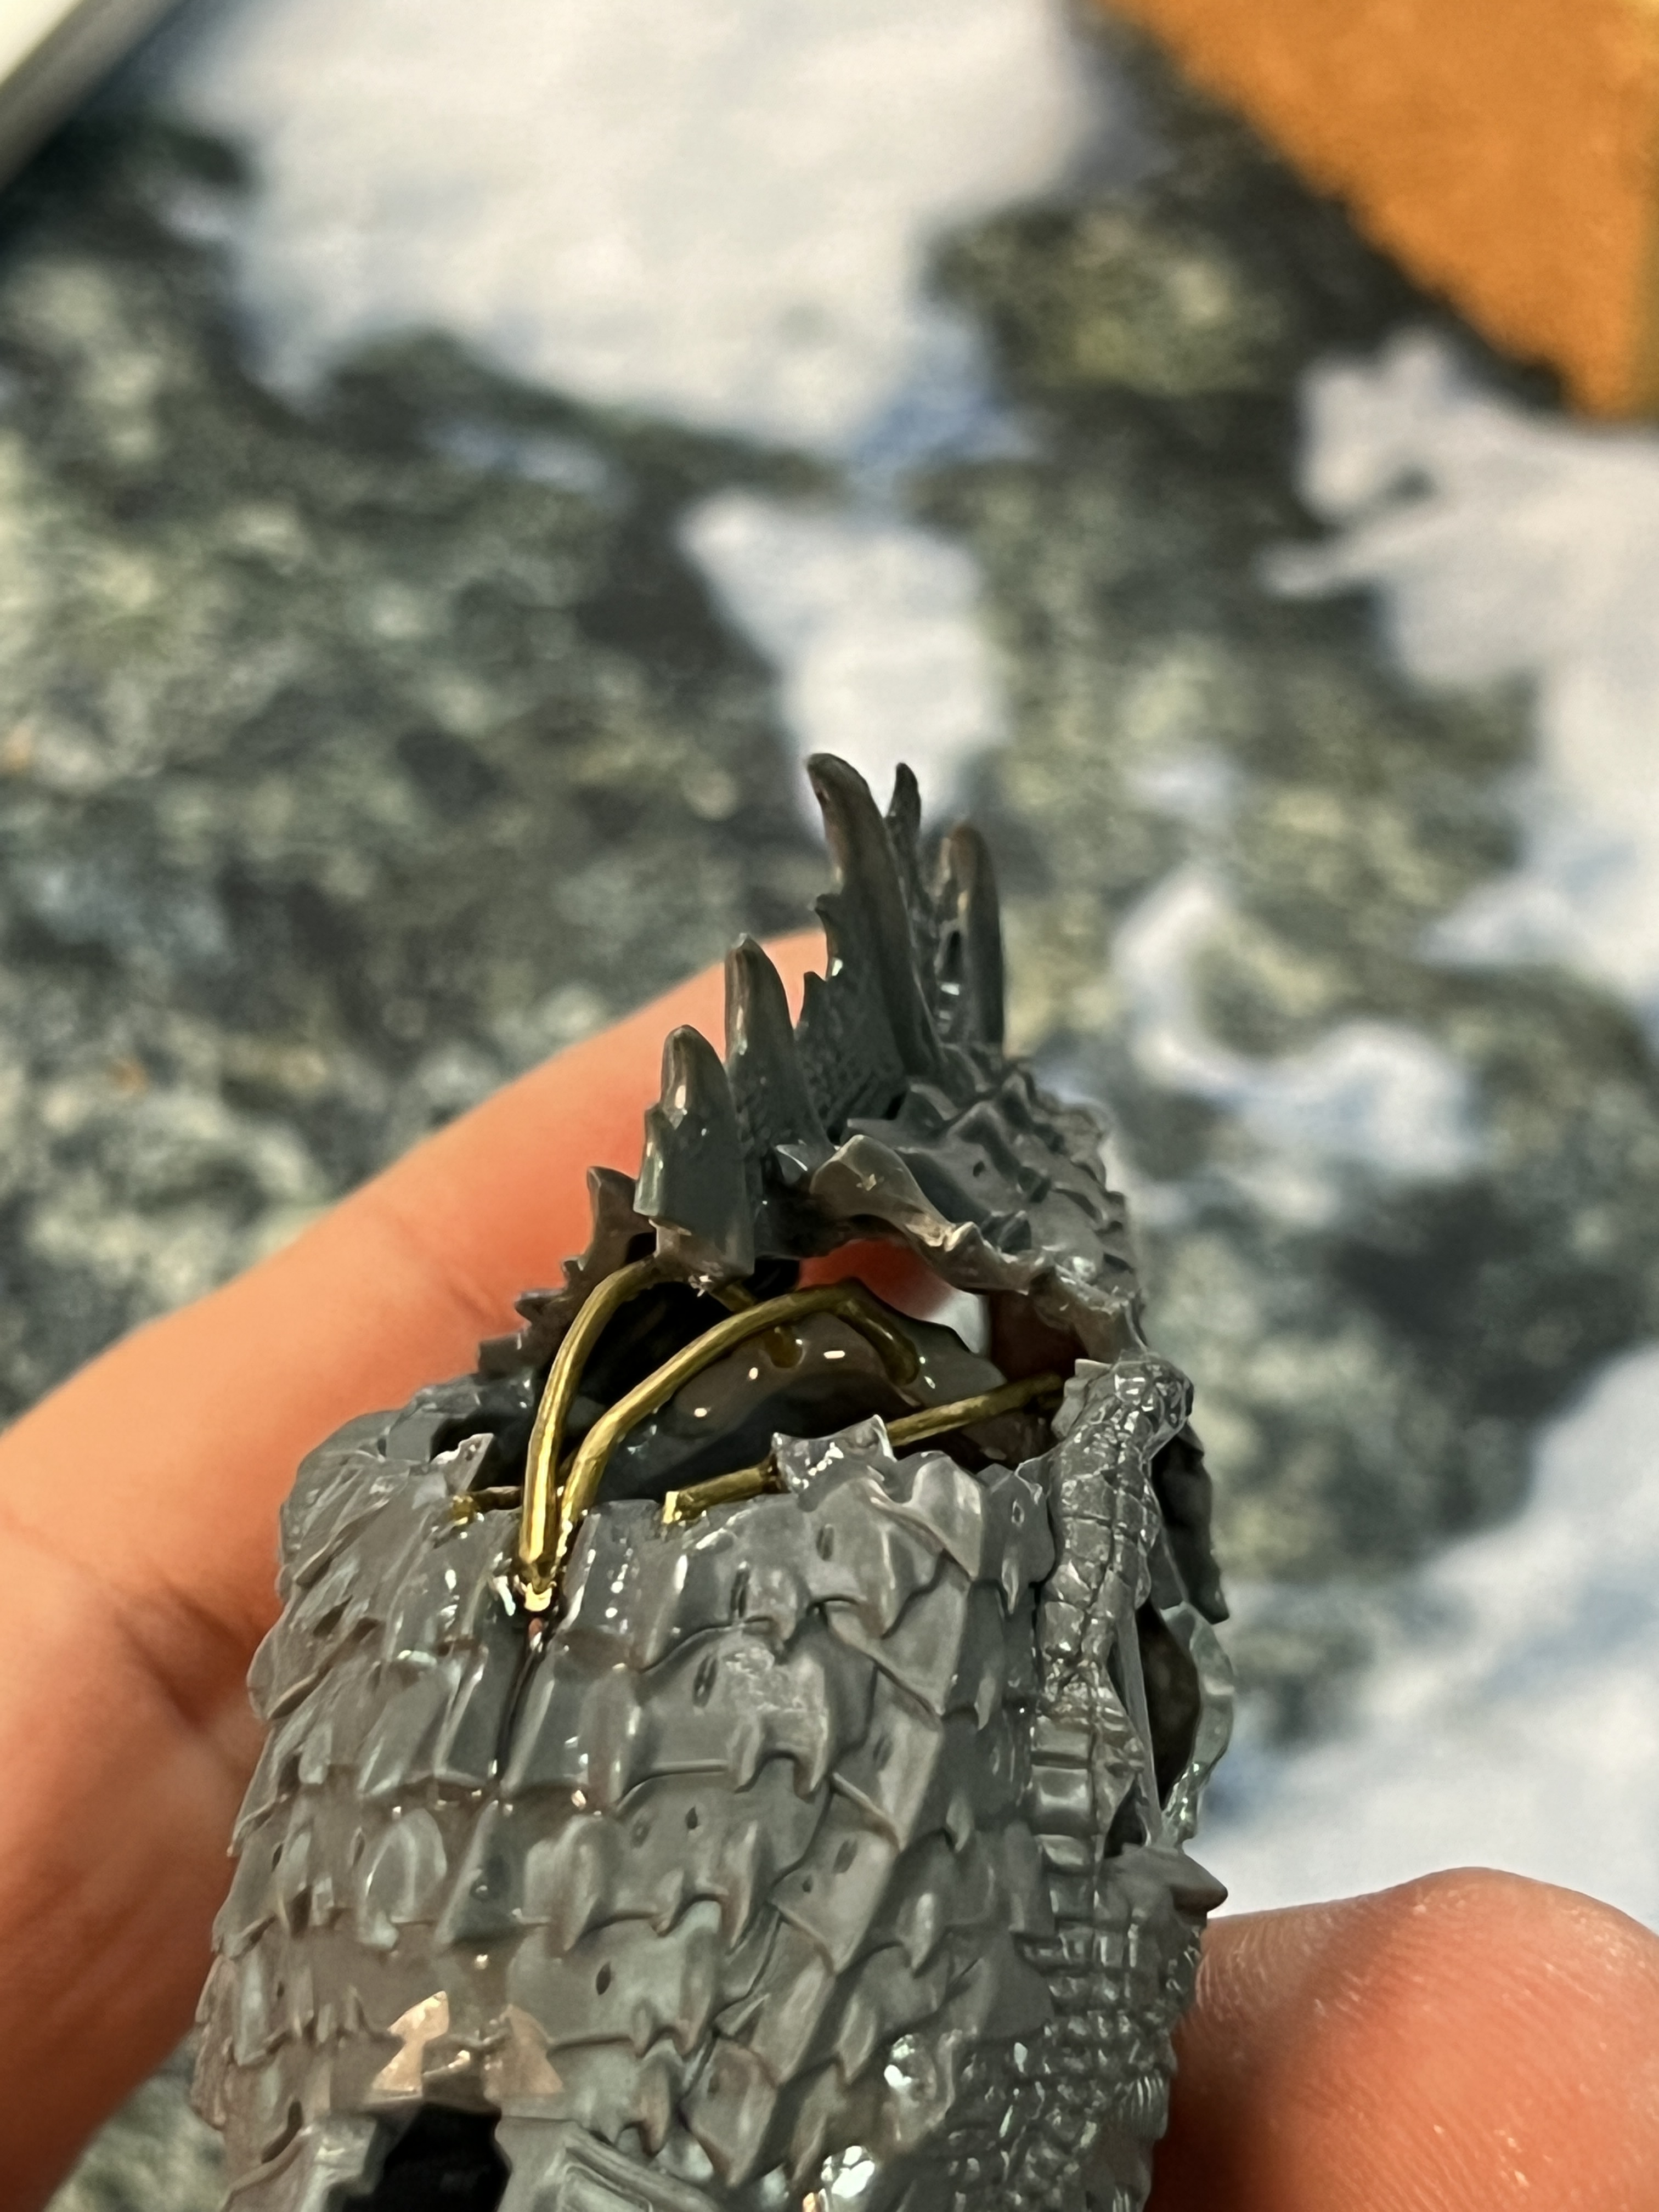
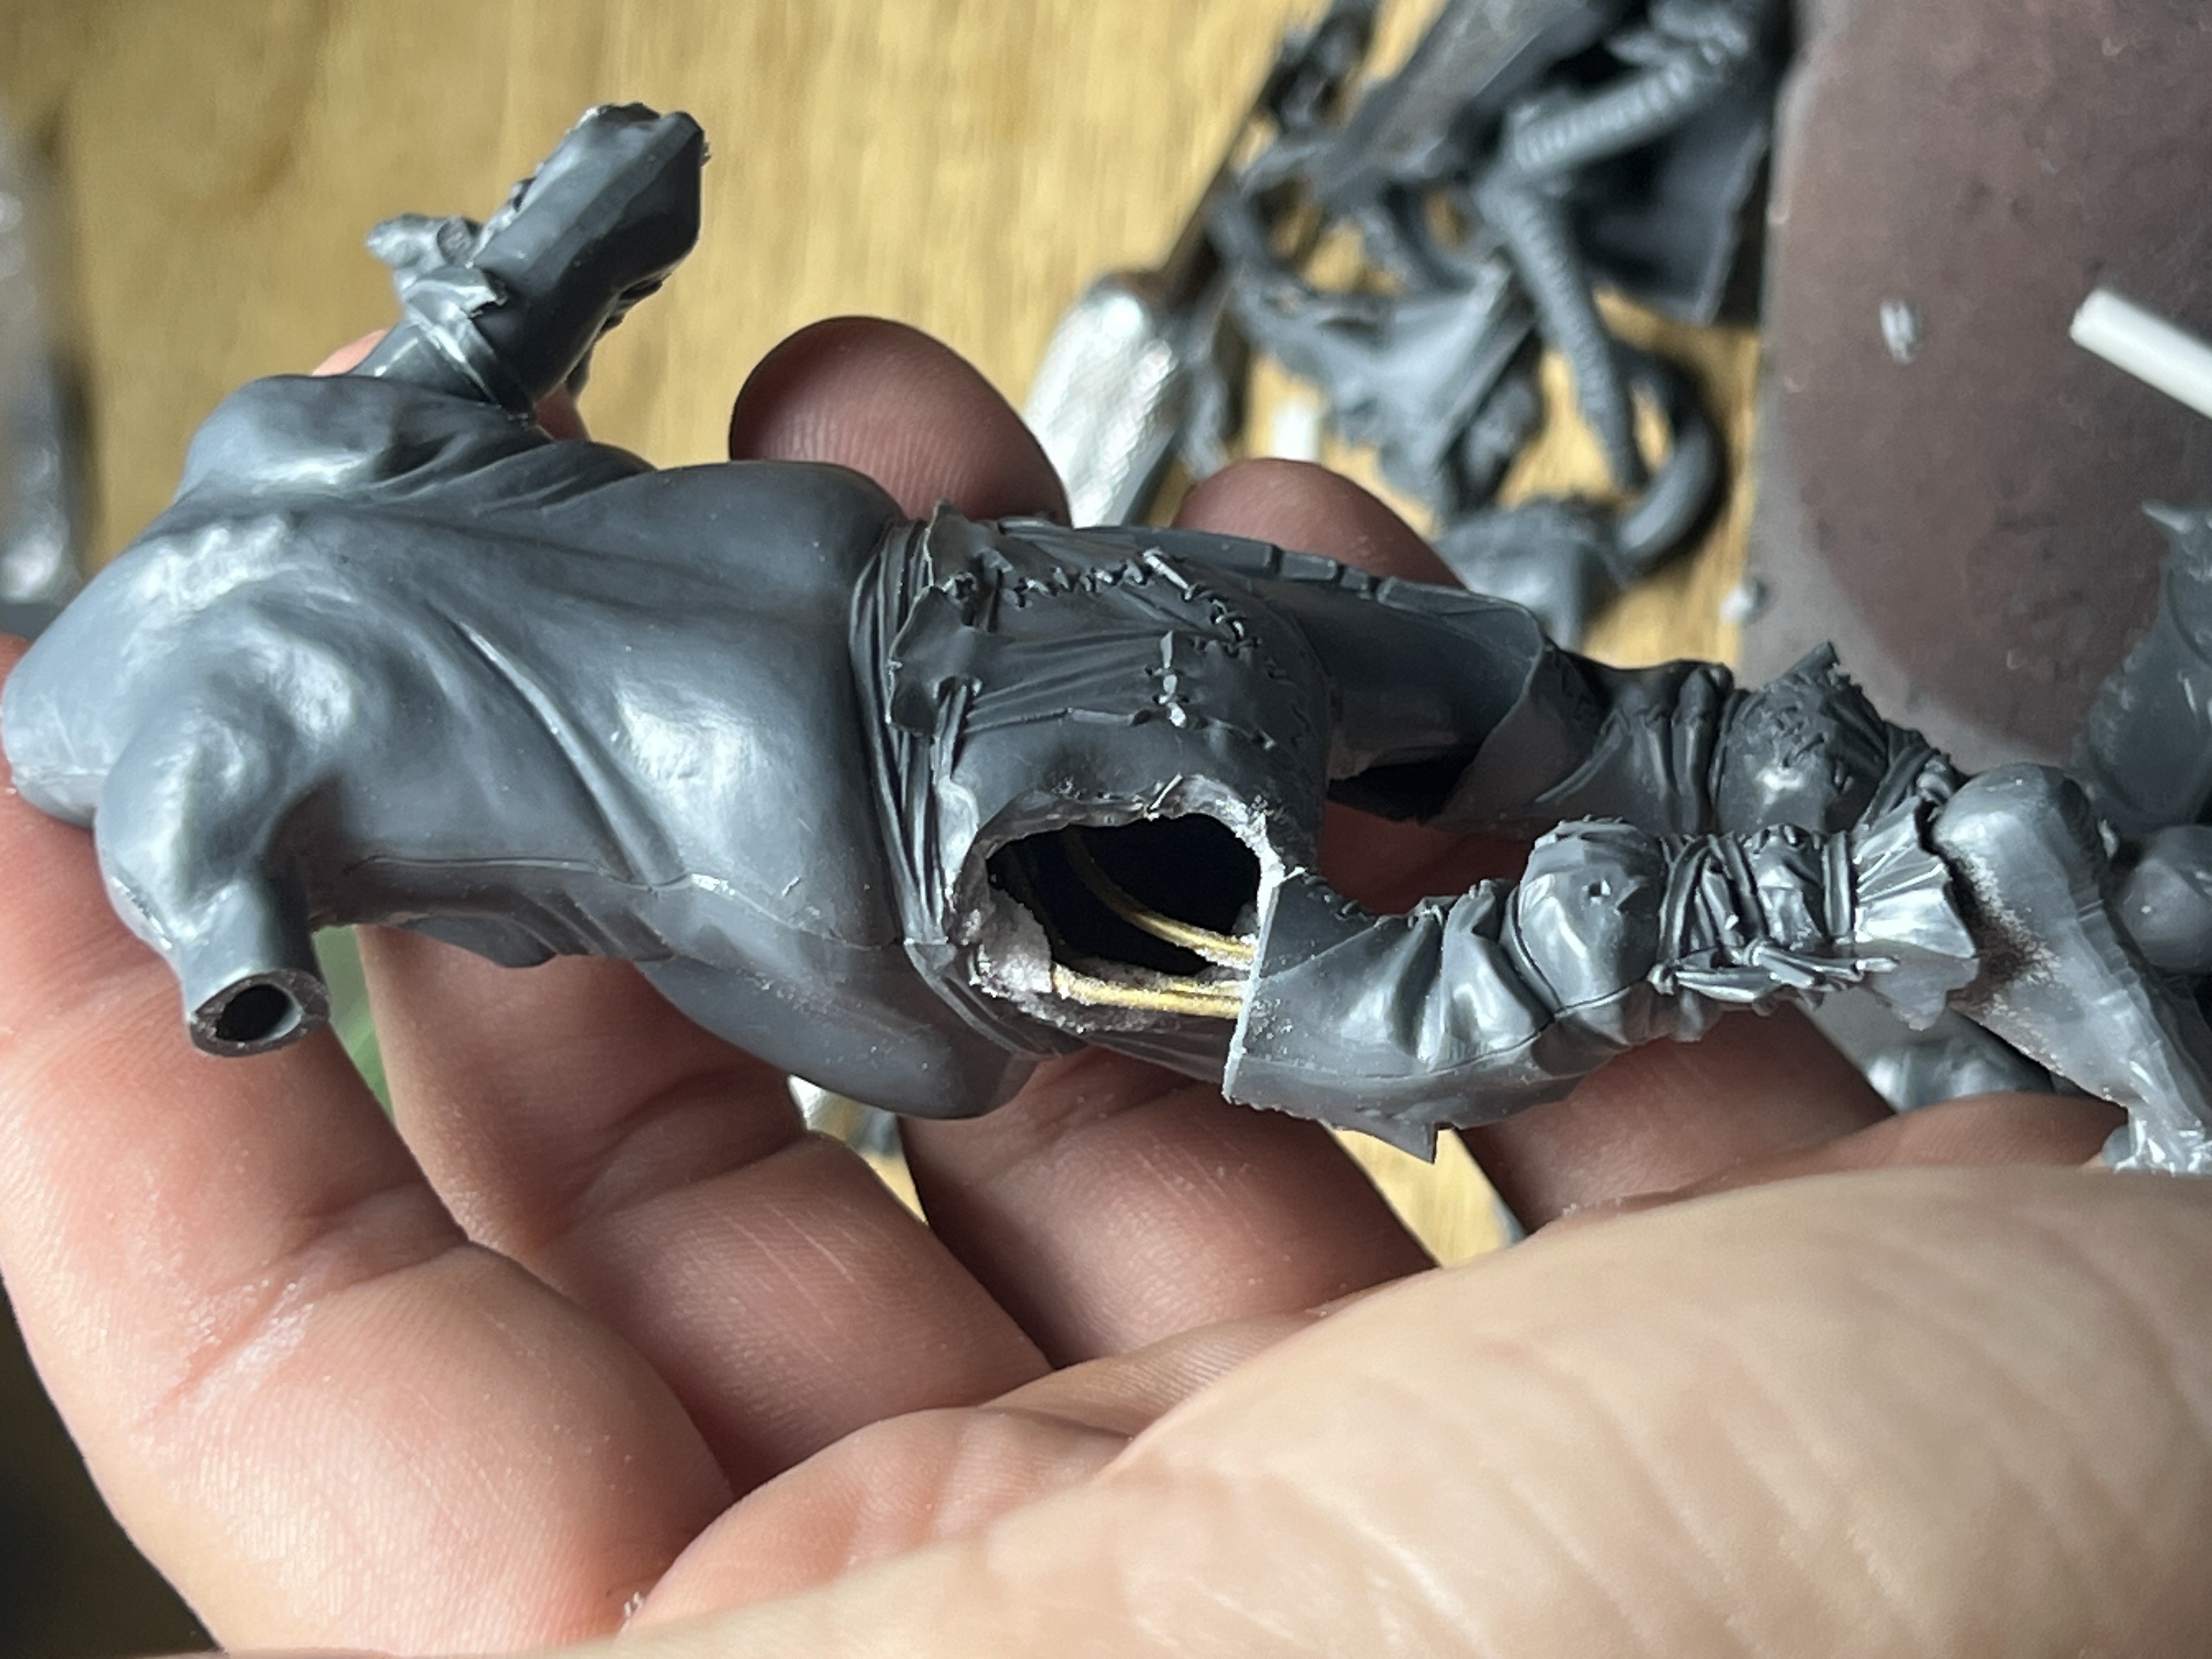
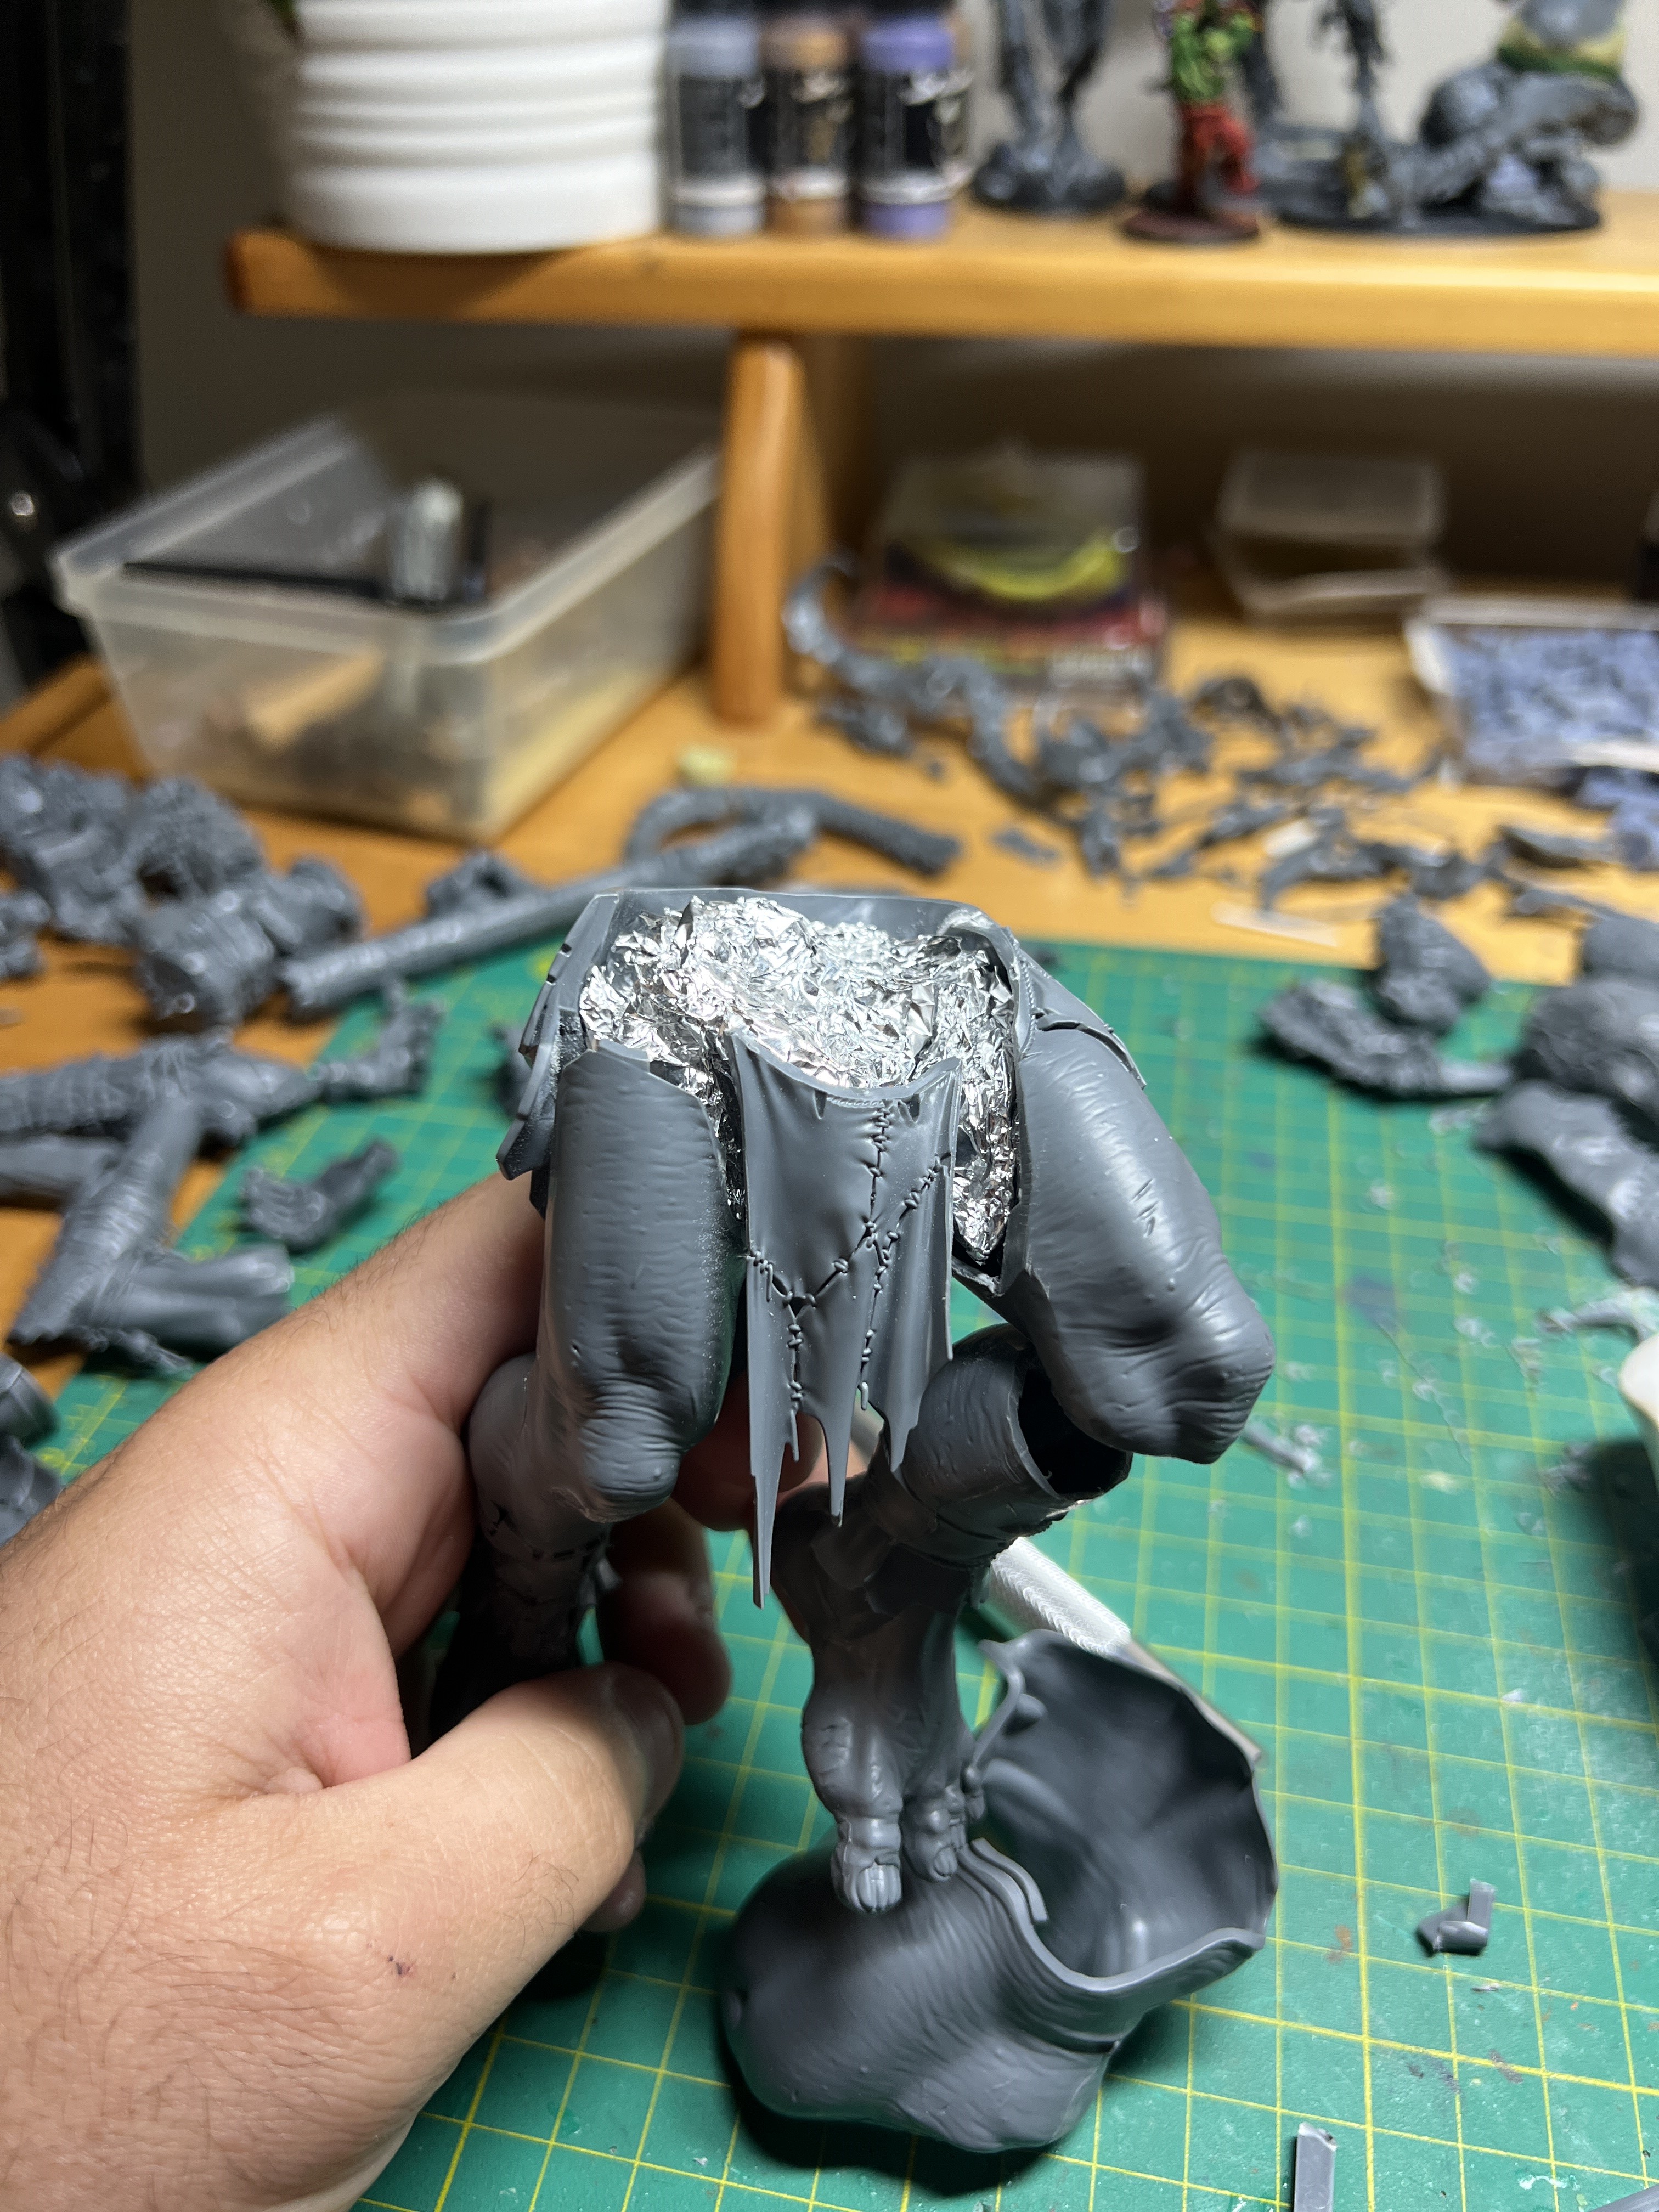
In these photos we can see the wire framing on multiple models, followed by bulking out with foil
A big tip when working with modelling putty (Greenstuff/ Miliput/ Magic Sculpt etc) is to “sculpt in layers”. Sculpt how you paint! When you paint you first apply a base coat, then a layer, then add detail with a highlight; sculpting is no different. Wait for each layer to cure (dry) before applying the next layer. When you work in this way, you will quickly find using greenstuff to be much more approachable.
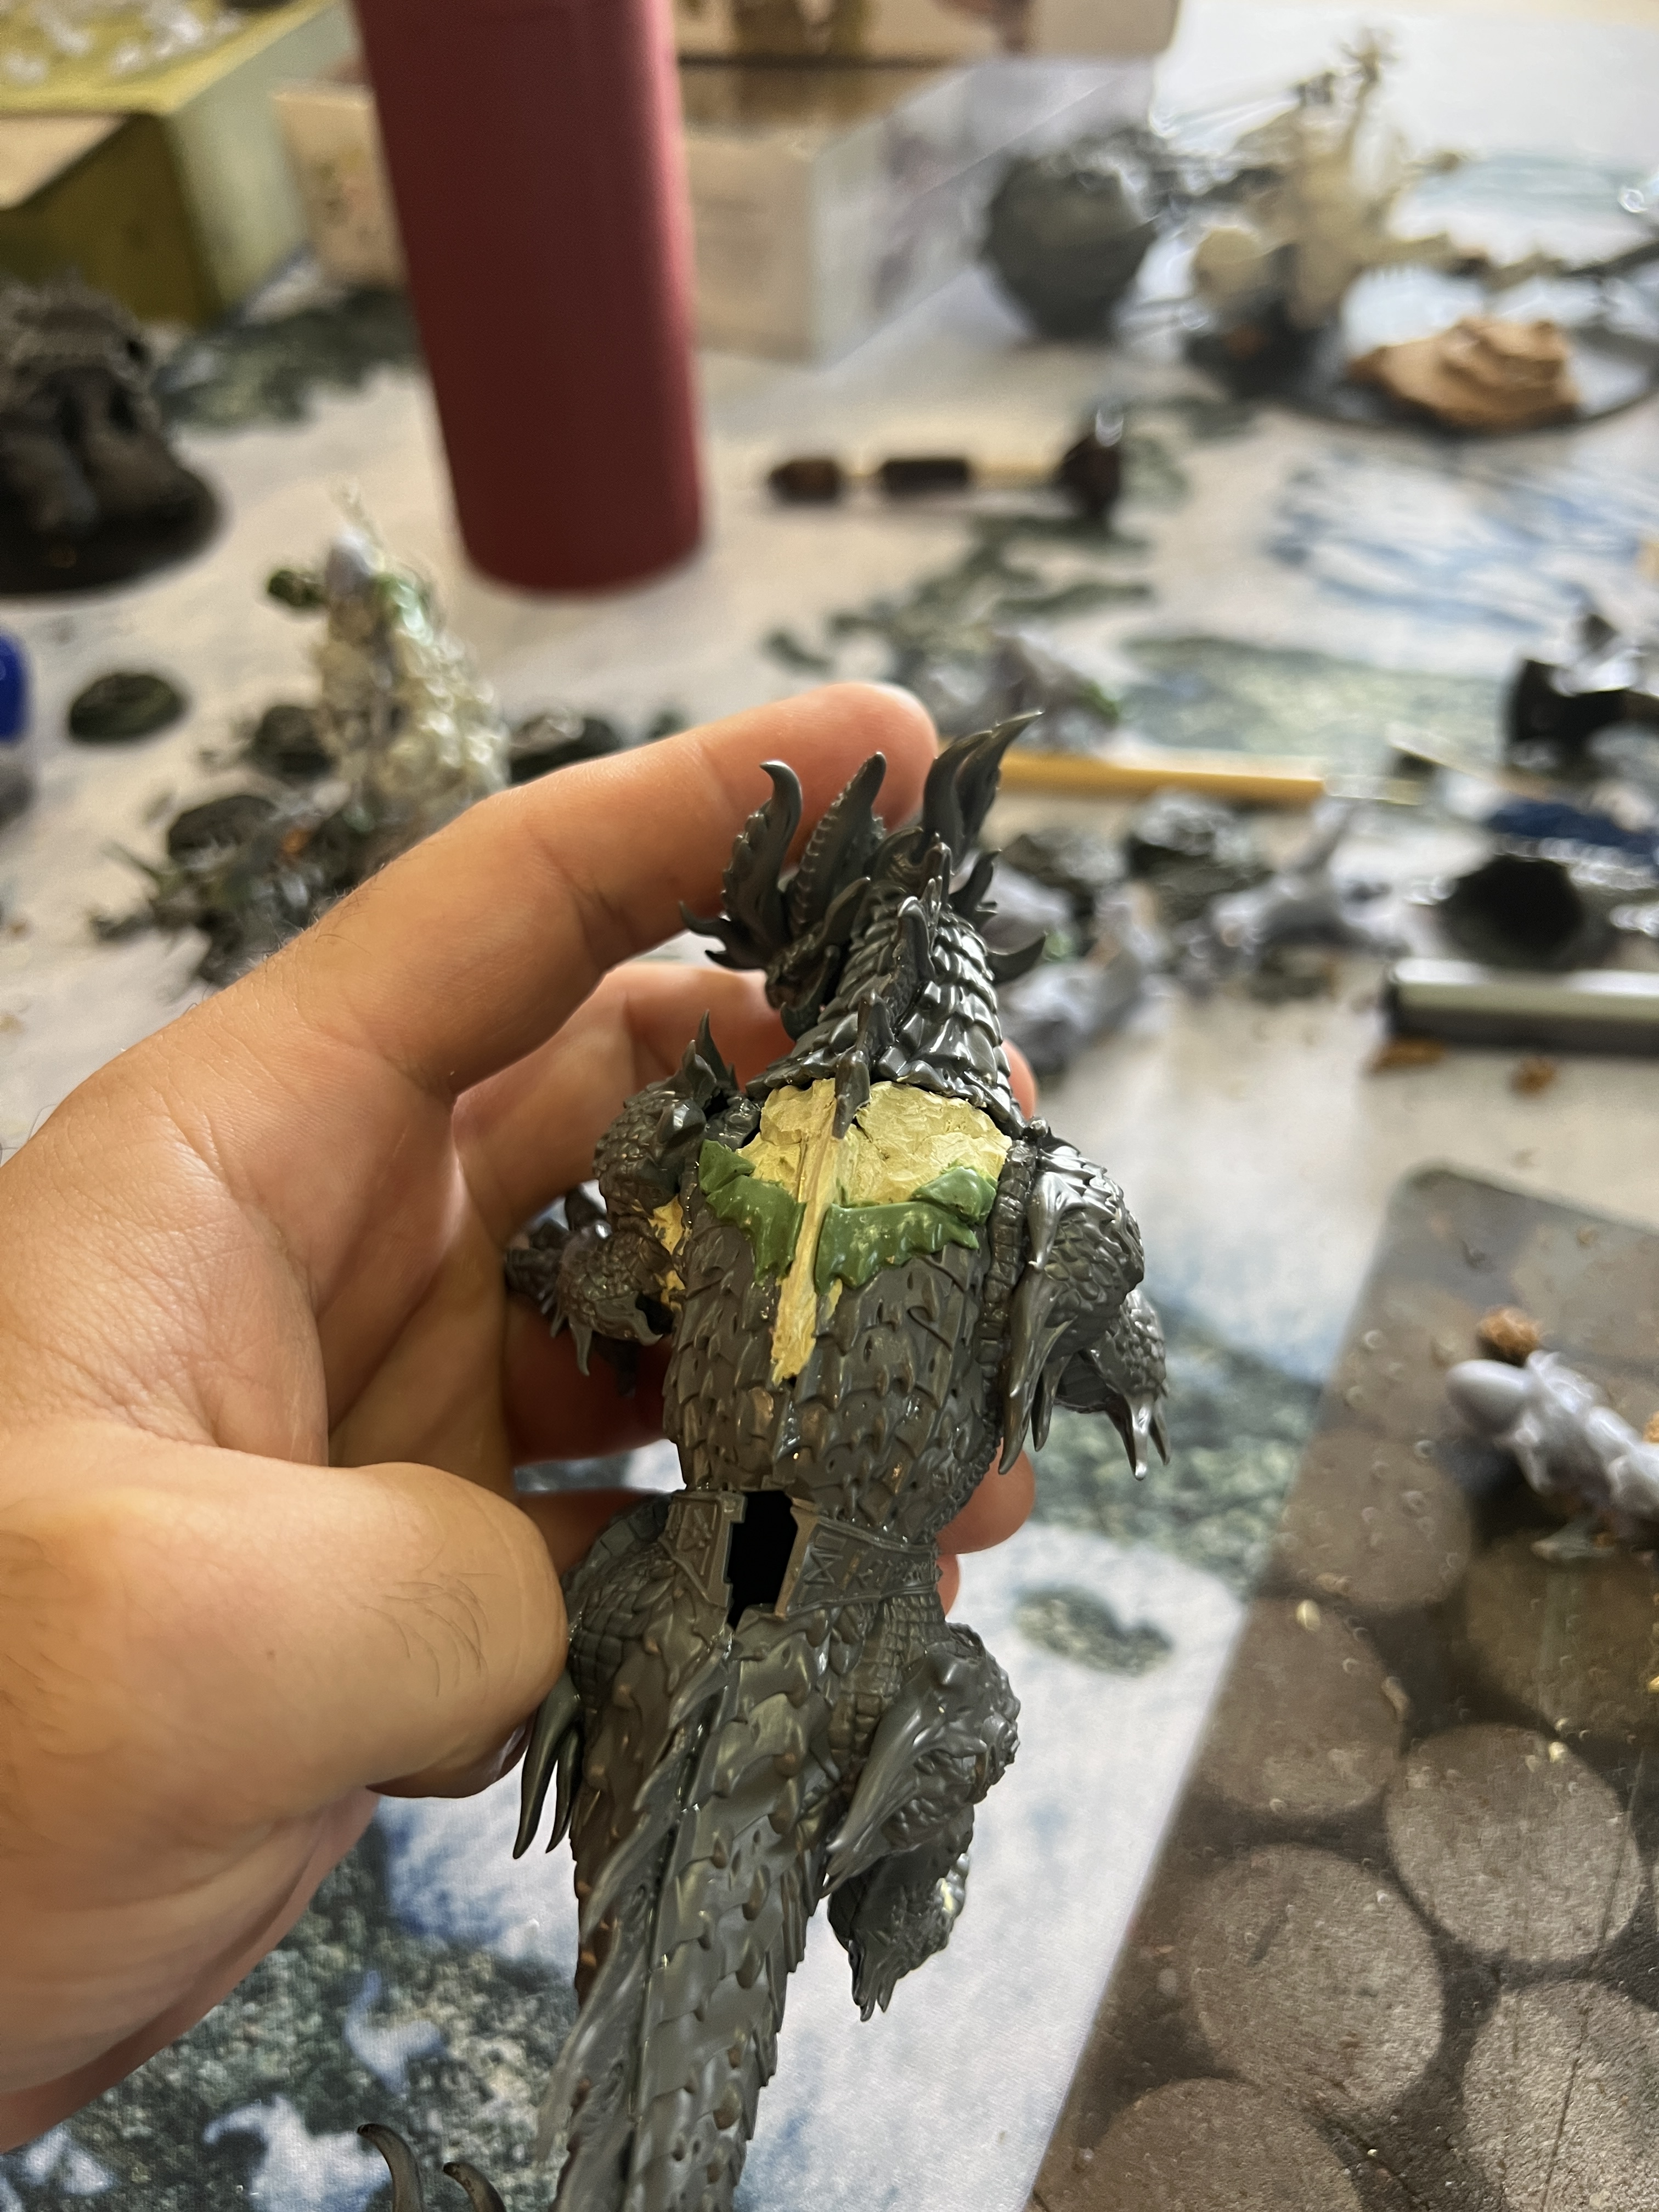
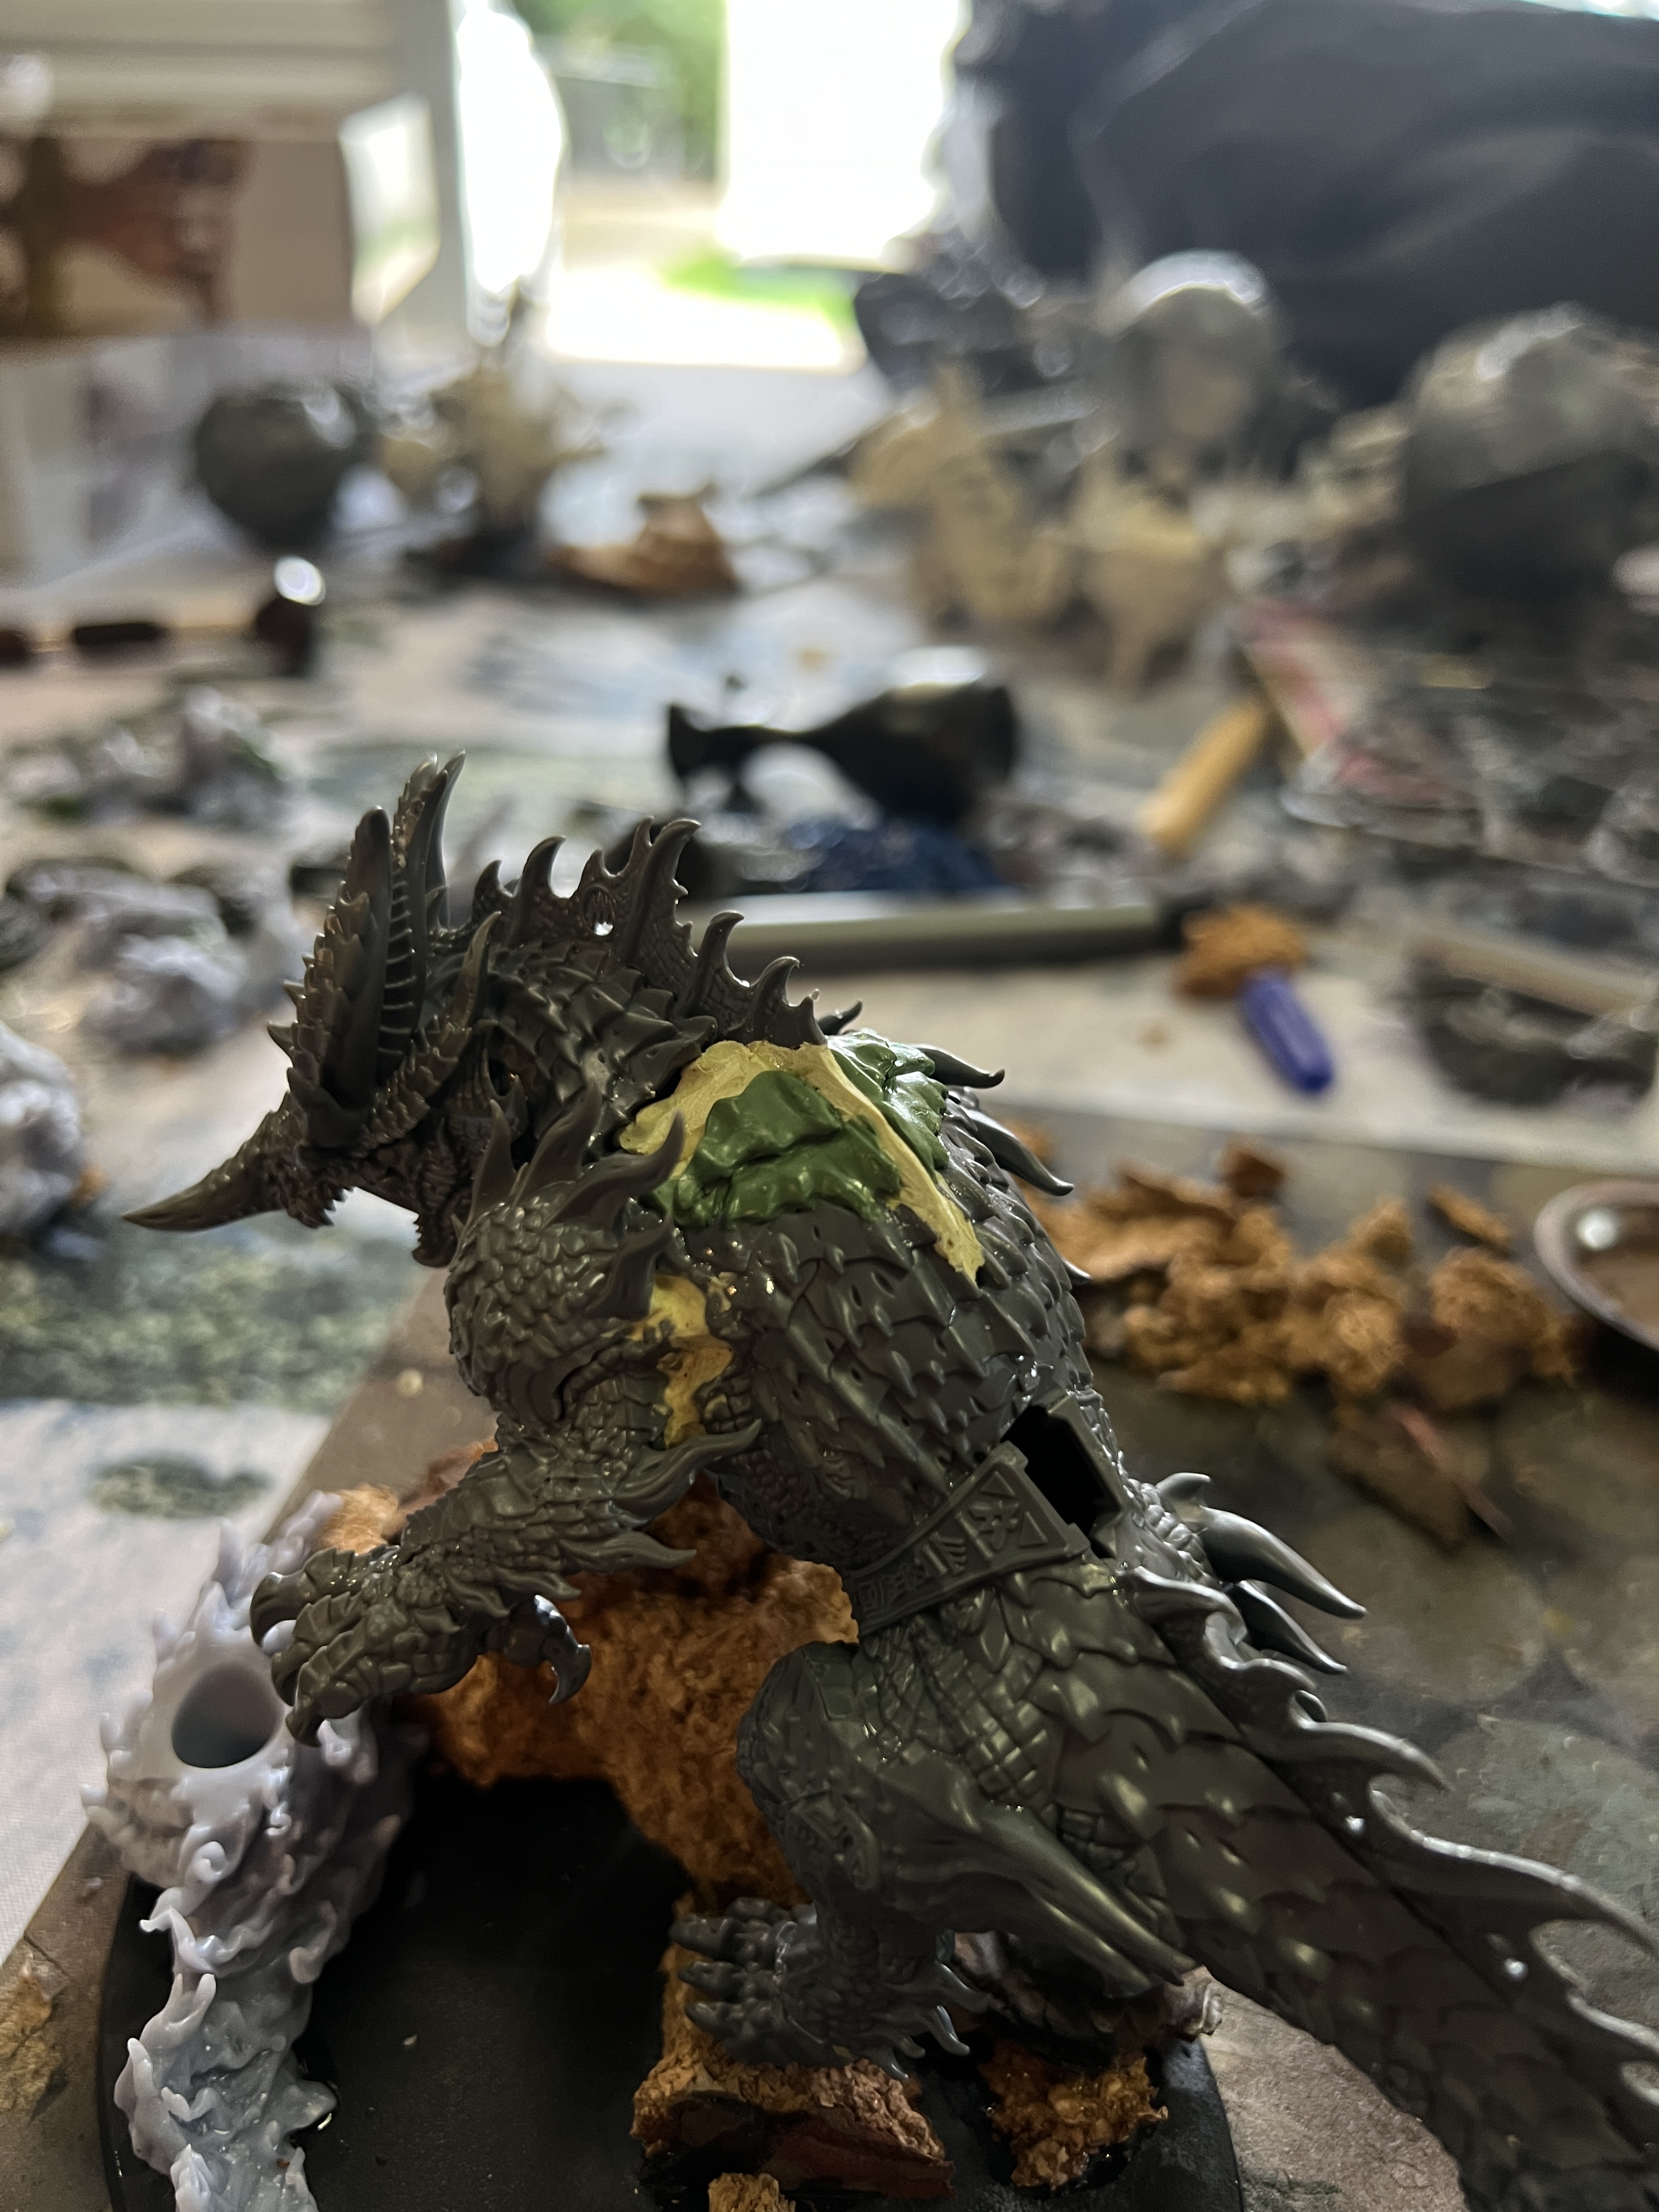
Filling and then layering with putty – just like paint, you shouldn’t expect to get it all done in one layer
Without further ado, let’s jump in and check out how I went!
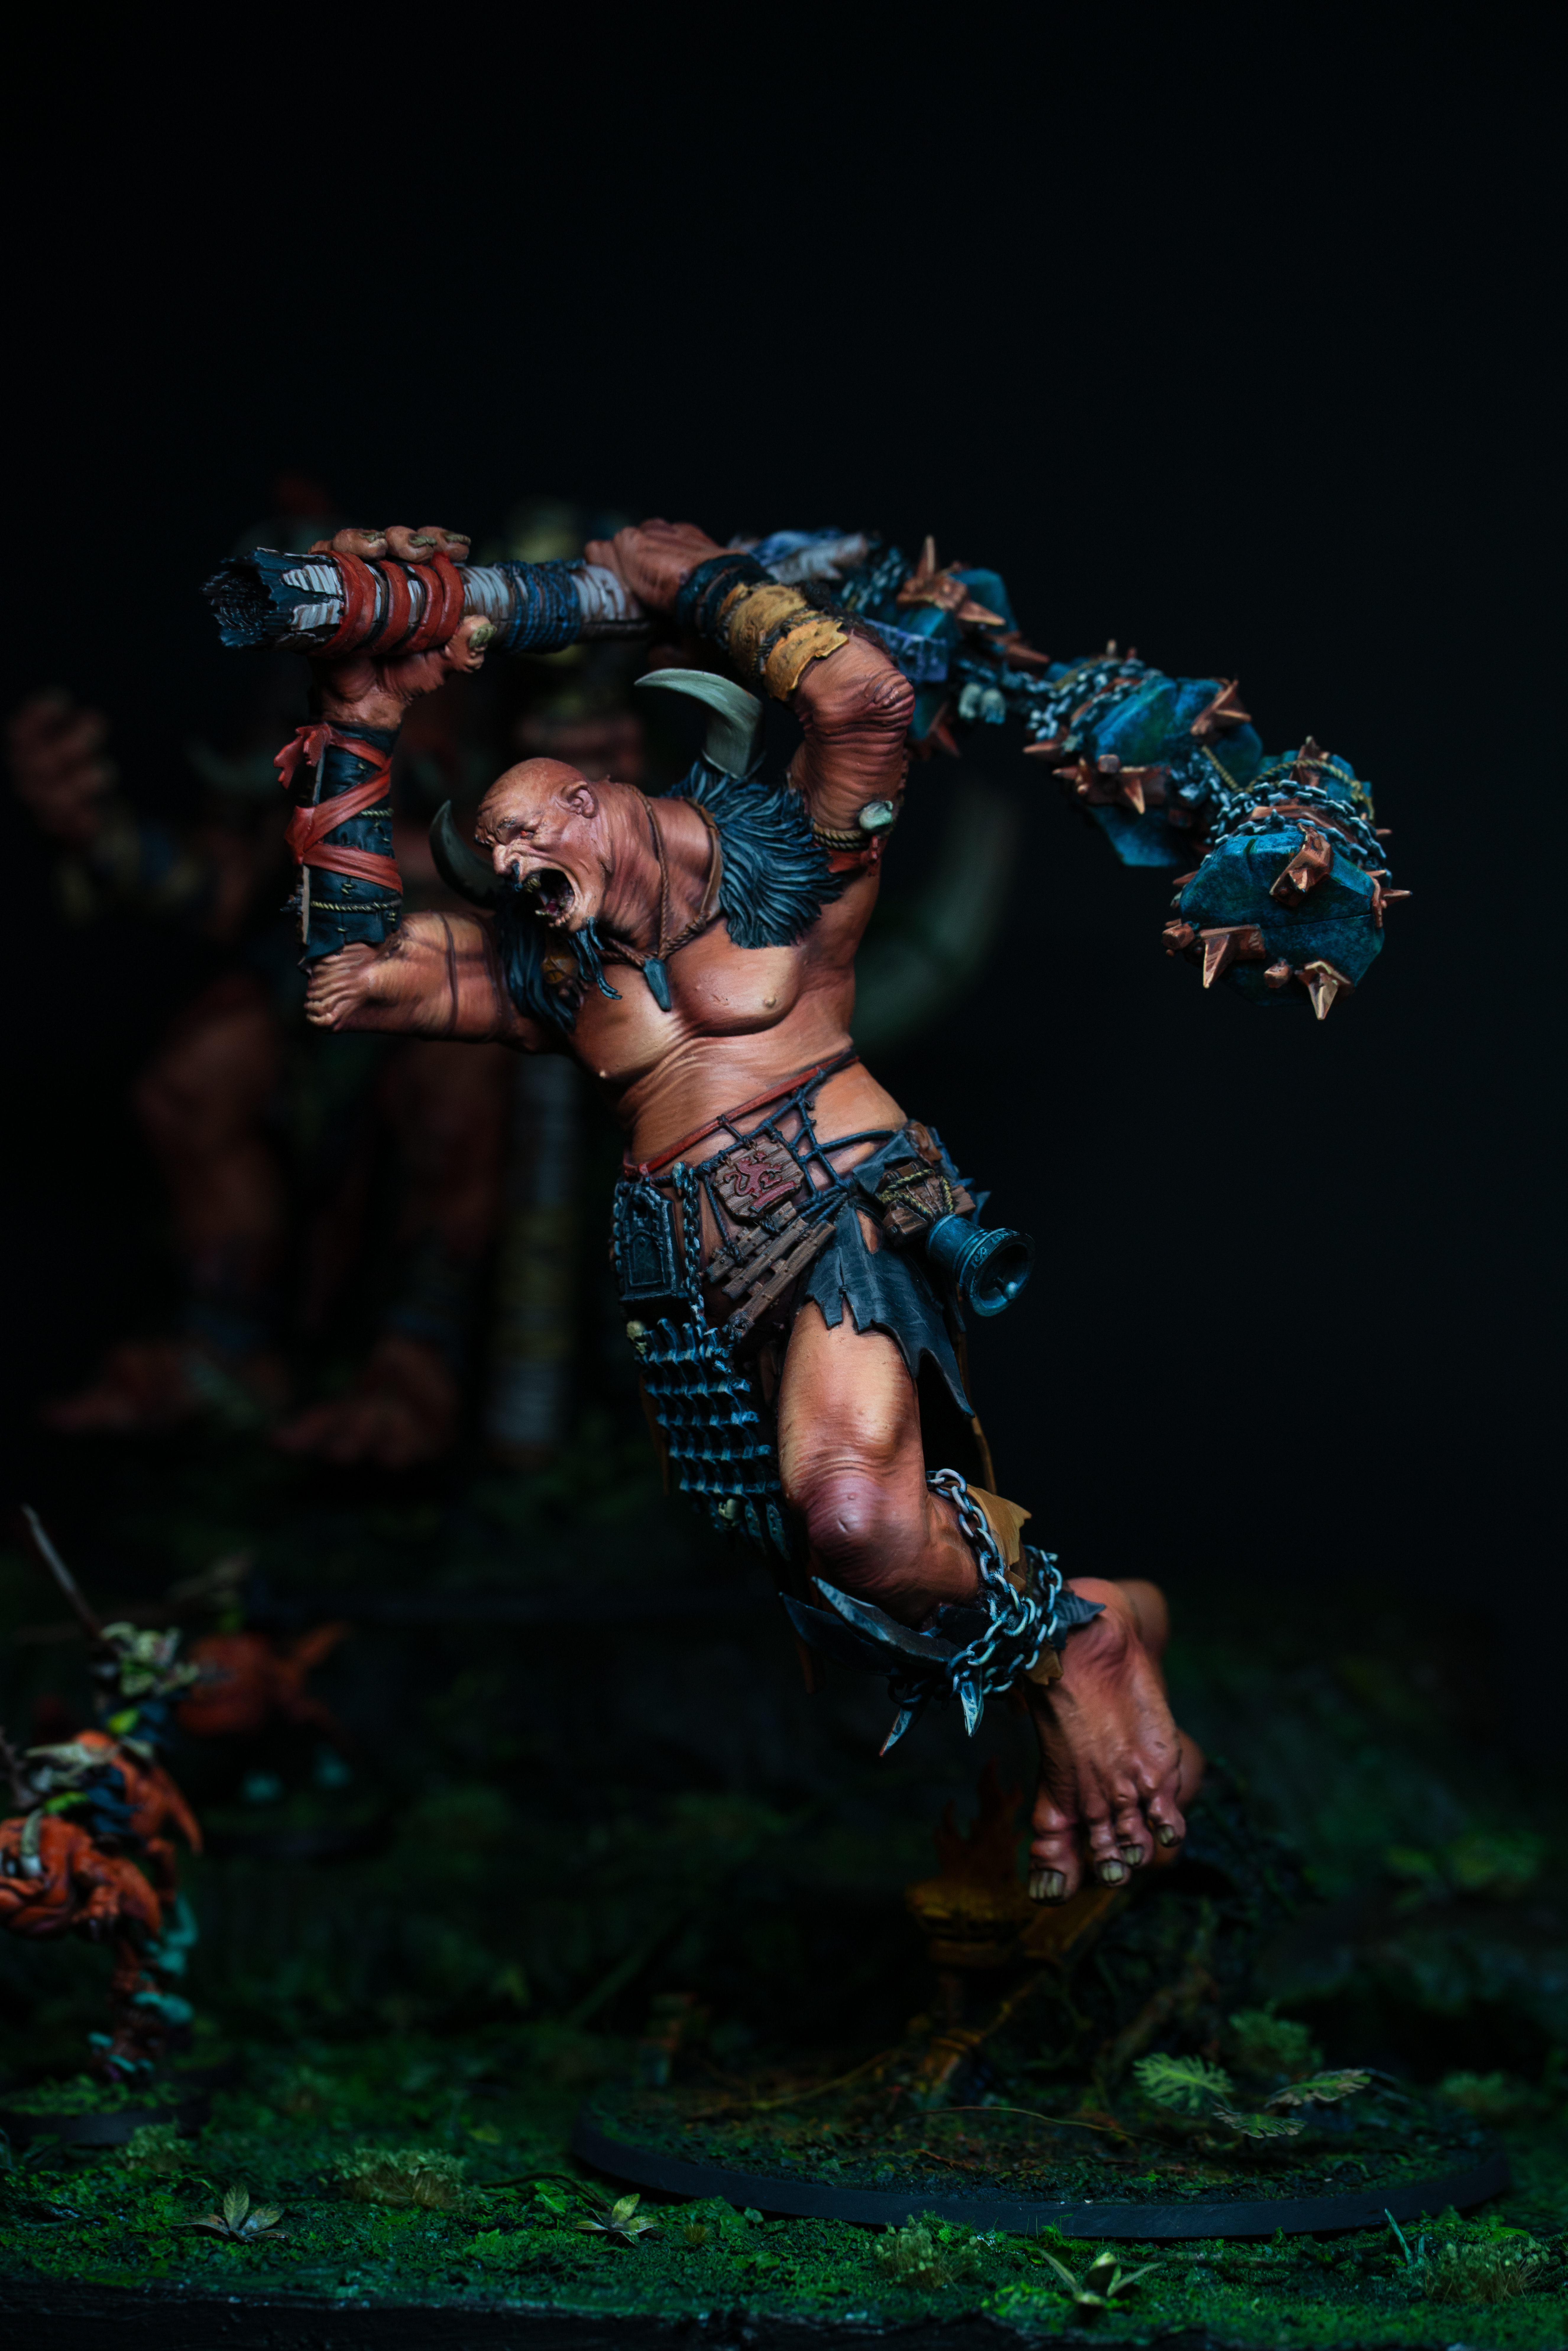
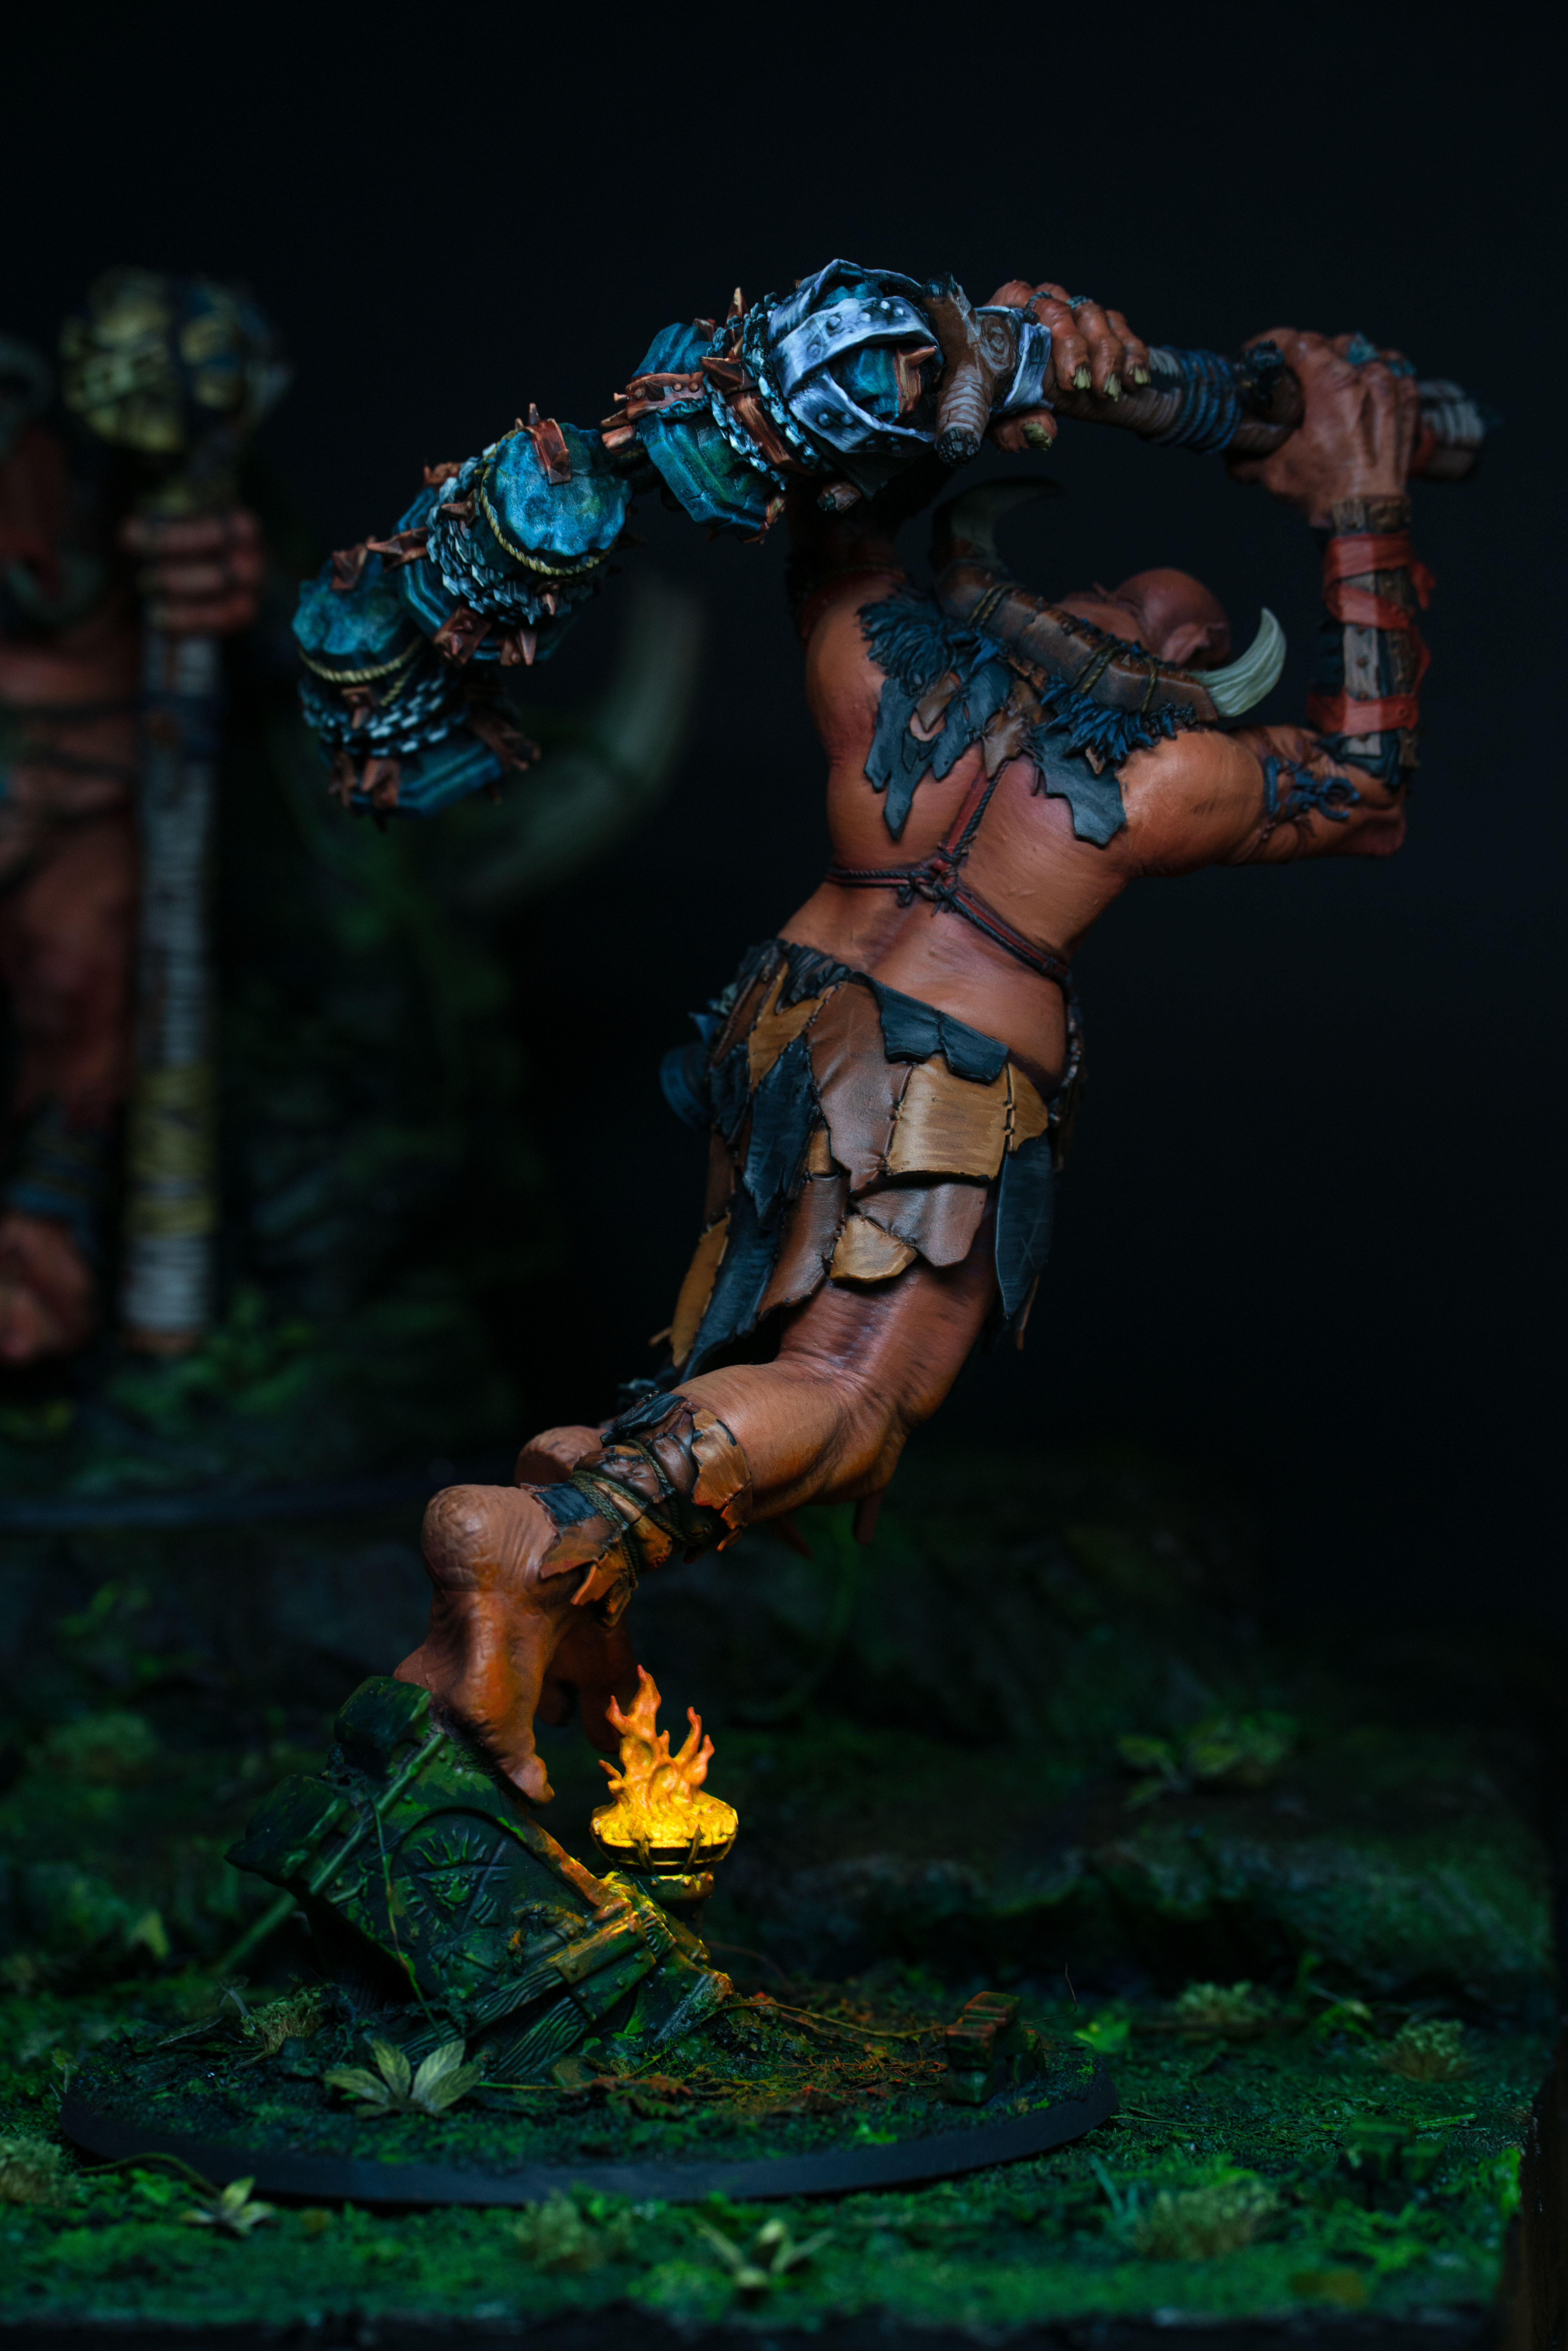
Gatebreaker Rager
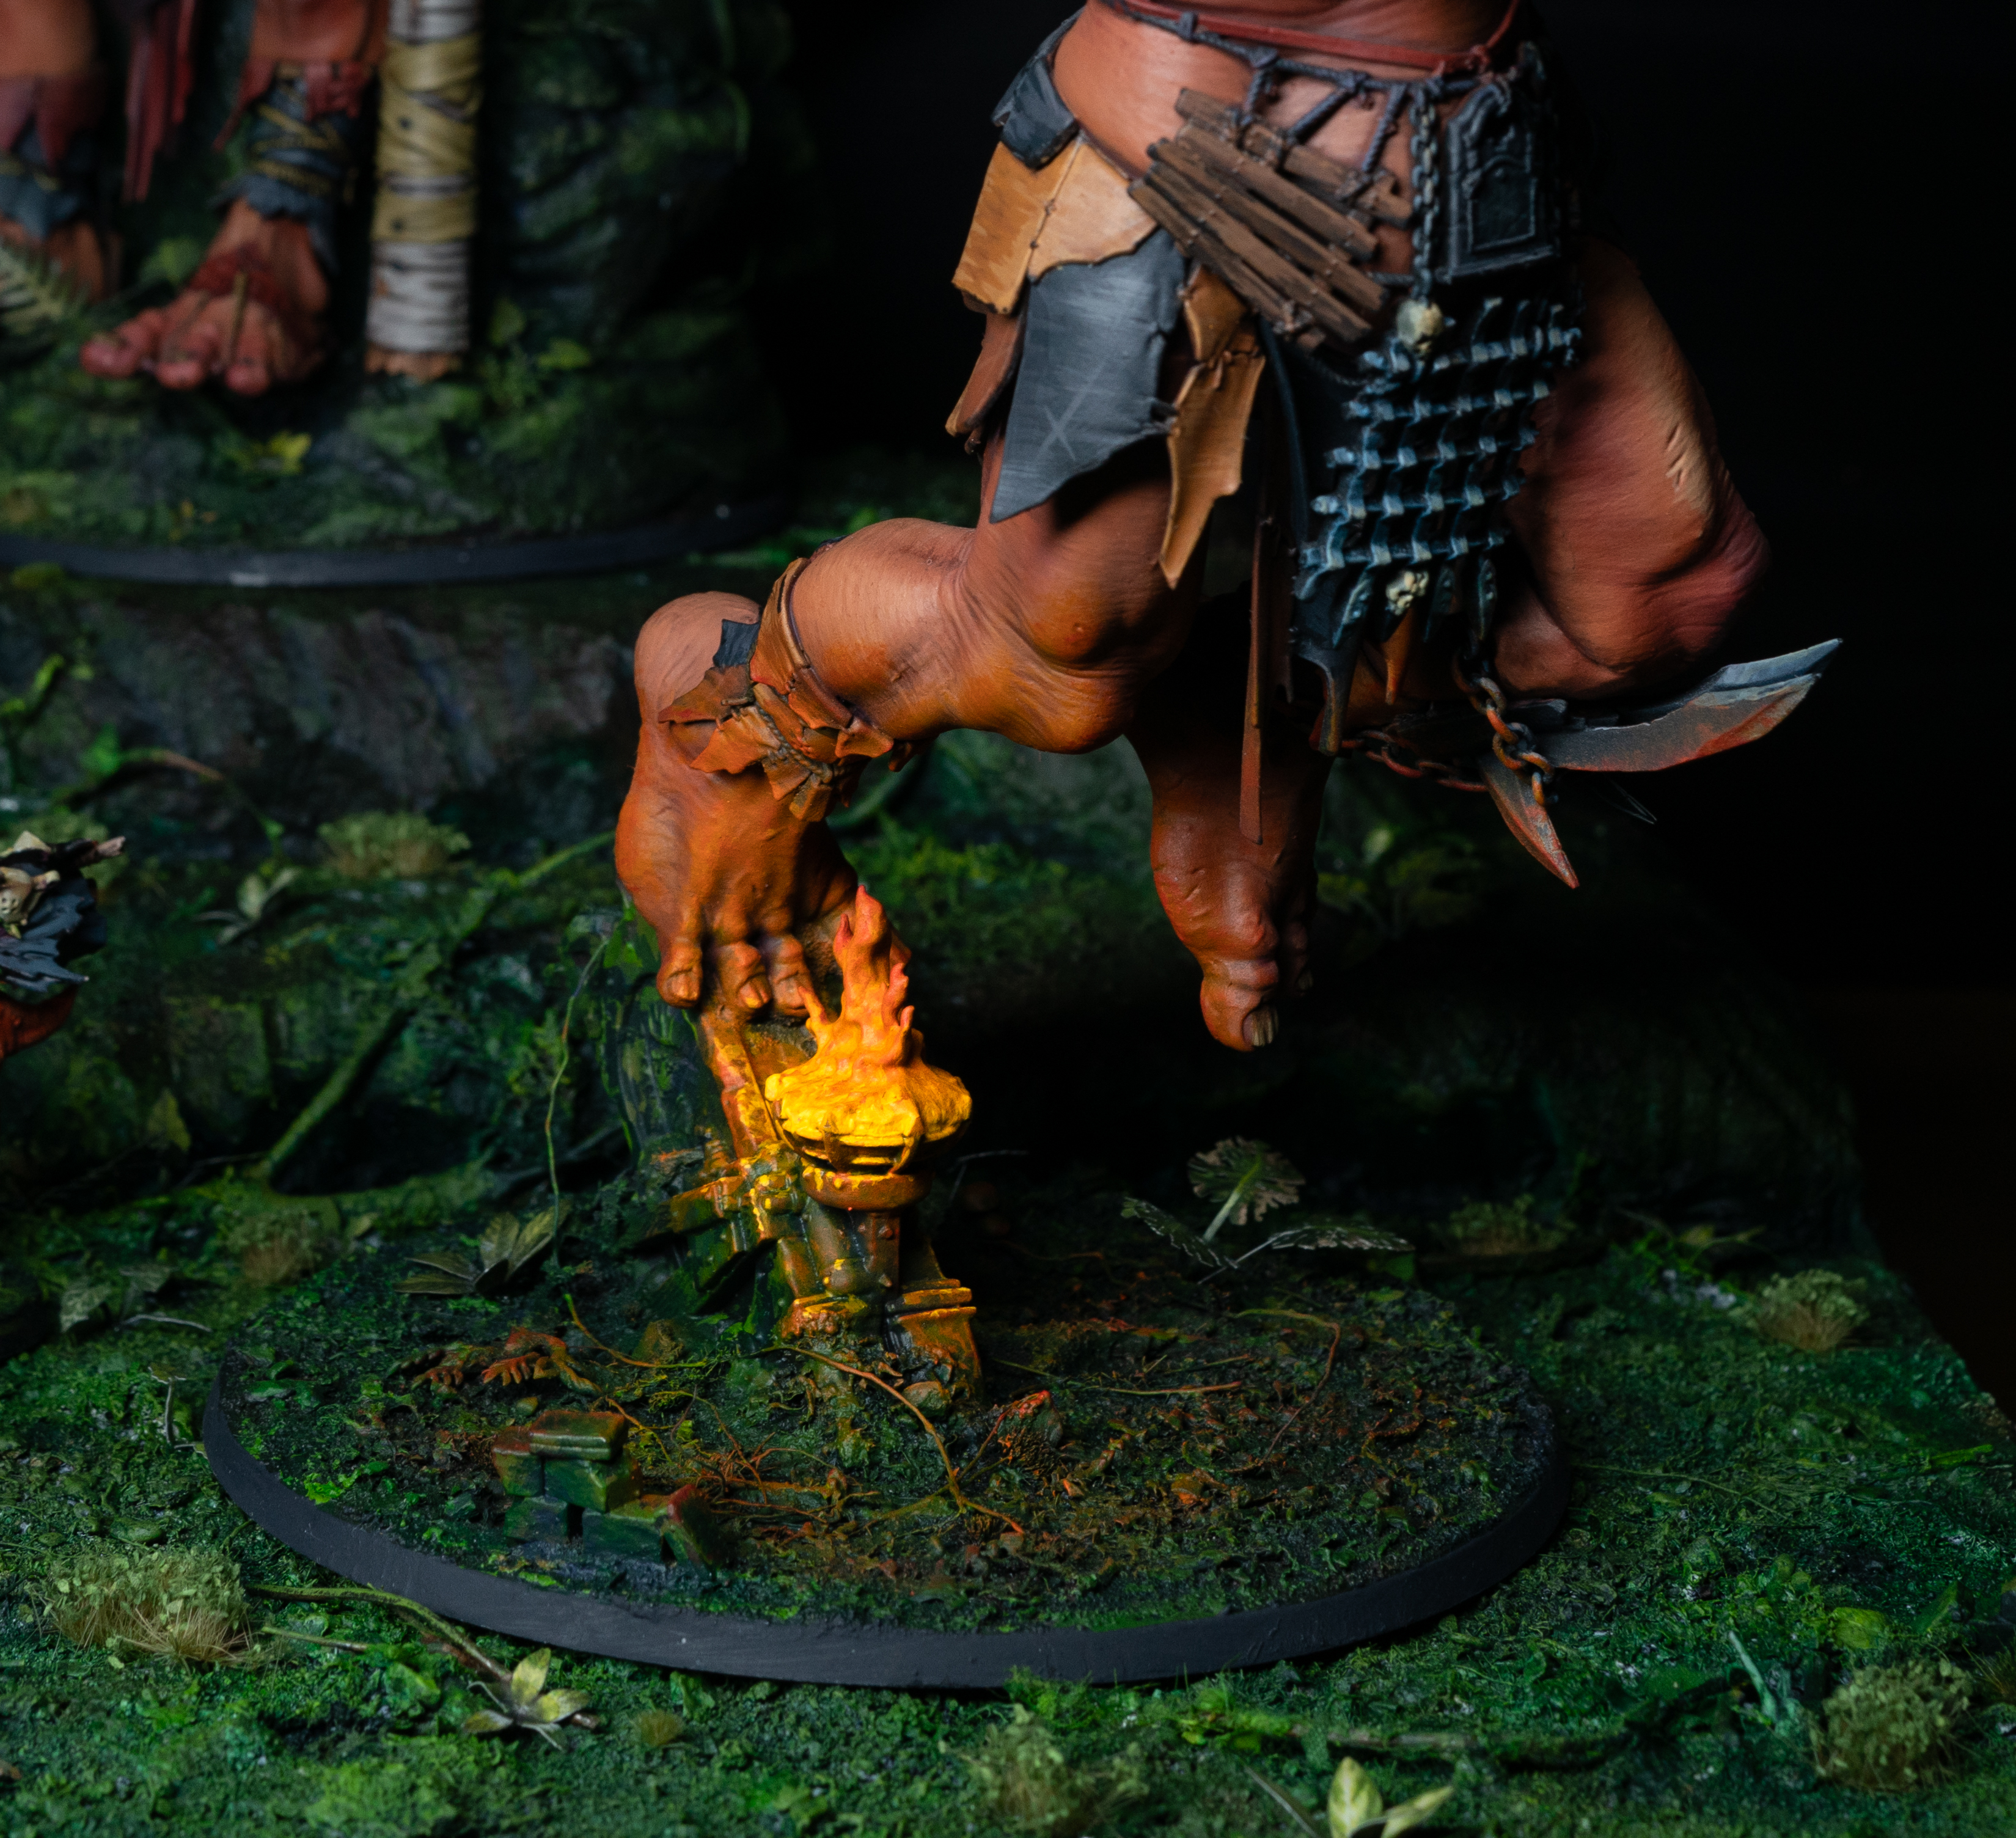
Whilst I am stoked with how all of the big lads turned out, I’m lowkey proud of the engineering that went into this idiot. There is a 3 inch long, 2.5mm thick brass rod running through his base up the length of his foot and into his calf, which creates an anchor point to perfectly cantilever his very forward-heavy momentum. In addition, there is approximately the same length of rod wound through the chains of the weapon to ensure it is as stable as it is deadly looking! Whilst it is never visible, I put a lot of energy into planning how to make all of my conversions as durable as possible. Nearly everything I design is intended for the tabletop, so it’s a firm requirement of mine in the ‘actualization’ stage that this is taken into account!
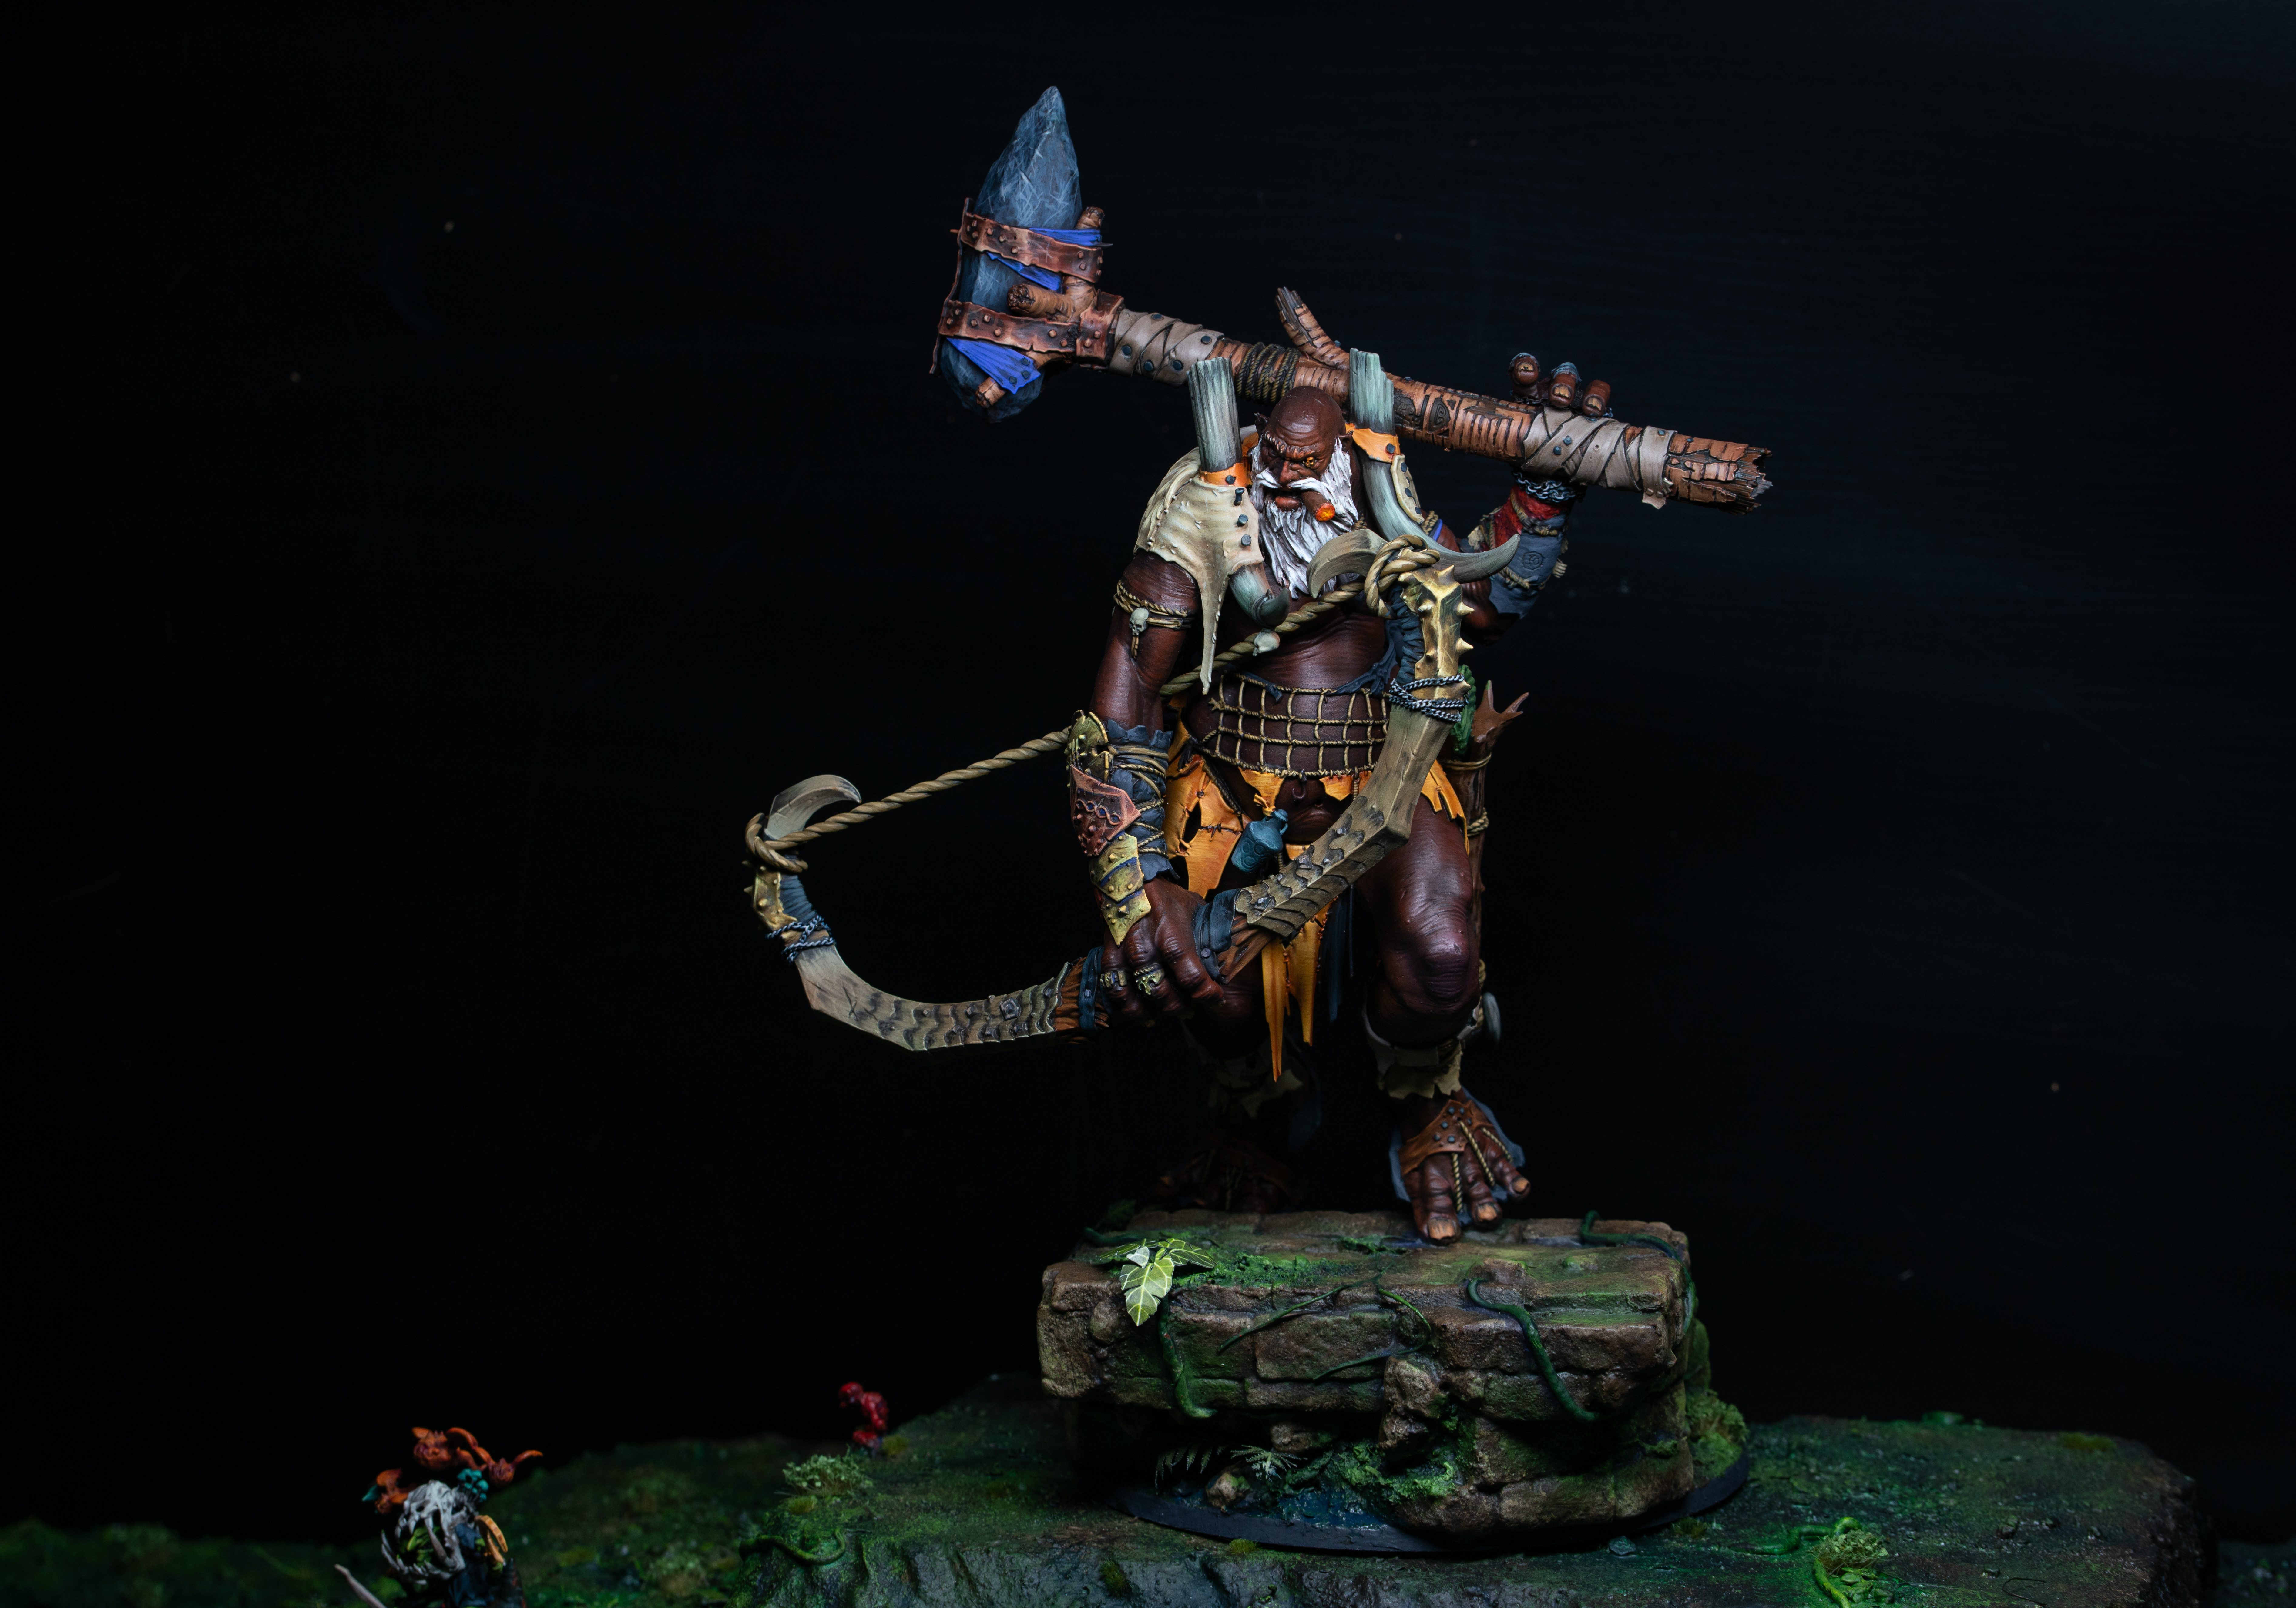
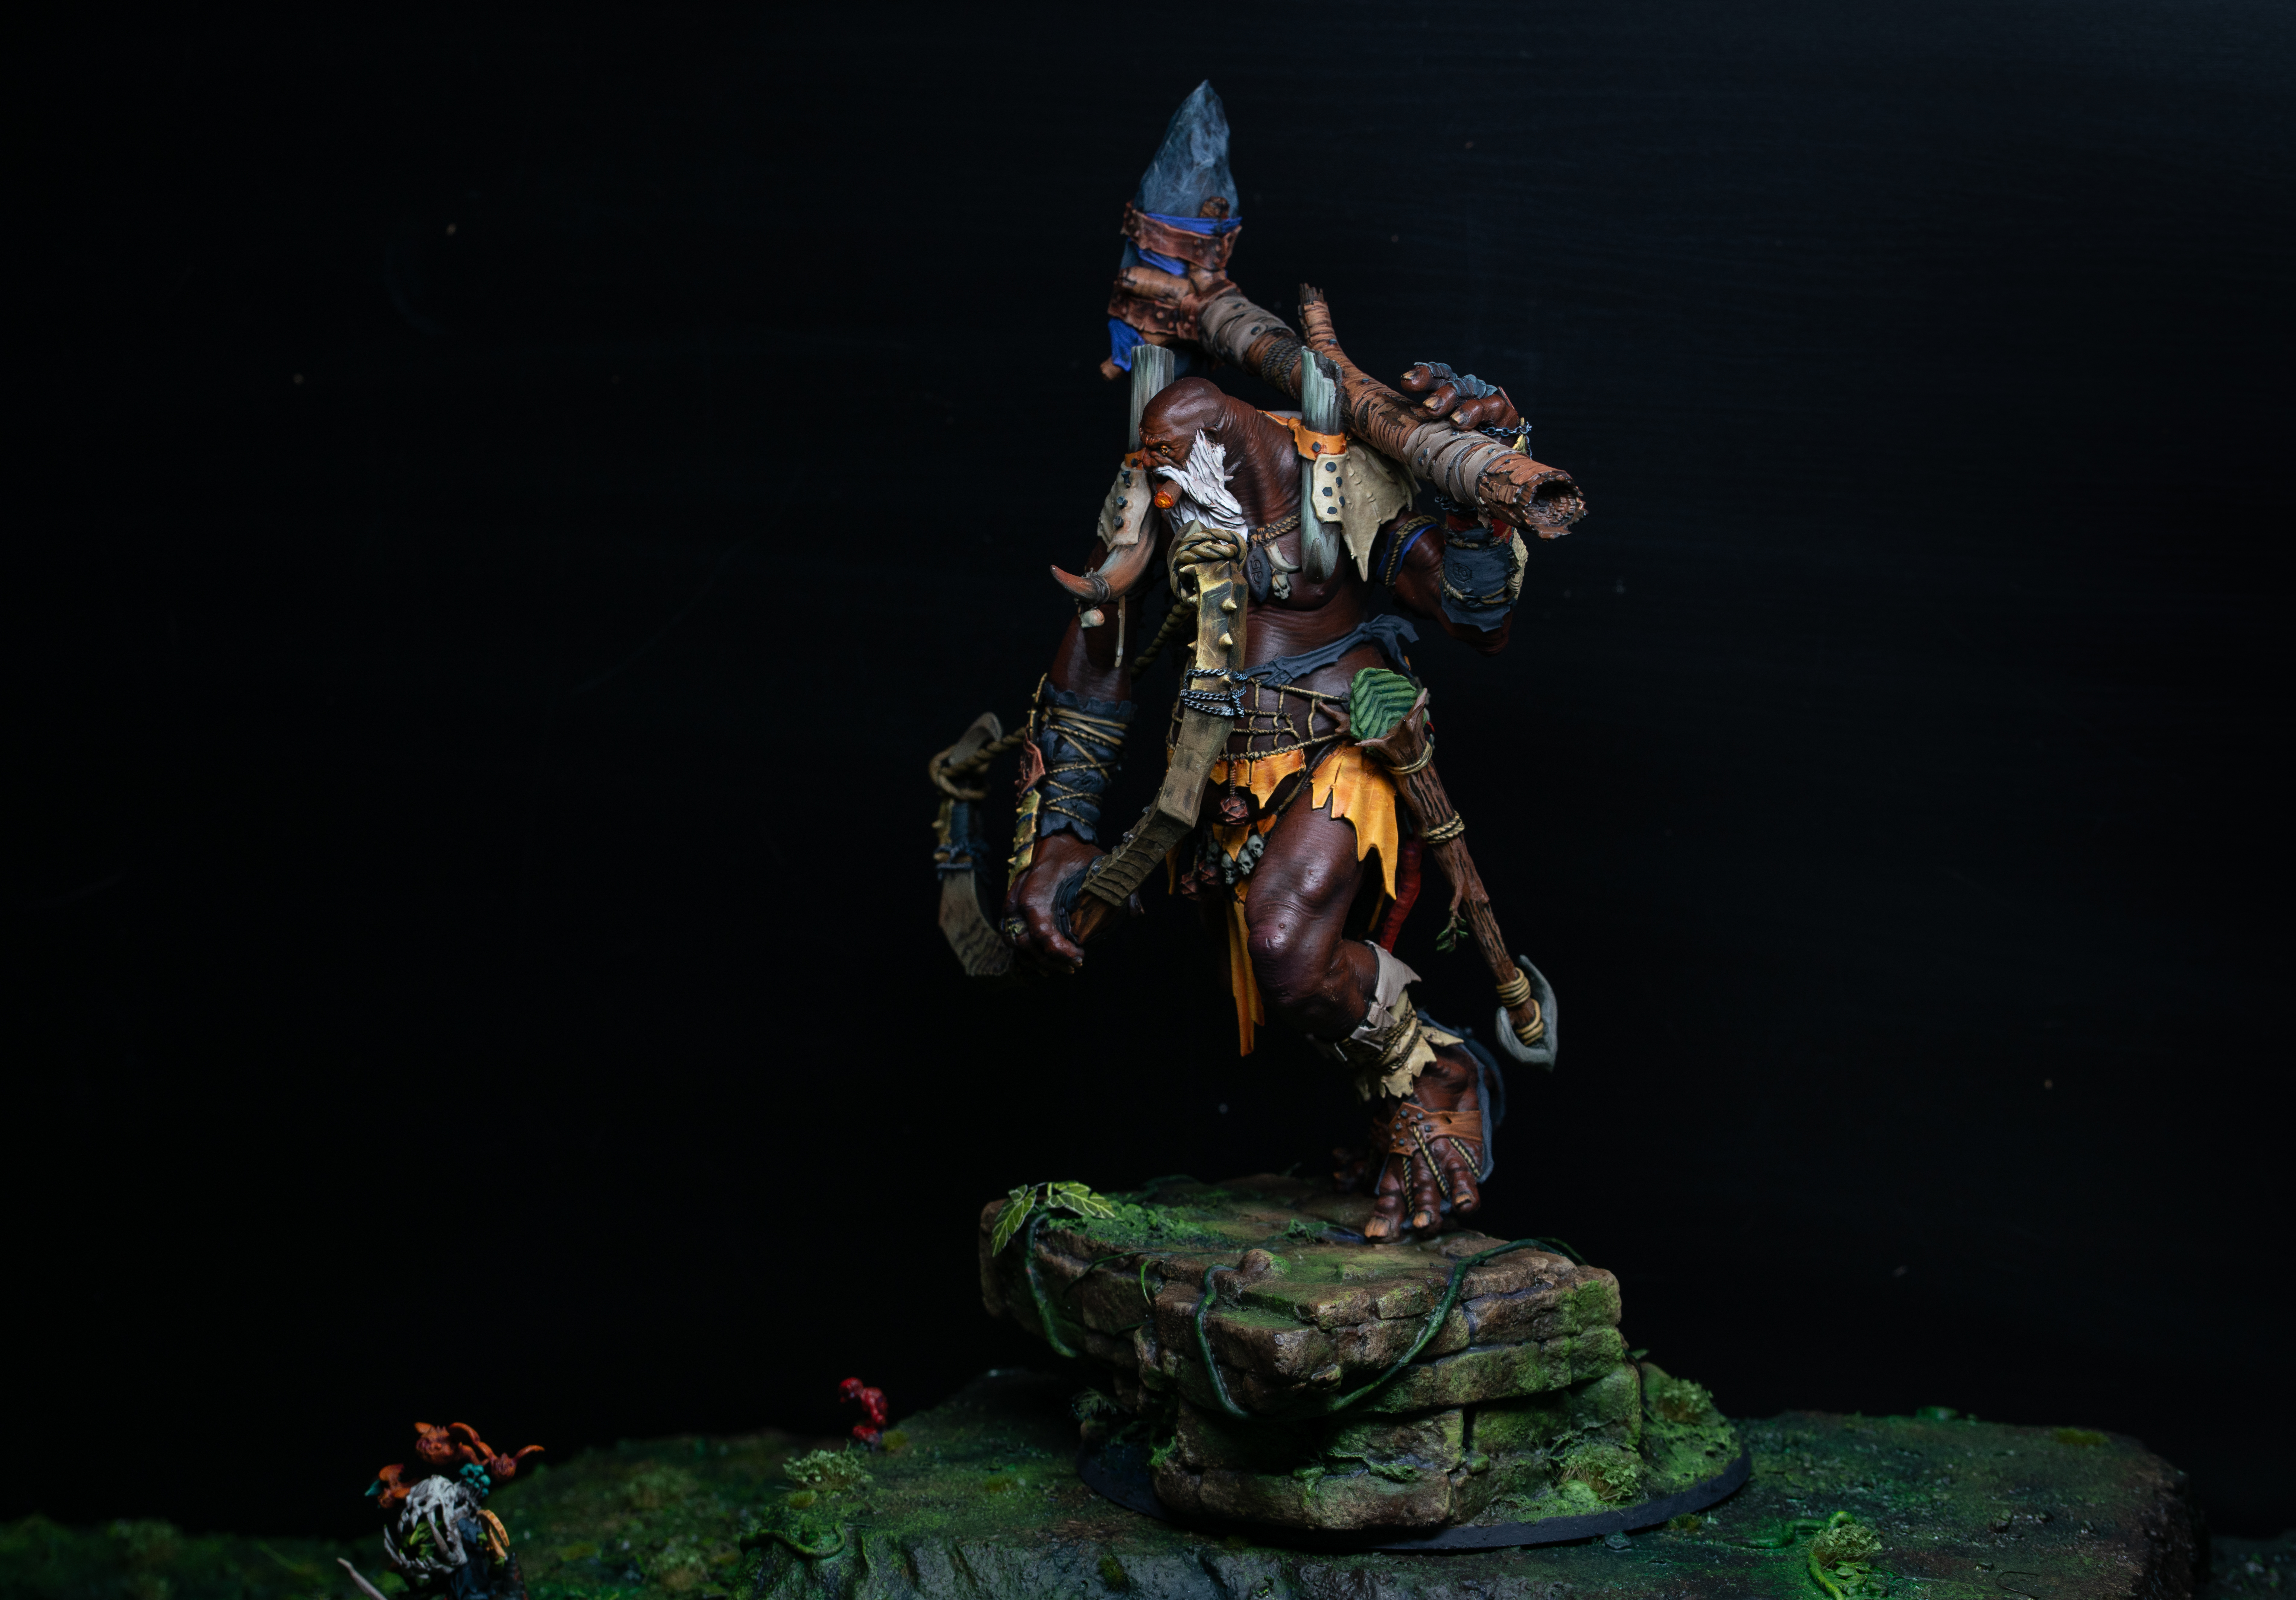
Bounty Hunter
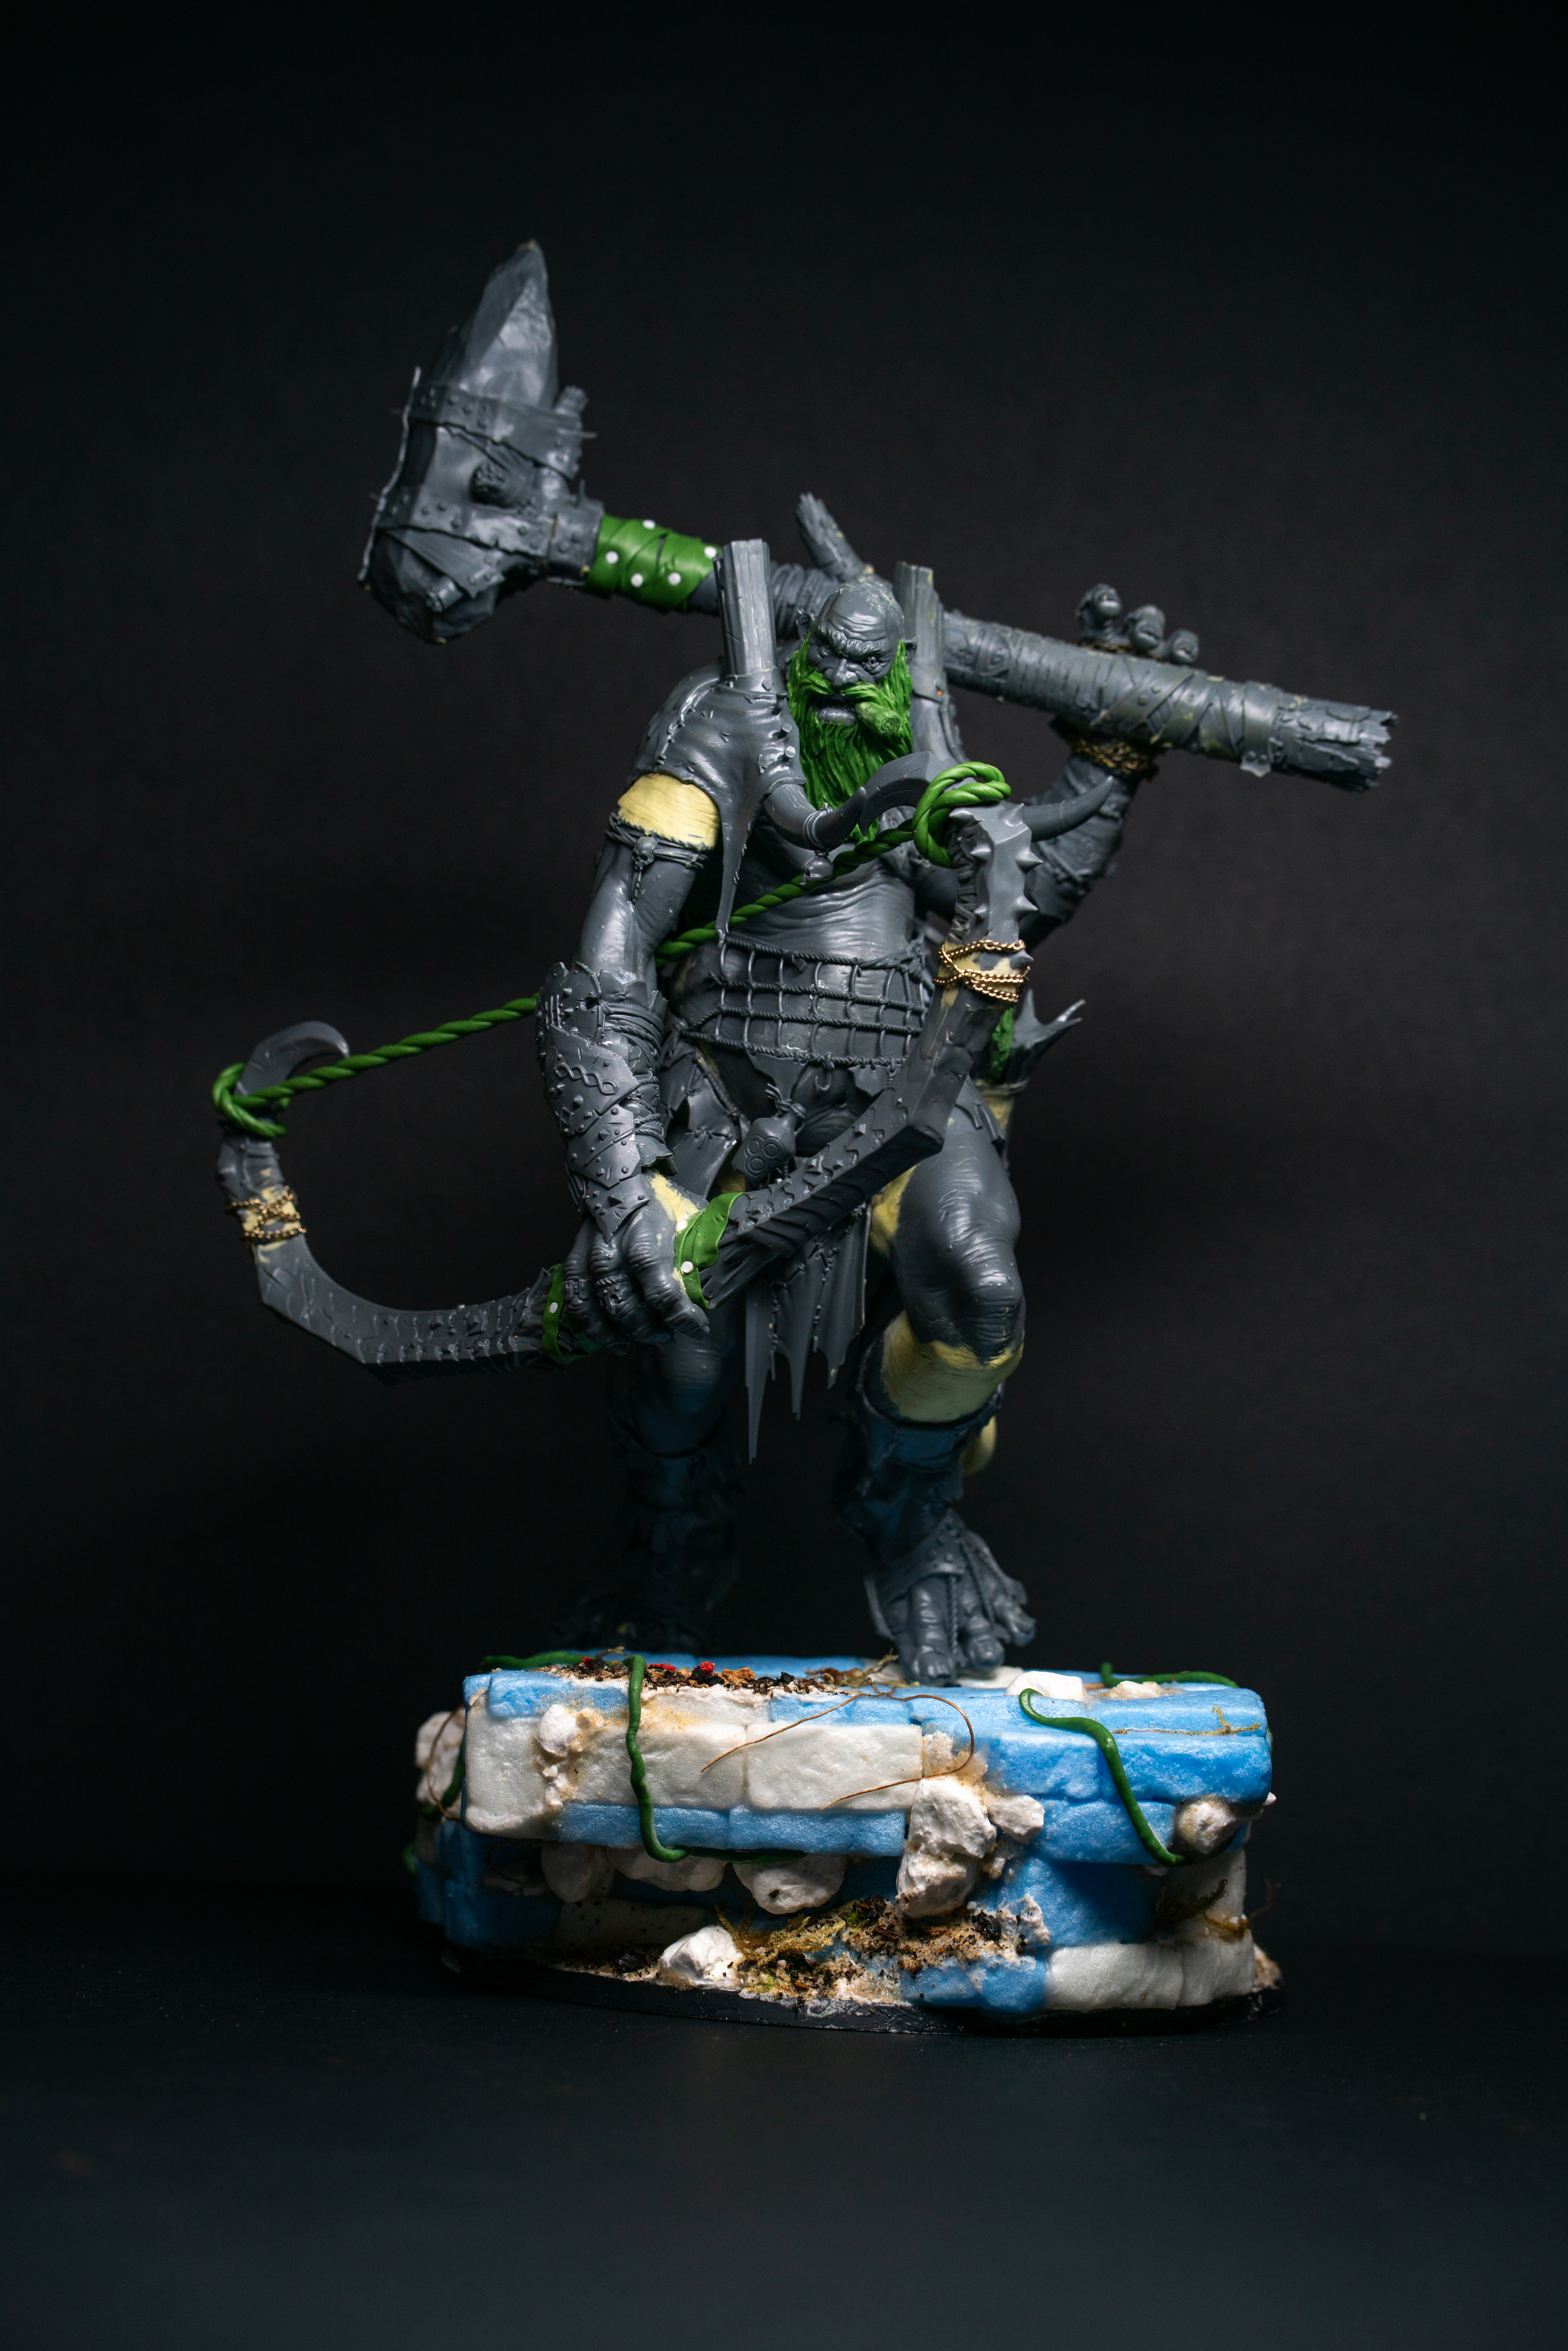
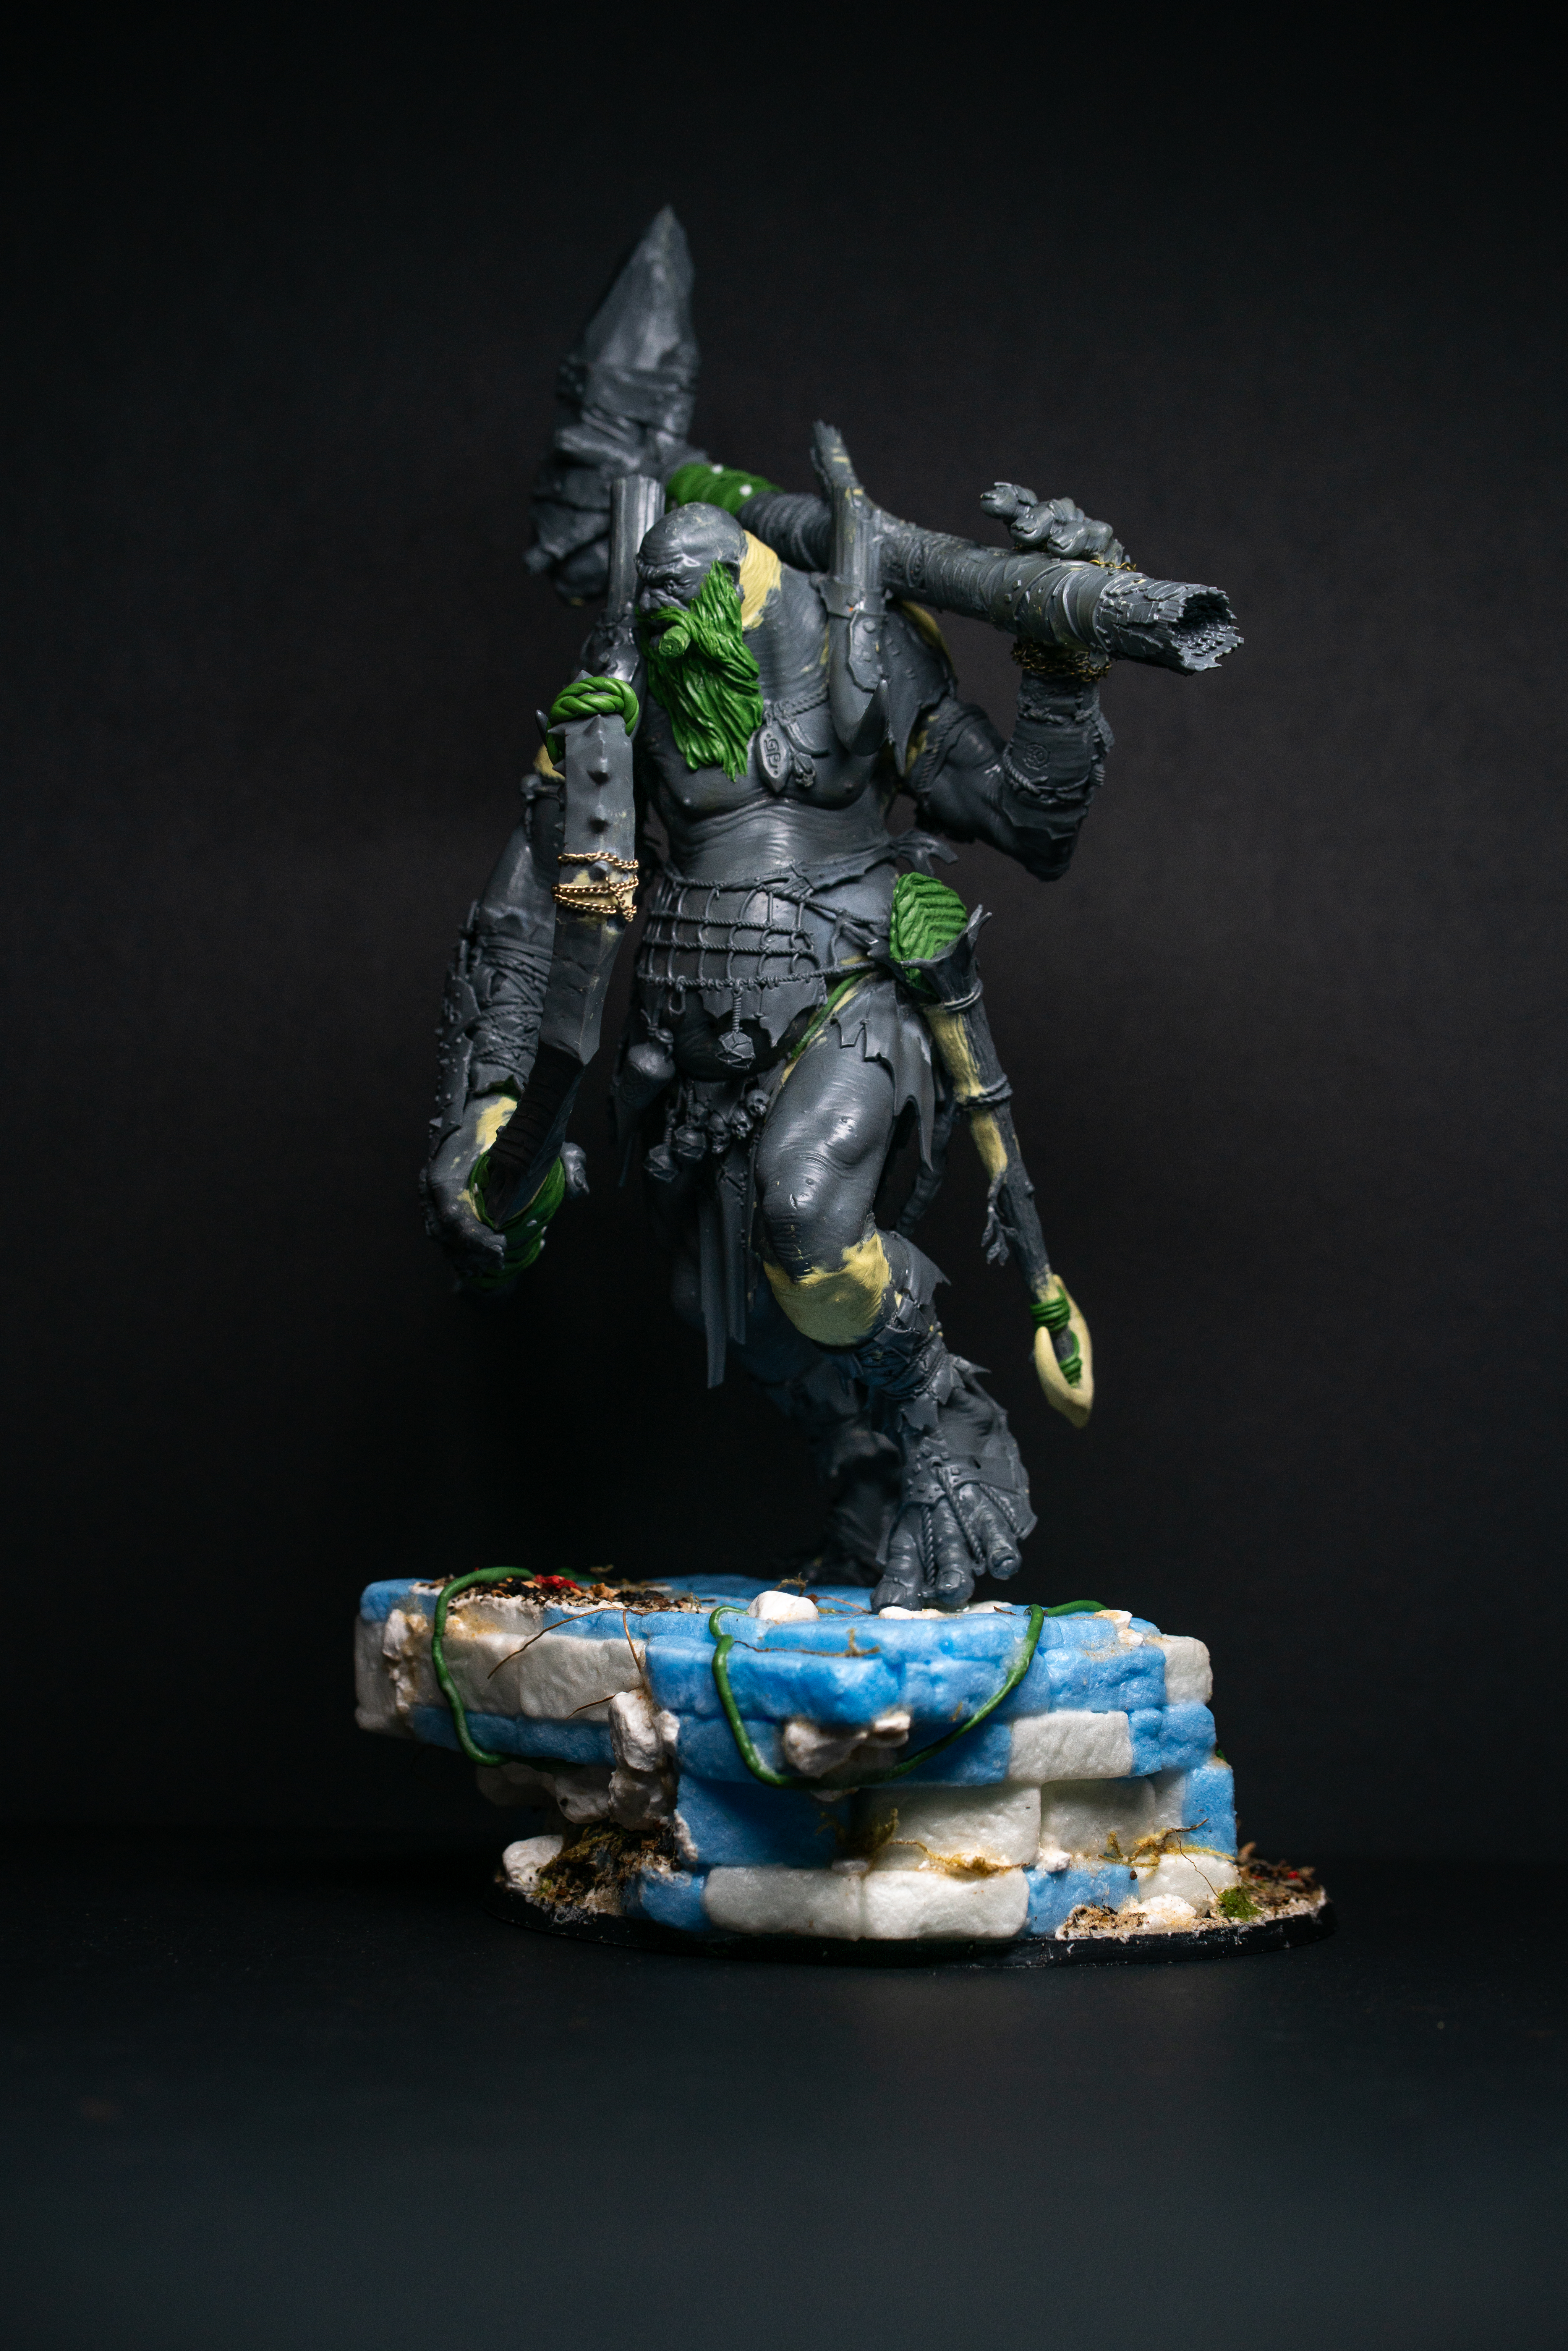
My original inspiration for this Mega came from the Maneaters in Ogor Kingdoms. I loved the idea of a Mega Gargant stalking the lands seeking out the biggest and baddest monsters to hunt for food/money/loot. In my mind’s eye, this Mega was a little more cool, calm and collected; accustomed to stalking out large prey and even negotiating. I wanted to convey this shrewd nature in his stature. I’ve previously mentioned the ‘corkscrew’ twist in the body of the Gargants, and I think this conversion is a great example of how you can turn a negative into a positive, and the impact of powerful basing.
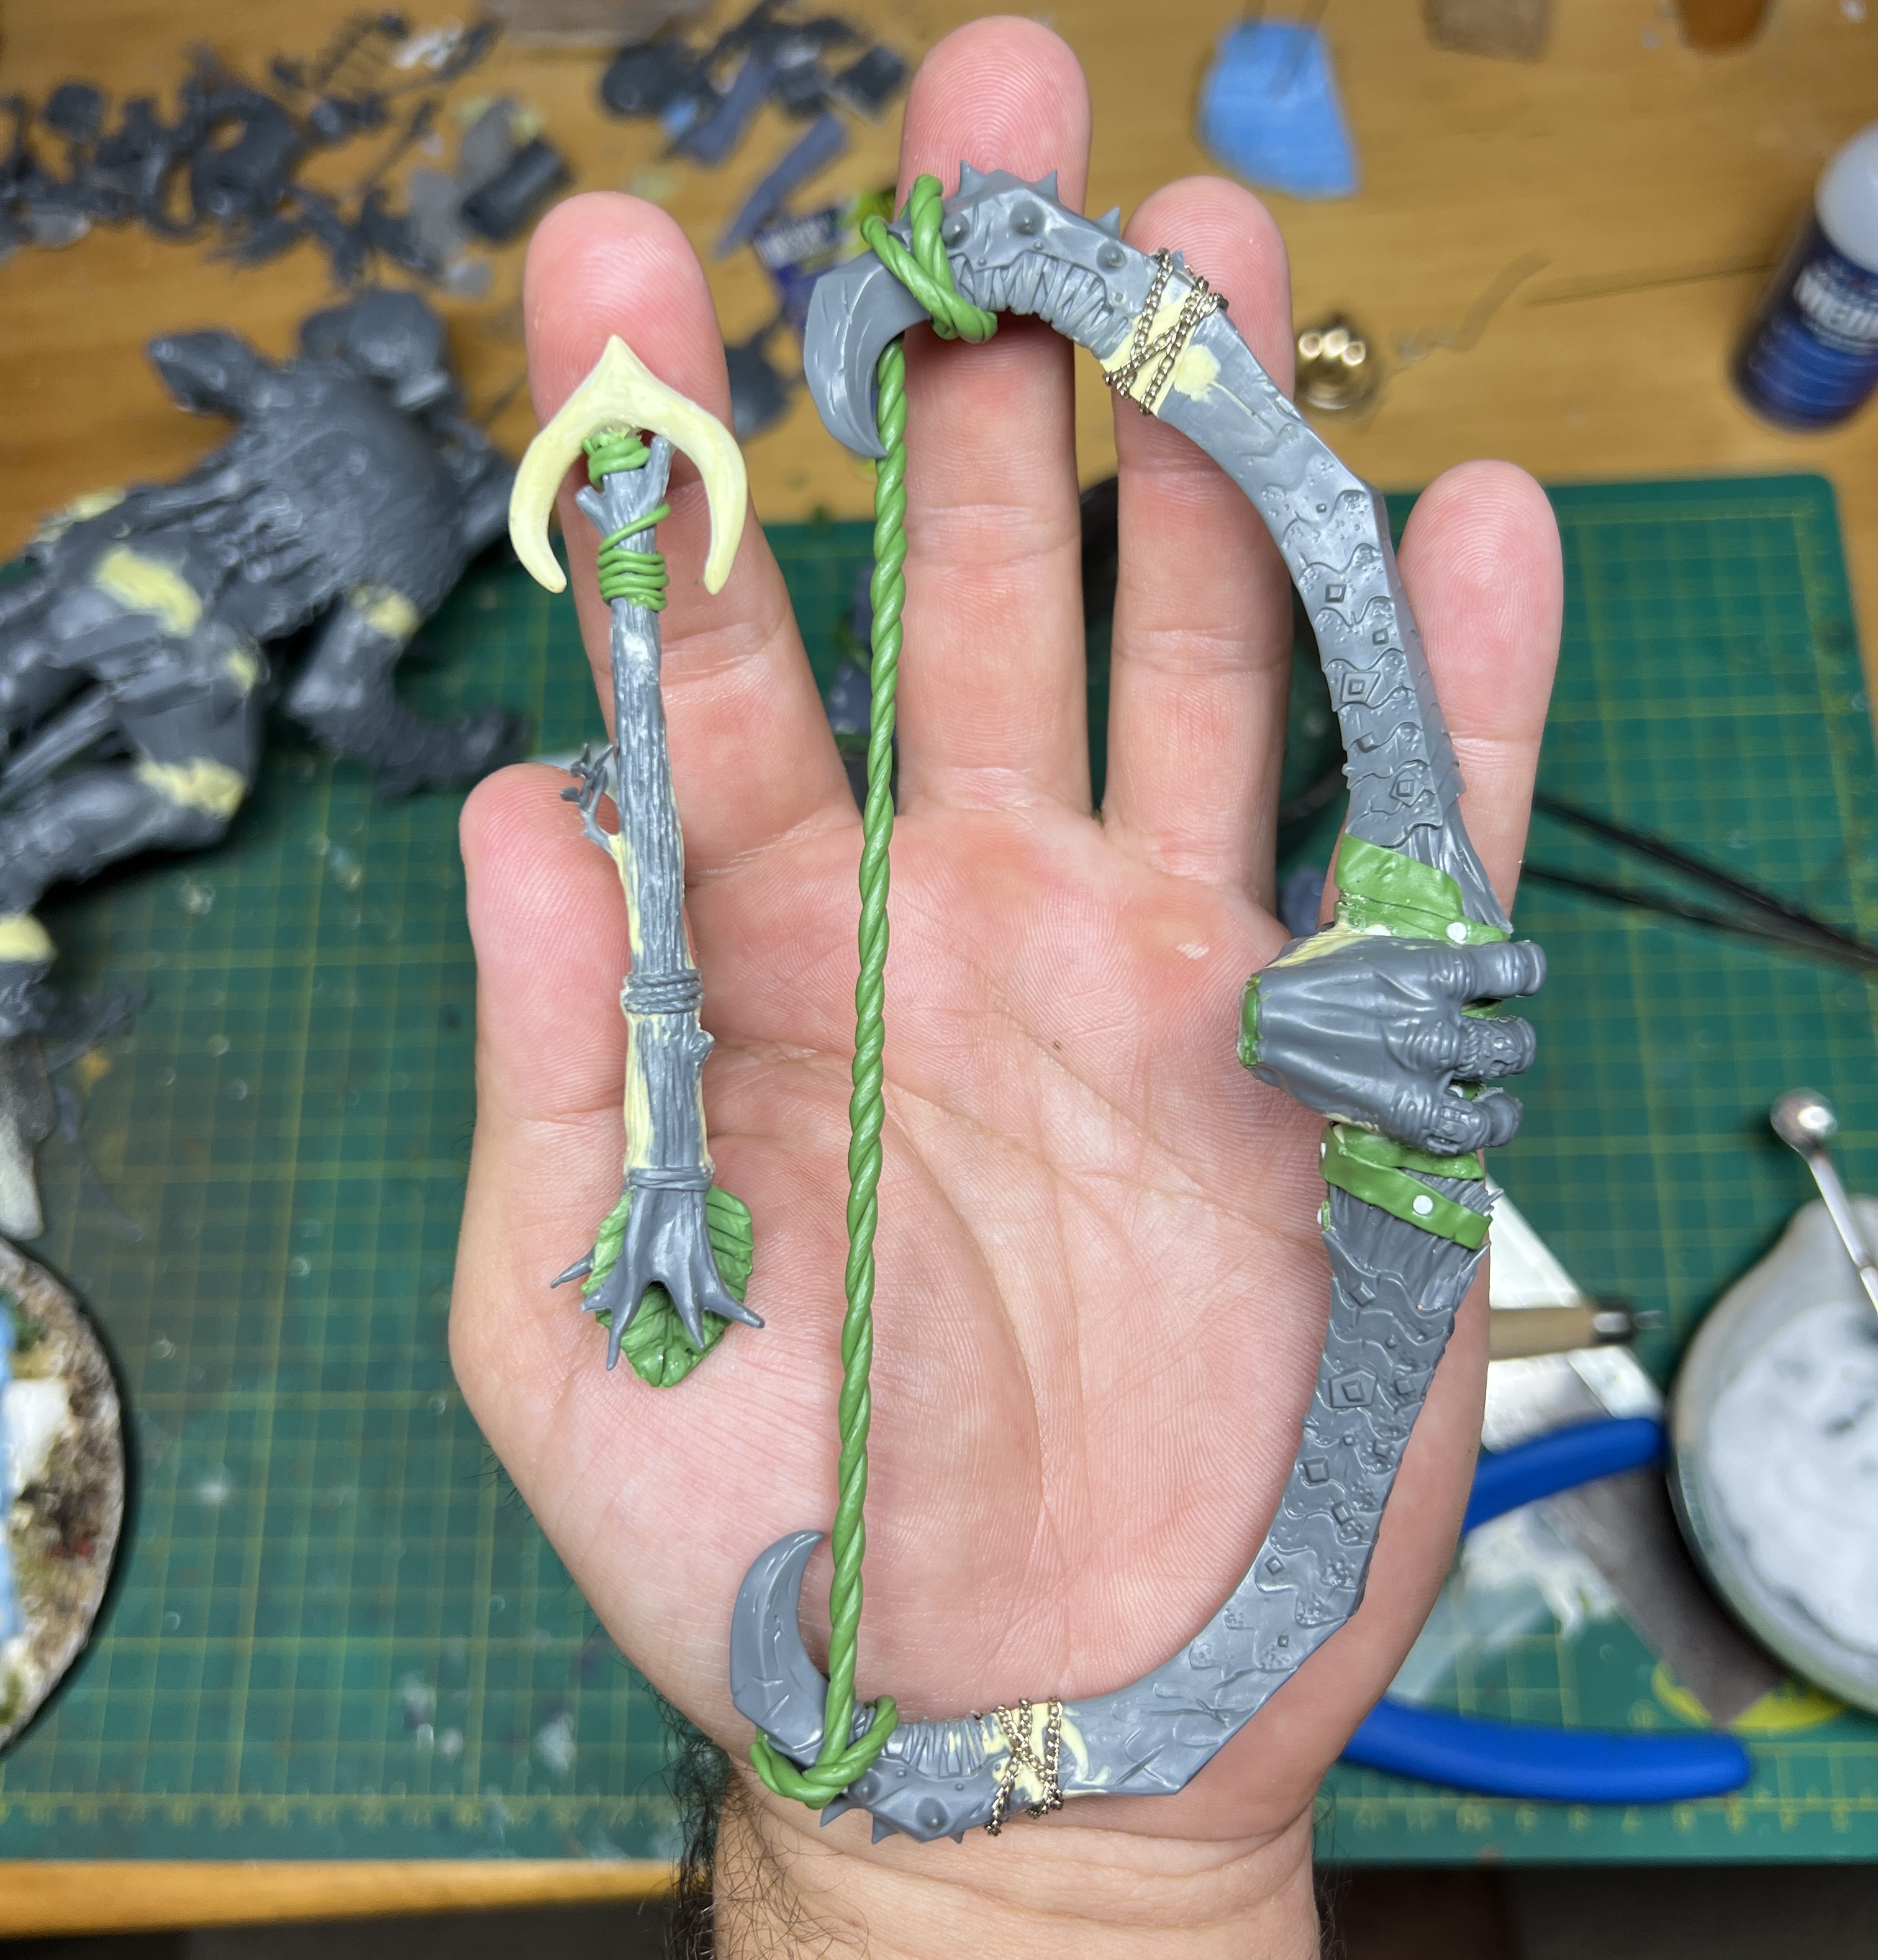
I cut up XPS foam into bricks, textured them with stones and glued them to a cardboard frame to create a twisting staircase. I imagined him walking up an old path or tower to gain a vantage point to identify his prey. By twisting the stairs, I was able to work WITH the corkscrew in the torso, creating a natural body pattern and maximising the flow of the model. To further enhance the shrewd coolness I was chasing, I sculpted a long flowing beard and pinned a Greenstuff stogie in his mouth. The massive Beast Smasher mace casually thrown over his shoulder added to that laconic pose and I created a massive bow using two Thundertusk horns pinned together and wrapped with Greenstuff. The arrow was made by cutting down a tree trunk from the Manlet Gargant kit, sculpting some leaves for fletching and an anchor for the arrow head!
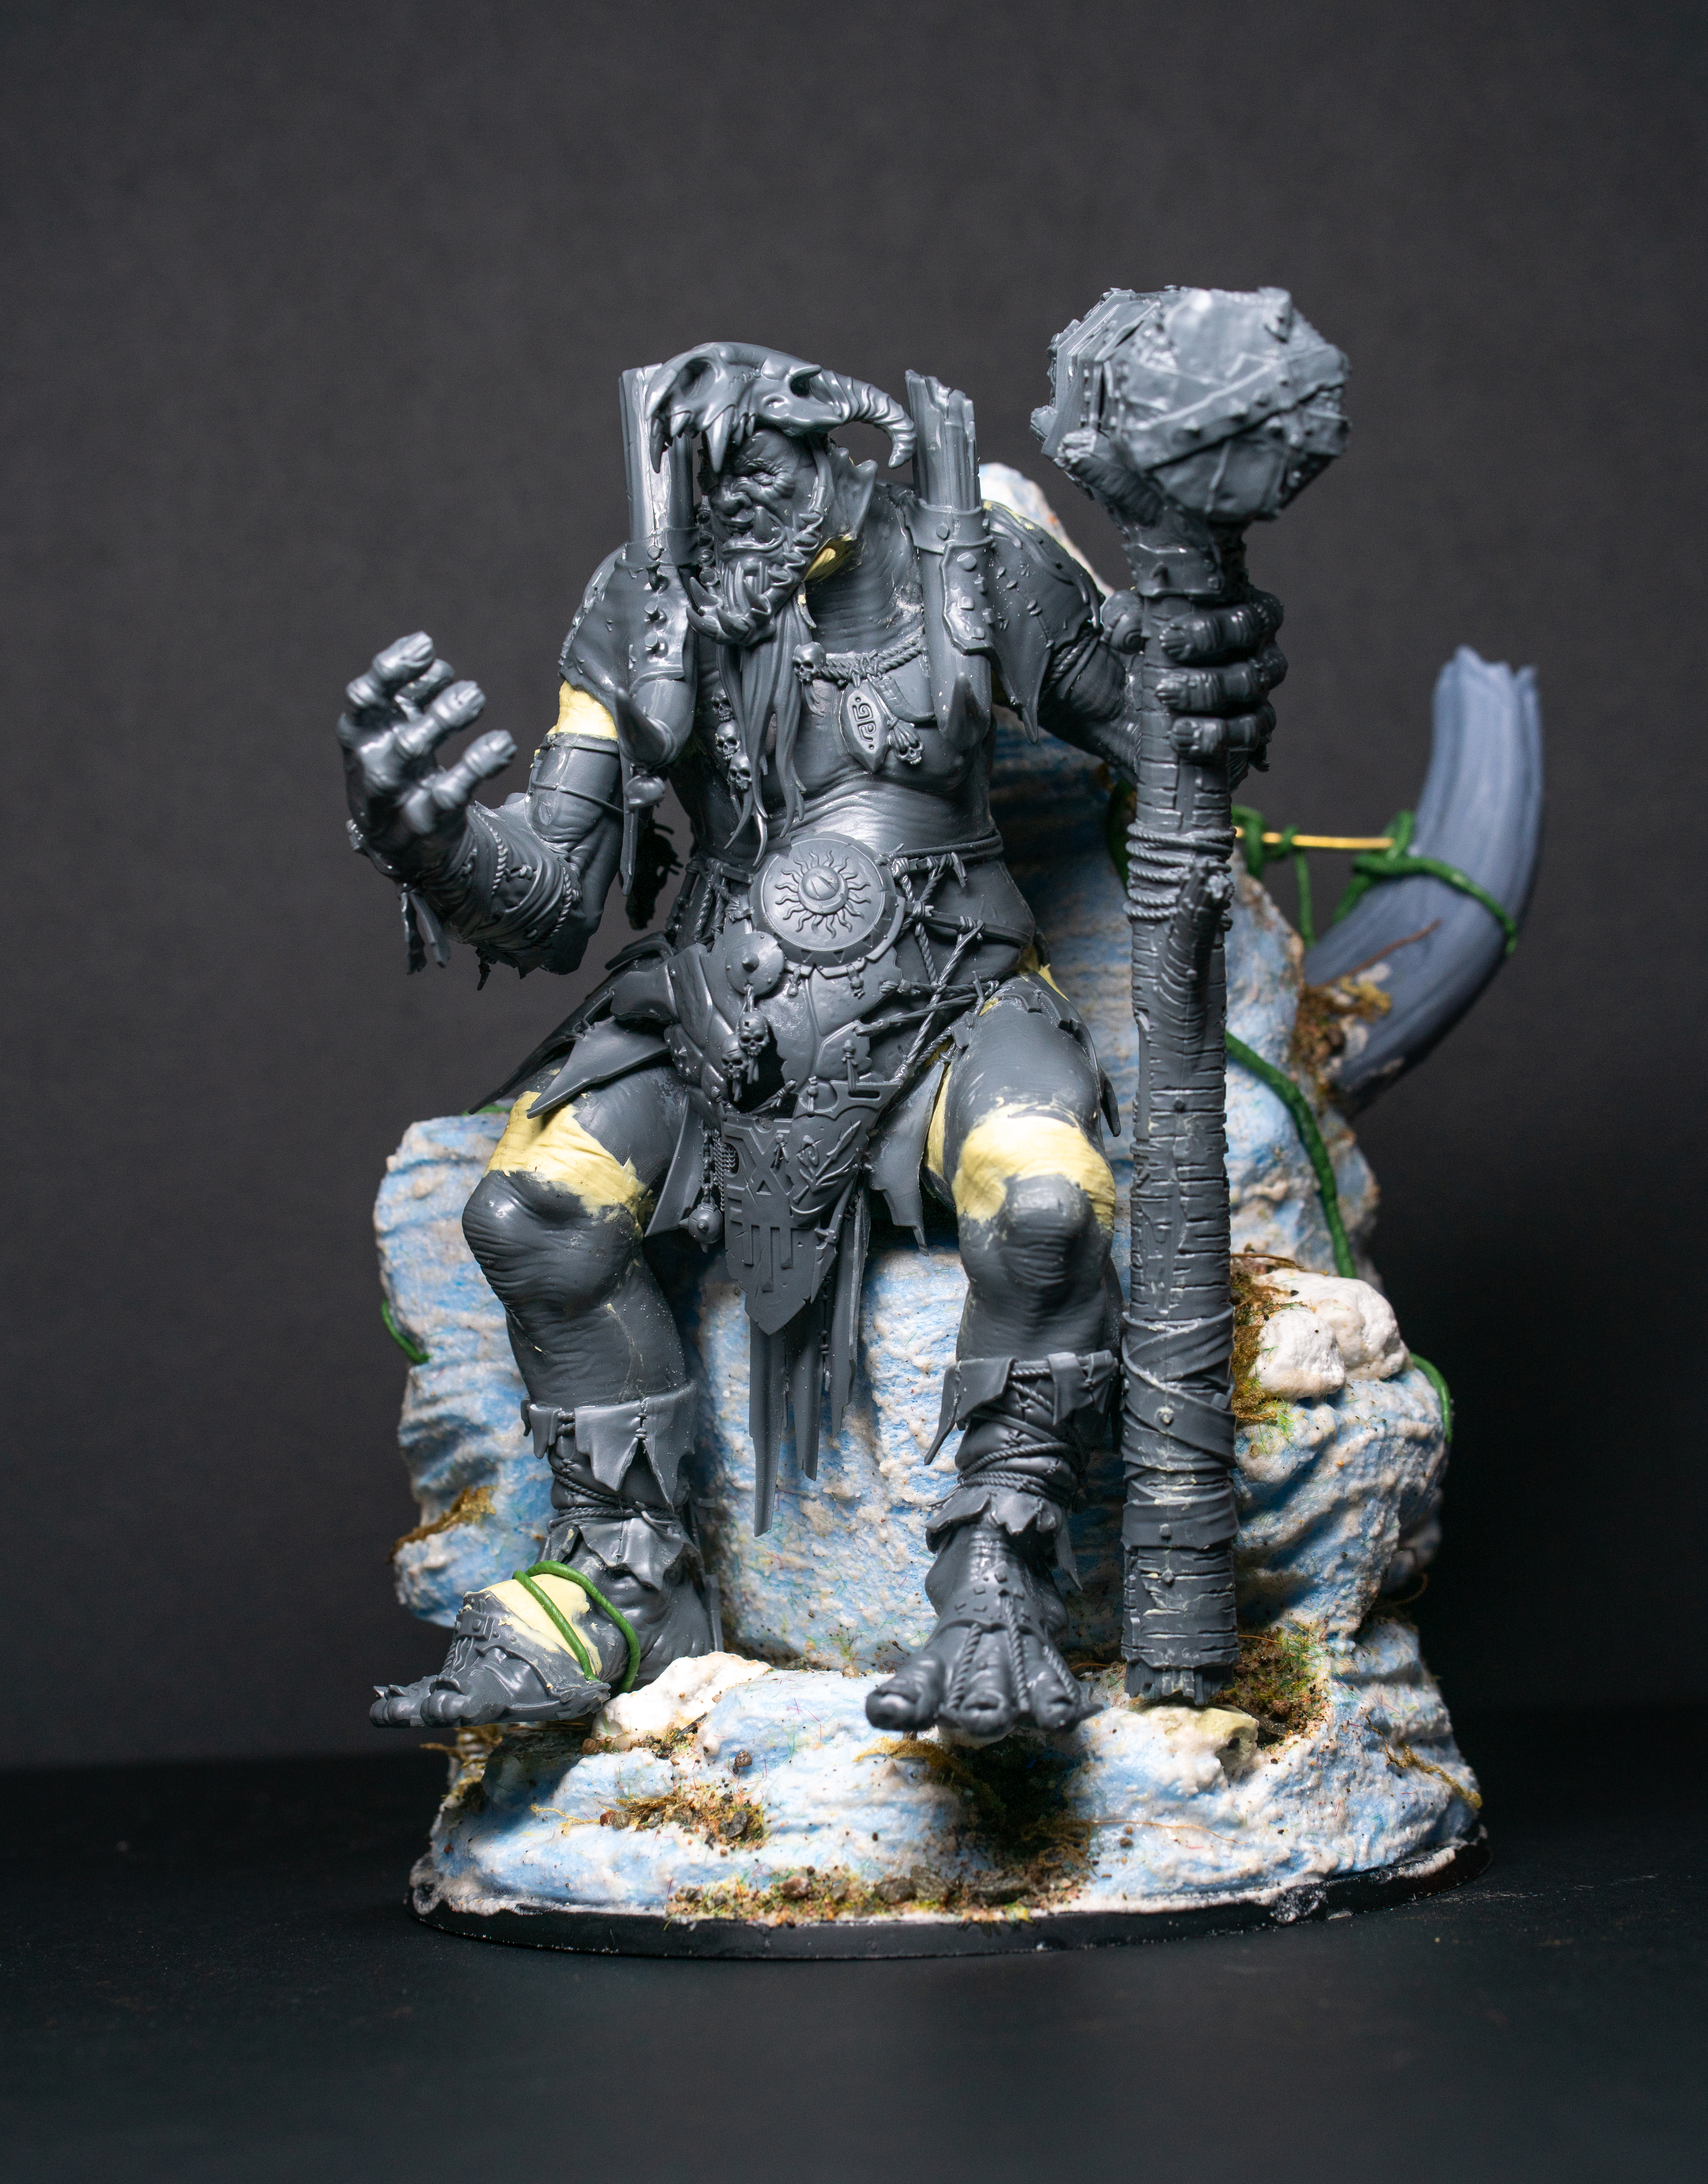
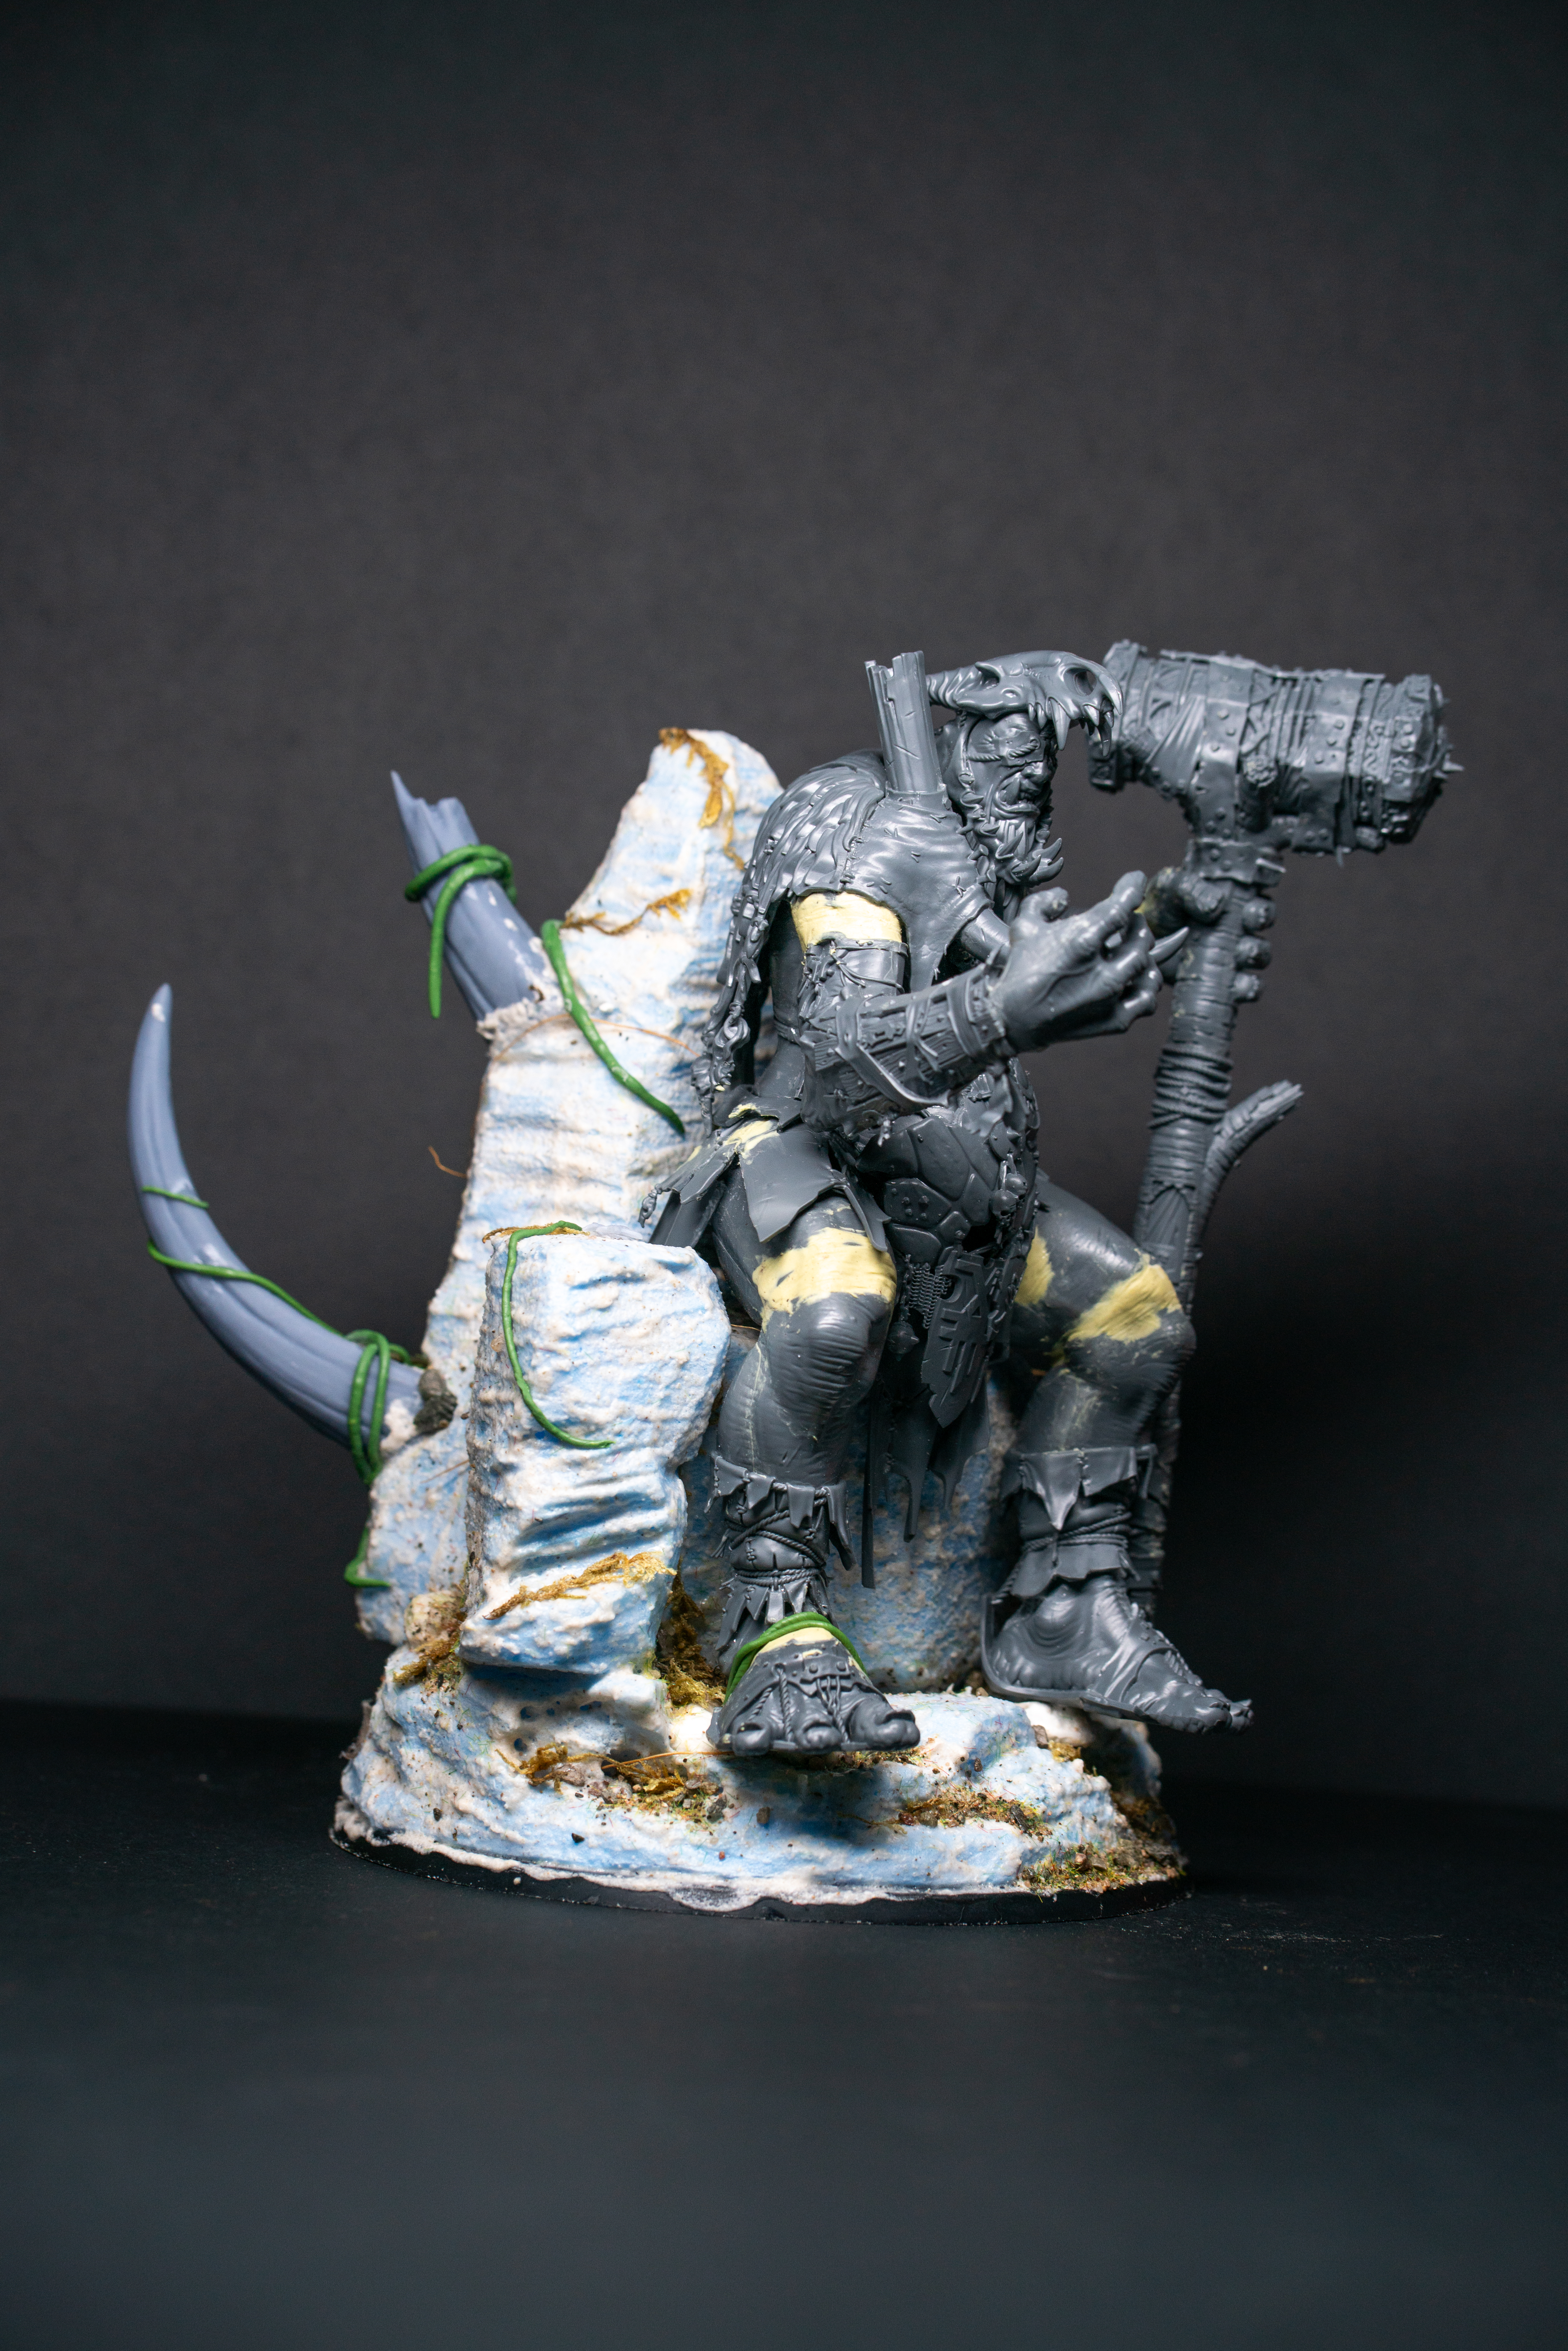
King Brodd
Whilst Brodd had the most reposing of any of the Megas, what actually took the longest was his throne. He was the last Mega I converted and by this stage fatigue was setting in hard. I ended up making 4 variations of the throne over a 10-day period using various materials, before finally settling on XPS foam due to its ability to get the exact shape I want, even though it isn’t super durable for transportation and gameplay.
There are a few challenges when creating seated miniatures. For starters, Brodd is da biggest and da baddest of the big boys, so it was critical for me that he had a similar stature when next to the other Megas on the tabletop. The final challenges were nailing the scale of the throne so it enhanced Brodd’s size, instead of diminishing it, and fixing that floppy sullen look he had in the artwork I’ve mentioned earlier. I was able to overcome these by, you guessed it, leaning into the corkscrew of the torso yet again! Although Brodd is only Priest (1), I thought I’d try and capture his ability to inspire the Megas through his powerful oration. Leaning forward gesturing in a Darth Vader-esque manner gave him the commanding countenance I was chasing.

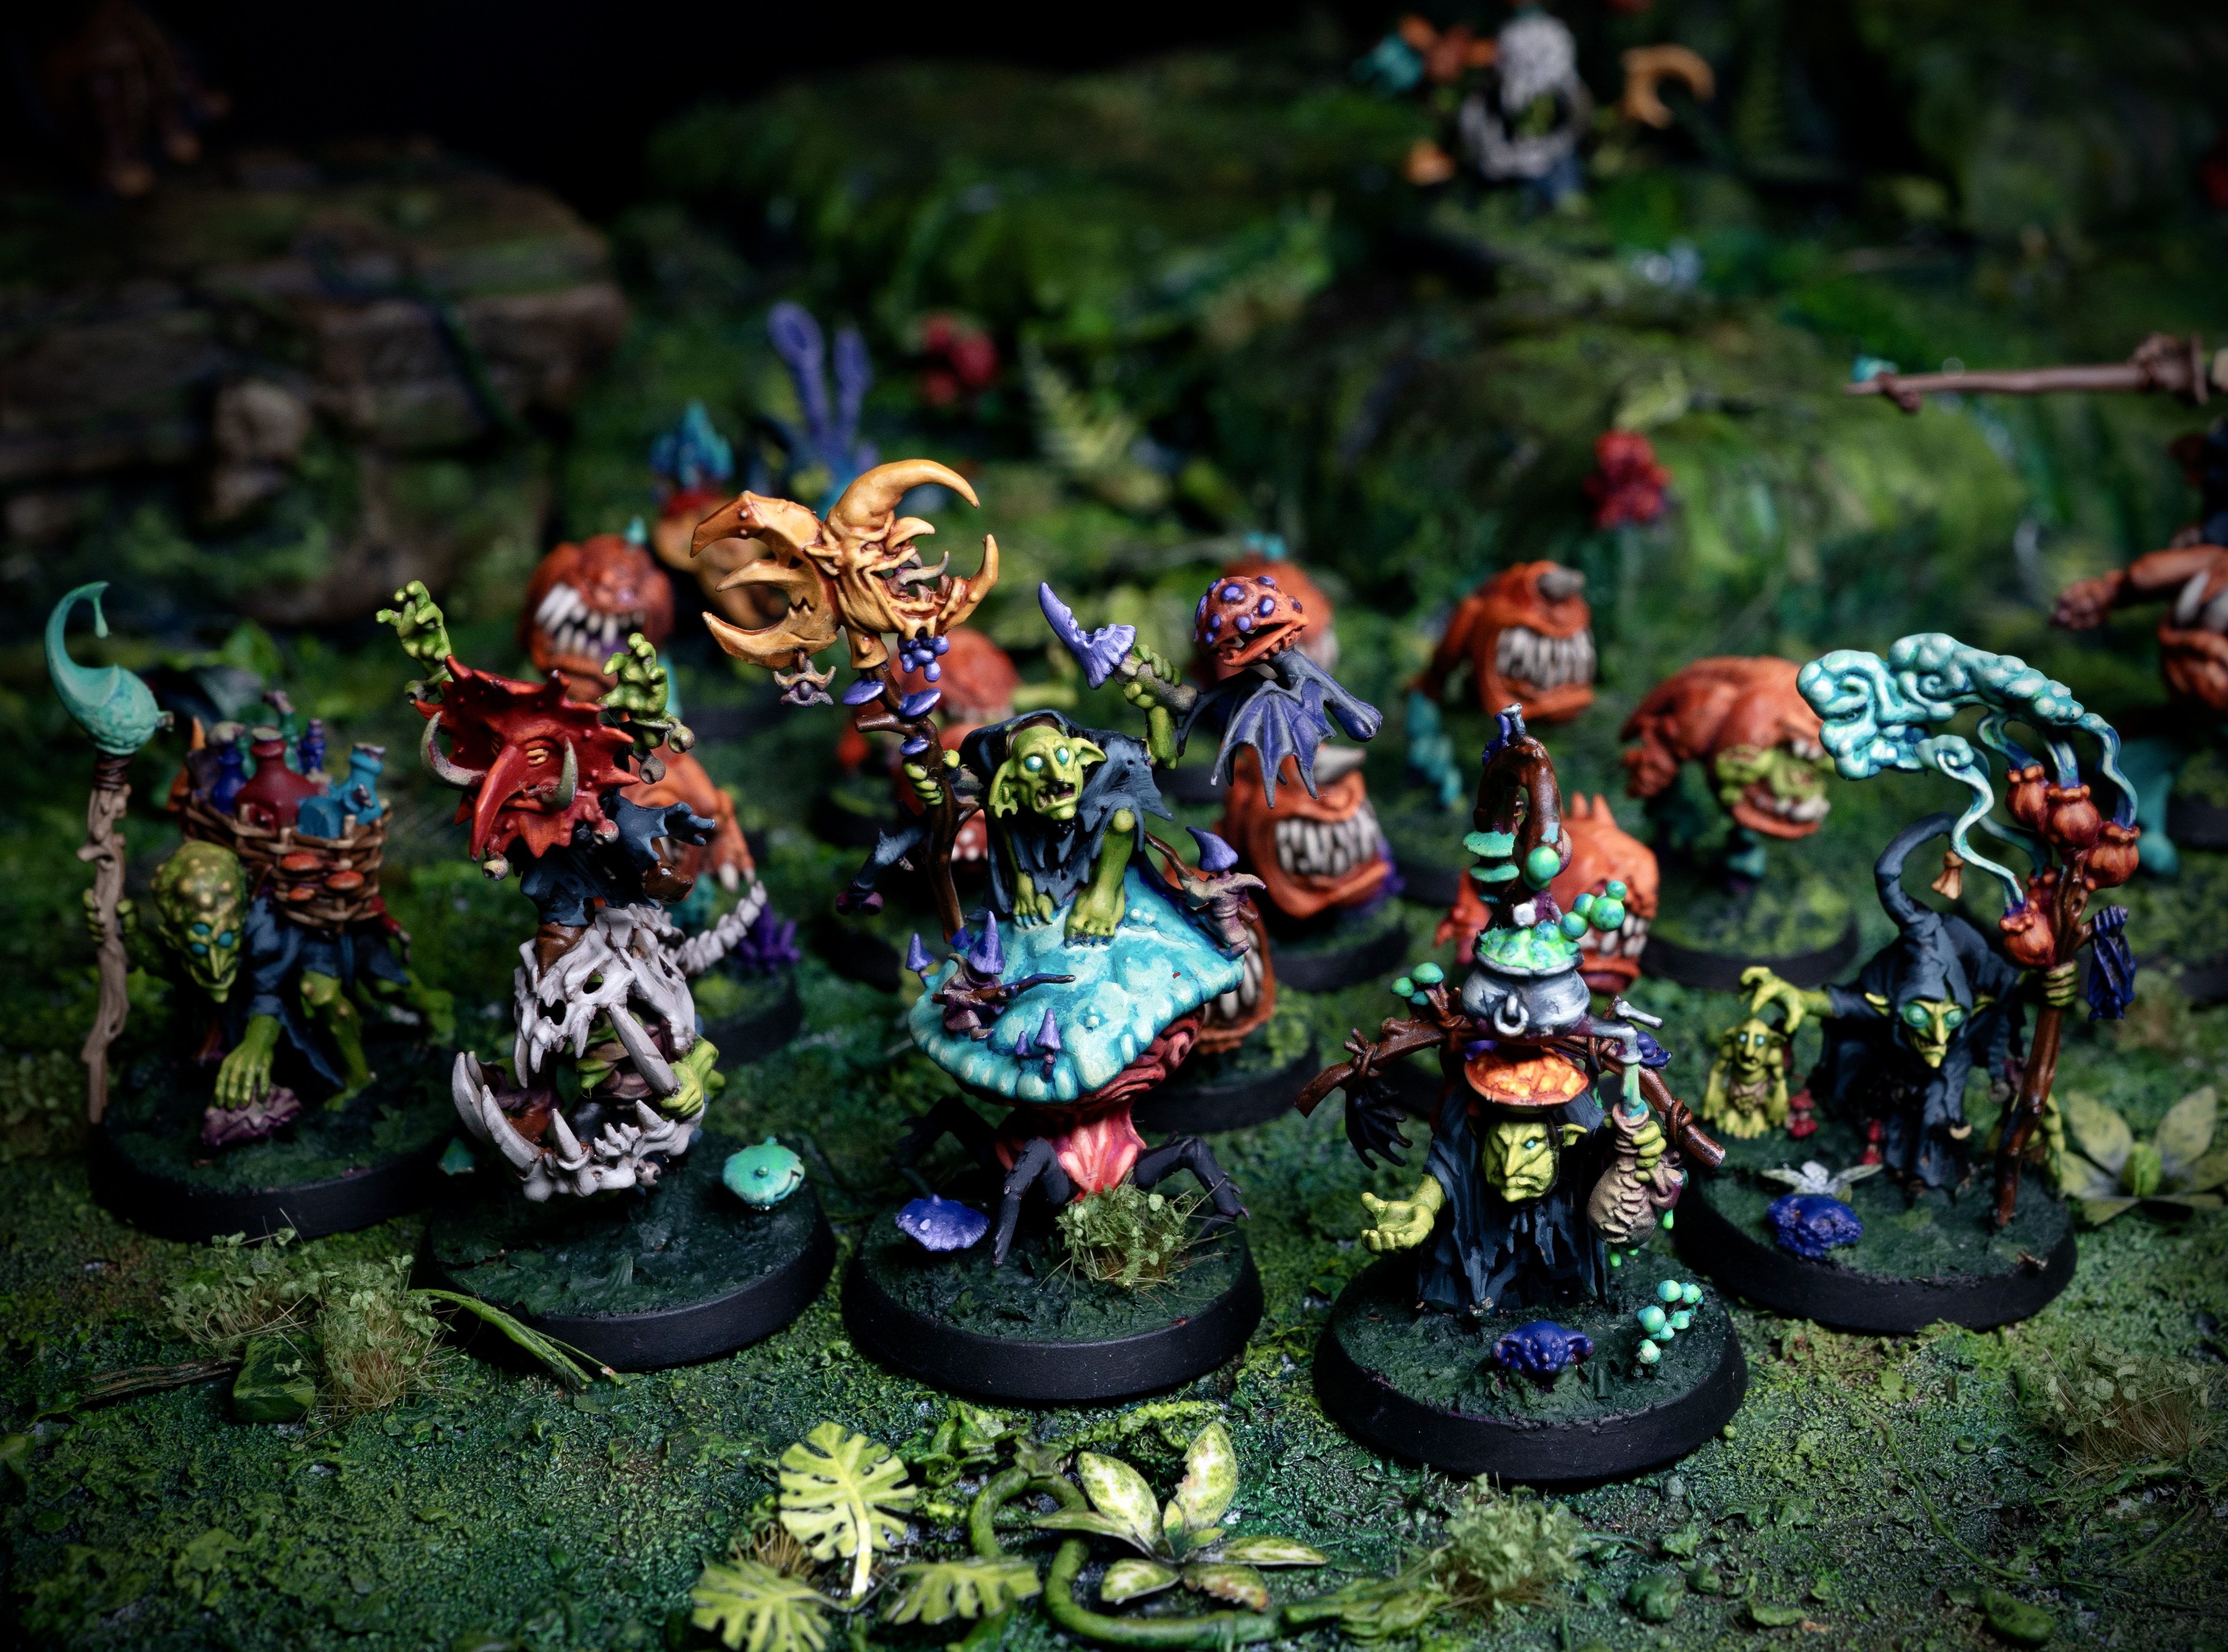
Braggit’s Rabble Rousers!
This was a (literally) last minute addition to the lineup. Whilst I didn’t convert any of these little idiots, my goal for taking this army down to Sydney was to win a Best Painted / Best Army MVP award and I was struggling to introduce enough colour, pop and pizzaz onto my display board with purely Megas alone. So at 11:59pm, one minute before list submission, I decided to trade out my second, dual-wielding Gatebreaker for Braggit’s RoR. This also took the list from narrative to vaguely competitive.
If you’ve never had the chance, painting Gitz is an exercise in pure joy. The sculpts are absolutely loaded with every detail you desire. They are also a perfect illustration of the concepts I shared above; checkout these pics of the Hoppers, Squig Herd and Gobbapalooza! Story, Silhouette and Dynamic Movement? – Tick, tick, tick!


Recap
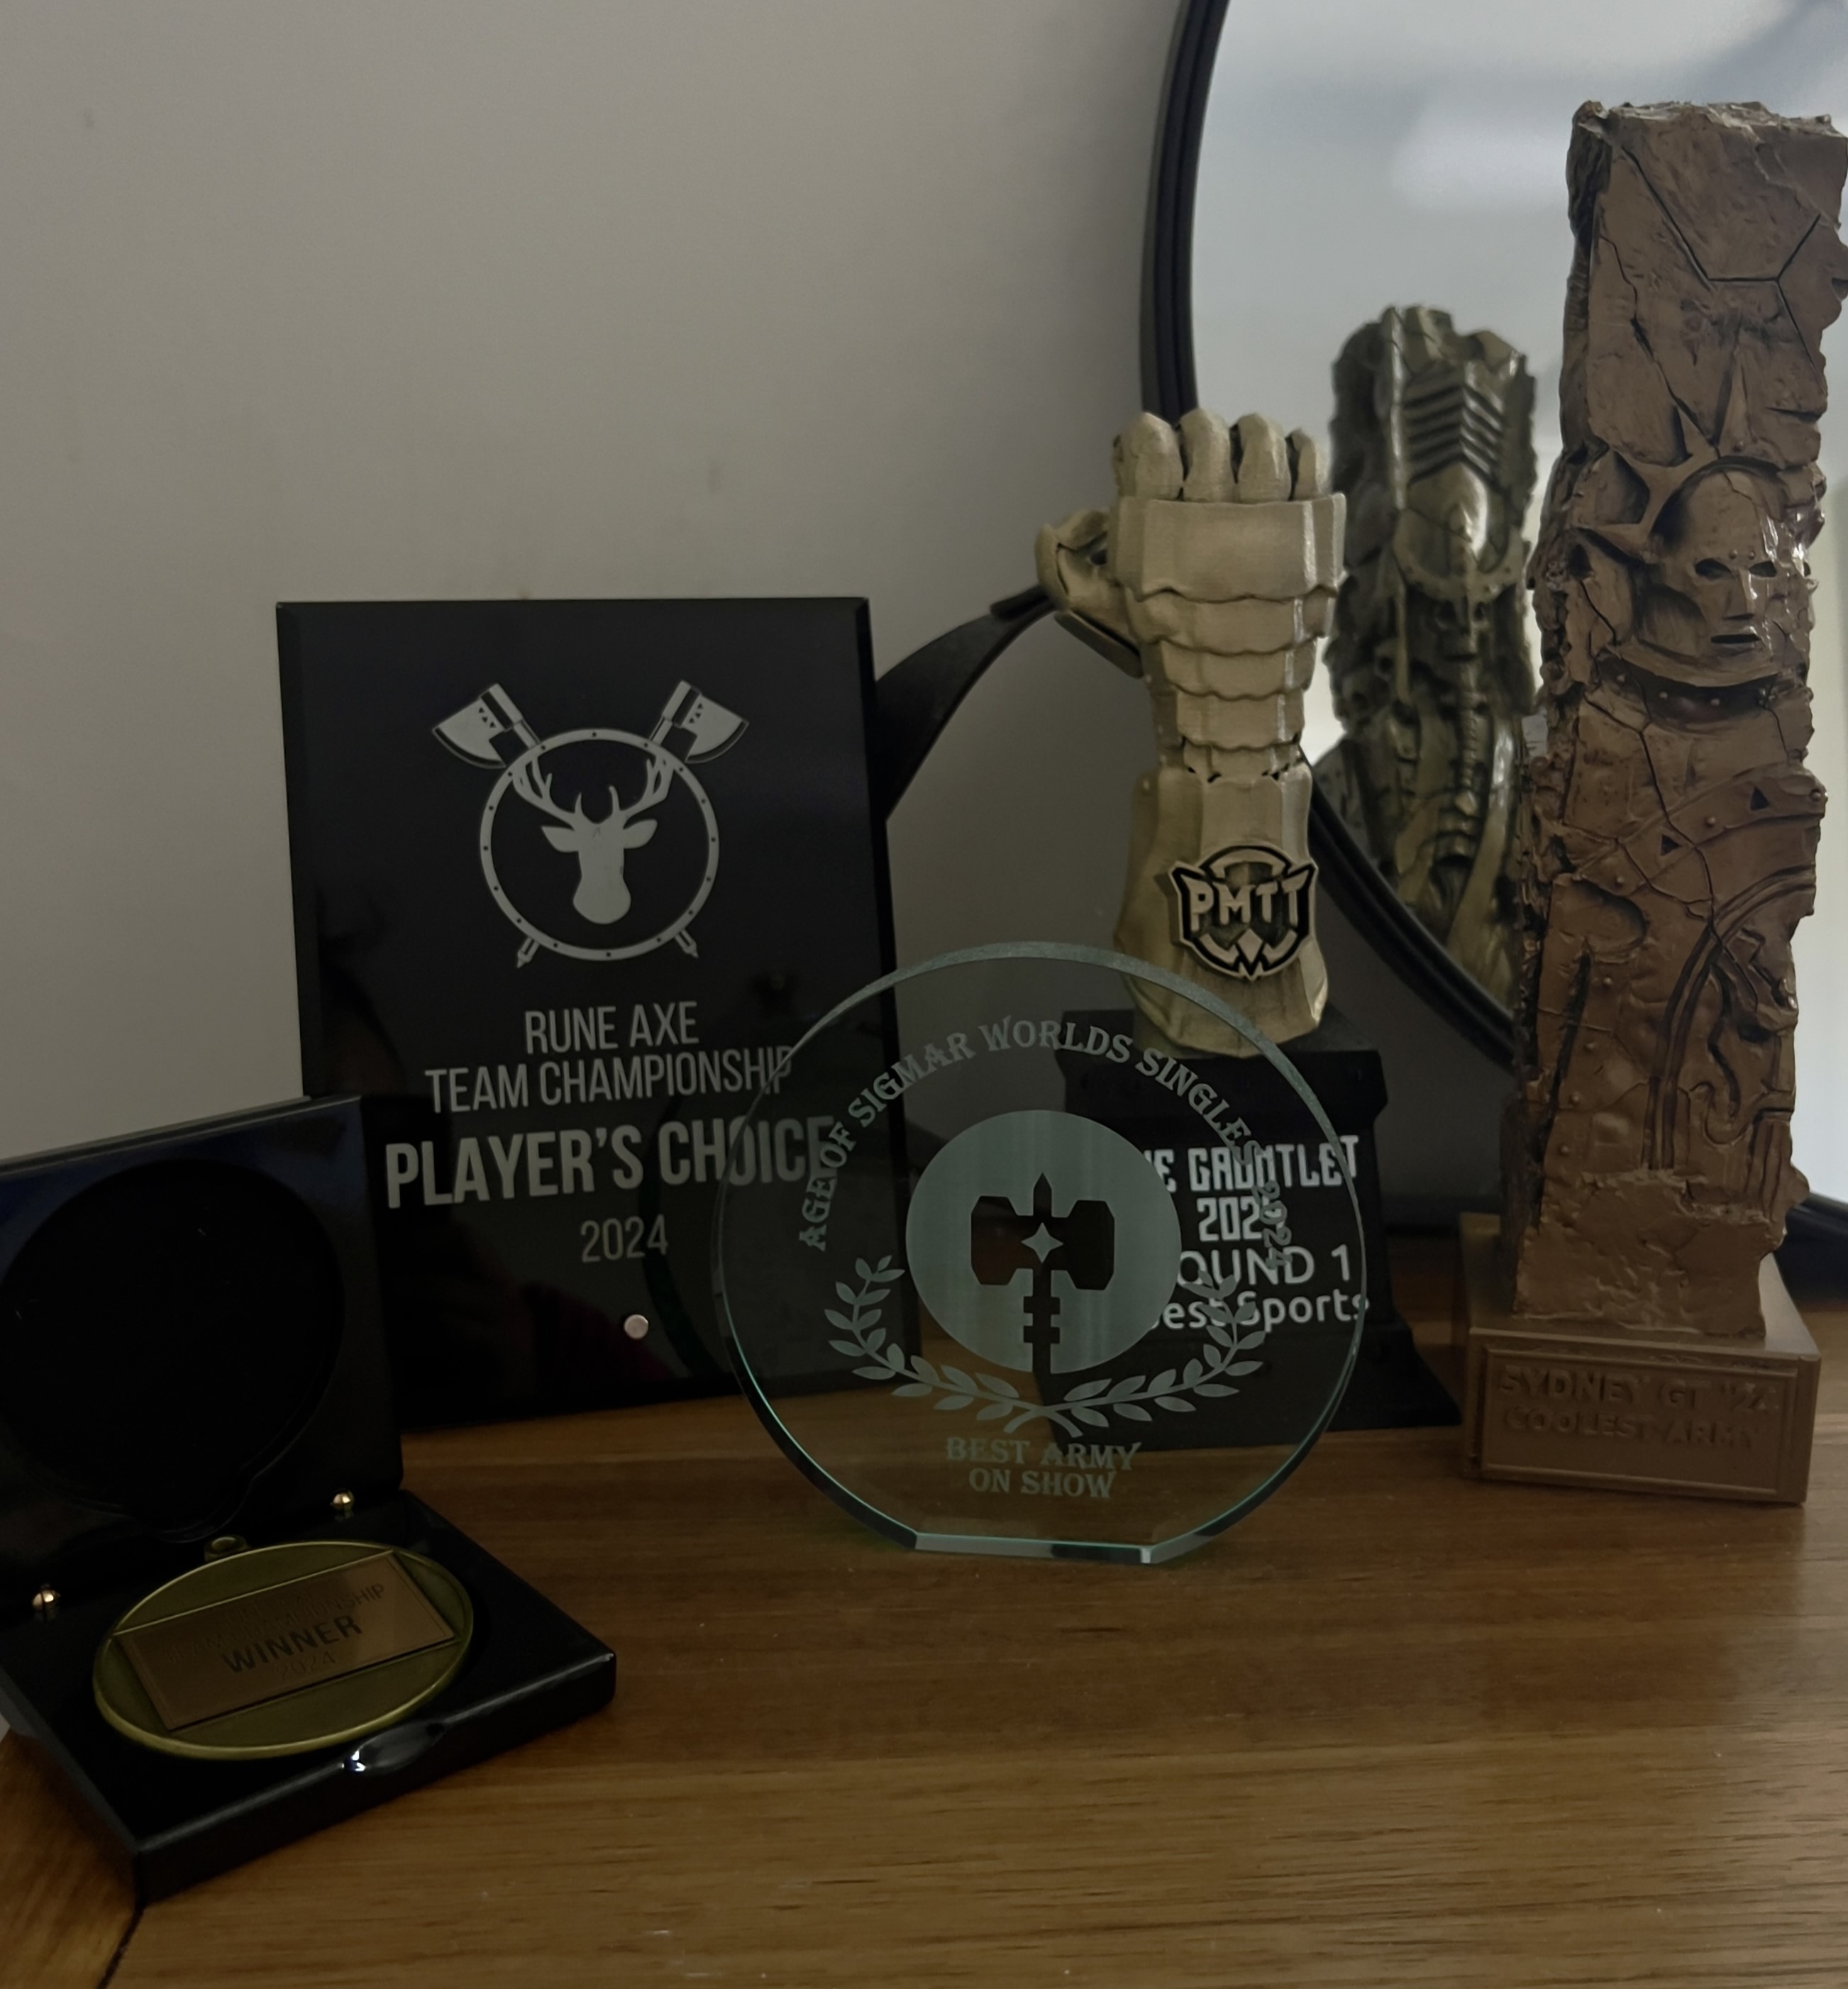
Sydney GT was an absolute blast. It was fantastic to see old friends and catch up with the Plastic Craic crew too finally. Magro runs a superb event, and I was humbled to take home Coolest Army MVP! I ended up with 3 Wins, a Draw and a Loss – not bad considering this was at the height of Lumineth & Nighthaunt digustingness!
A month later we had the Runeaxe Team Championships, which is run by the nebulous enigma known as “Gabe” of Runeaxe Radio infamy. Gabe’s as beautiful as he is disorganised and Runeaxe is an absolute staple of the Aussie event calendar for good reason. It’s an outstanding event with great piss, good vibes and, this year, even better hobby! If you haven’t seen the level of hobby on display this year at Runeaxe, I’m not even sure some of them are legal without a planning permit, one was nearly 5 feet tall!!! Absolutely incredible. I decided to trot the Gargants out for one last run for the year and not only did the big boys take out Players’ Choice, but our Team took out the Championships! I again went 3-1-1, with only a 3pt loss in Round 3! Cracking event all round, chocker block full of good mates from QLD and a smattering of interstaters too.
I’m really happy with the hobby work this year. I have pushed myself in a number of new ways and come out swinging and have made a tonne of new friends around the world. There’s some big works in store for 2025, can’t wait to share more!
Thanks for reading folks!
Hope to see you across the table someday – until then!

If you’d like to help us continue our work, we’d love to have your support. All Patreon Tiers include Discord access, exclusive articles and regular contests. Our Tiers are priced to be within everyone’s reach, so please click here to join us today!


- I can see Pat shaking his head as he reads this part (bold of me to assume he’s made it this far) muttering “Damn hippy” under his breath. ↩︎
- If you are interested in going really deep on more design principles, jump on Albert’s Instagram and check out this post where he gives a very thorough breakdown of his process when designing this miniature. ↩︎
- Ew Teclis ↩︎

Very effective verbalization of what is often just intuitive for we kitbashers. Stunning army! I’m more inspired now to make a flying Maw-Krusha, and possibly a Krushnos Centorruk.
LikeLiked by 1 person