

Gitmob has a bunch of movement tricks, but in a game centred on killing stuff and scoring objectives, how does an army without a true sledgehammer or a ton of bases on the table win games? It’s one thing for me to go on about Moonclan nuking units with Squigs or dumping a million Stabbas on objectives, but Gitmob is a whole different challenge. How do you consistently win games with them?
Fucked if I know, but Chris Riley has really got this army figured out. His lads had their debut at The Honest Wargamer’s UK Masters 2025, going toe-to-toe with some epic players and earning Chris a 4th place finish. Chris has been further testing Gitmob’s mettle and went undefeated at two recent RTTs ran by his club The Outriders MK, earning 2nd place and 1st place finishes respectively while facing down known Meta builds from armies like Kruleboyz, Kharadron Overlords, Lumineth Realmlords, Soulblight Gravelords and Stormcast.
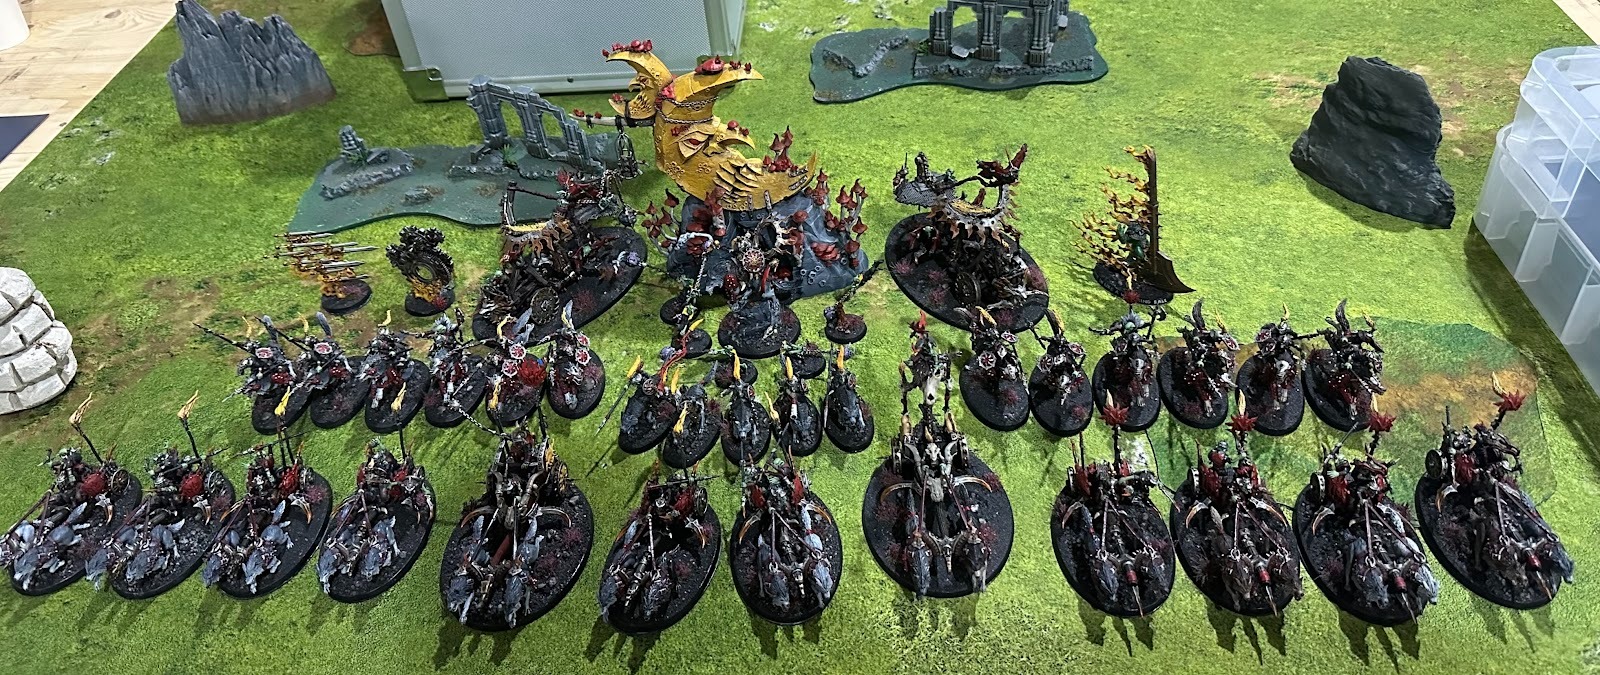
Chris’s current list is almost entirely Gitmob and makes use of pretty much their full range, so it’s an excellent showcase for what Da Mob can do. This article will take a look at how the army operates, with a rundown on every unit and what it contributes to your win condition. Then Chris will address the specifics of deployment, scoring tactics, dogpiling1 opponents and picking your battles. Gitmob are endlessly interesting to play, and Chris plays them so bloody well.
Over to you mate. ~ Pete

To win wiv da Wolfgitz, ya gots ta fink like a Wolfgit!
Anyone who knows me will tell you that I’m a sucker for cavalry-based armies, and I’ve been running Gitmob-heavy lists since the current General’s Handbook sent my beloved Boarboyz-heavy Bonesplitterz to Legends.
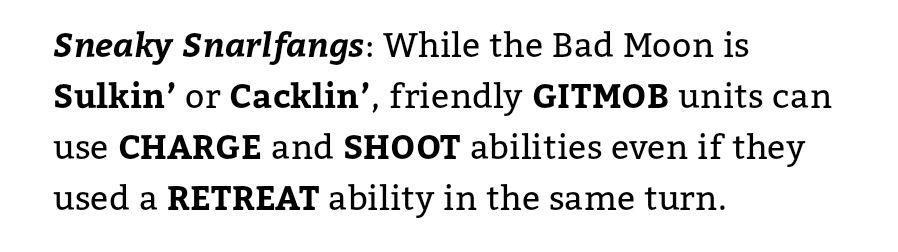
The adage that games of Warhammer are won and lost in the movement phase is never more true than with Gitmob. The units are reliably fast, have means of getting faster, and have subfaction-wide access to retreat and shoot / charge.
This is perfect considering that Primary objectives in this GHB’s battleplans offer the majority of the VPs available. You have the speed to cope with the spread of objectives, and the out-of-sequence moves with the Sunsteela Wheelas and Snarlfang Riders to go and nab anything unguarded.
Gitmob are not often winning a head-on scrap, so their ruleset is perfect for cowardly Grots running away from potential threats while looking to bully an overstretched unit or two in your opponent’s army.
So Hooz in da List, Boss?
My army list currently looks like this:
🤘Once More ‘Round the Sun 🤘 2000/2000 pts
Grand Alliance Destruction | Gloomspite Gitz | Sunbiter Pack
General’s Handbook 2025-26
Drops: 3
Spell Lore – Lore of Frazzlegit
Manifestation Lore – Aetherwrought Machineries
Battle Tactics Cards: Attuned to Ghyran and Master The Paths
—–
General’s Regiment
Droggz Da Sunchompa (170)
• General
Scourge of Ghyran Sporesplatta Fanatics (70)
Snarlfang Riders (120)
Snarlpack Cavalry (200)
• Reinforced
Sunsteala Wheelas (120)
—
Regiment 1
Snarlboss on War-Wheela (170)
• Leering Gitshield
• Loontouched
Snarlpack Cavalry (200)
• Reinforced
Sunsteala Wheelas (240)
• Reinforced
Sunsteala Wheelas (240)
• Reinforced
—
Regiment 2
Frazzlegit Shaman on War-Wheela (150)
Doom Diver Catapult (160)
Doom Diver Catapult (160)
—–
Faction Terrain
Bad Moon Loonshrine
‘Ow duz it wurk?
Sunsteala Wheelas
What we’re looking for is Movement Shenanigans and currently, there’s nothing more Movement Shenanigansy than the Sunsteela Wheelas!
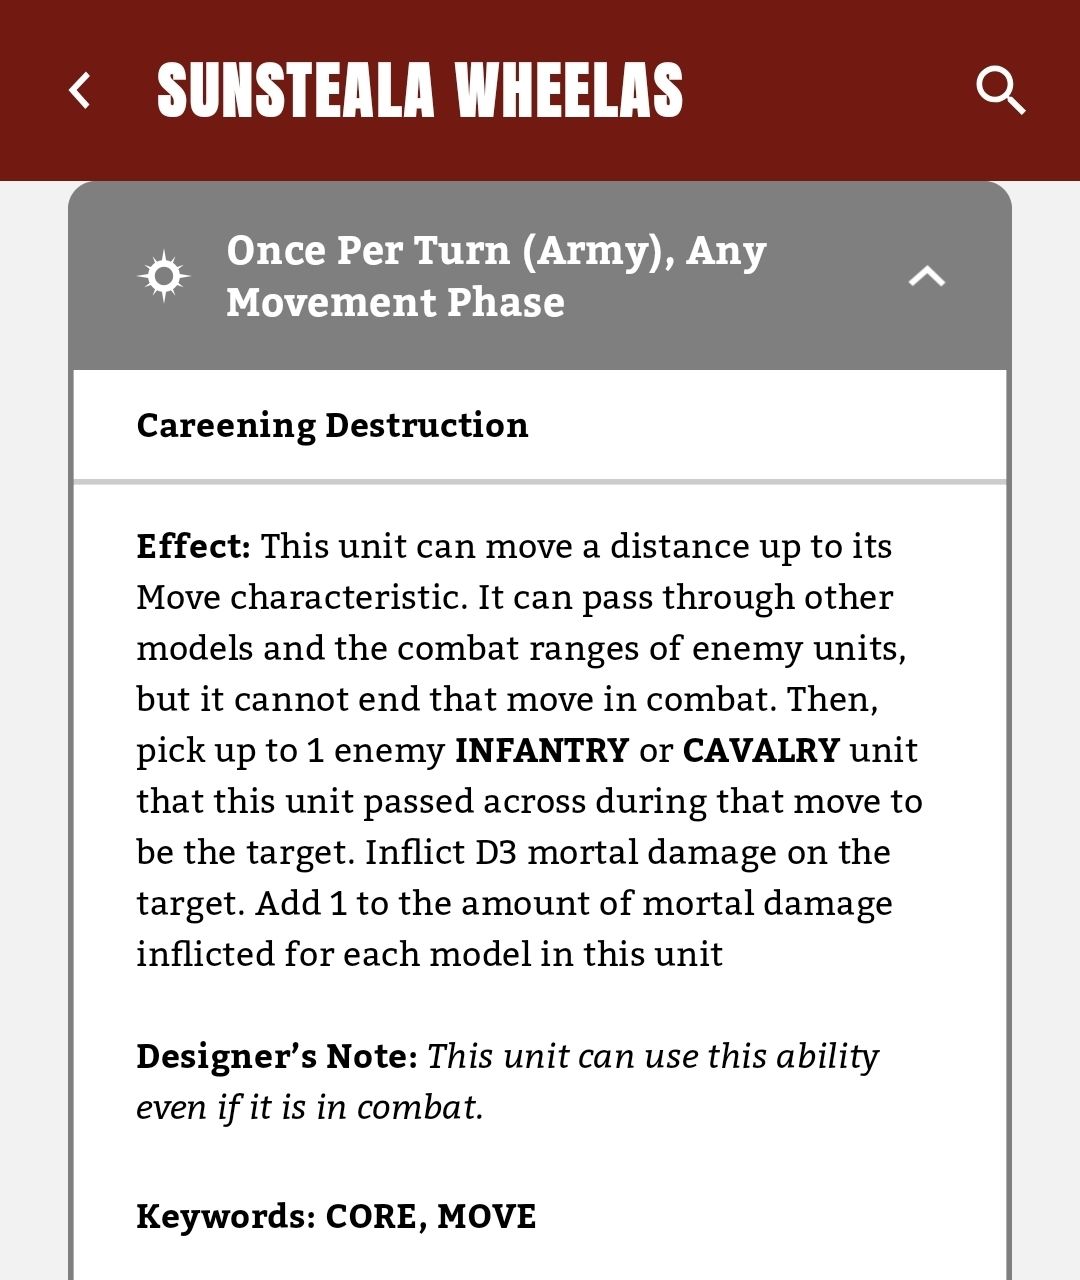
Their Careening Destruction ability is now available in ANY movement phase (so yes! Free out of Sequence move in your opponent’s movement phase!) and allows them to pass through other models and engagement ranges of enemy units. This Move allows you to slap a whole bunch of reliable mortal wounds on infantry or cavalry units for the privilege (but more on this later).
This is a Once Per Turn (Army) rule but I have taken three units in my list, two of which are reinforced. The reinforced units are more intended for fighting when needed, whereas the unit of two has a more point-scoring and move-blocking role.
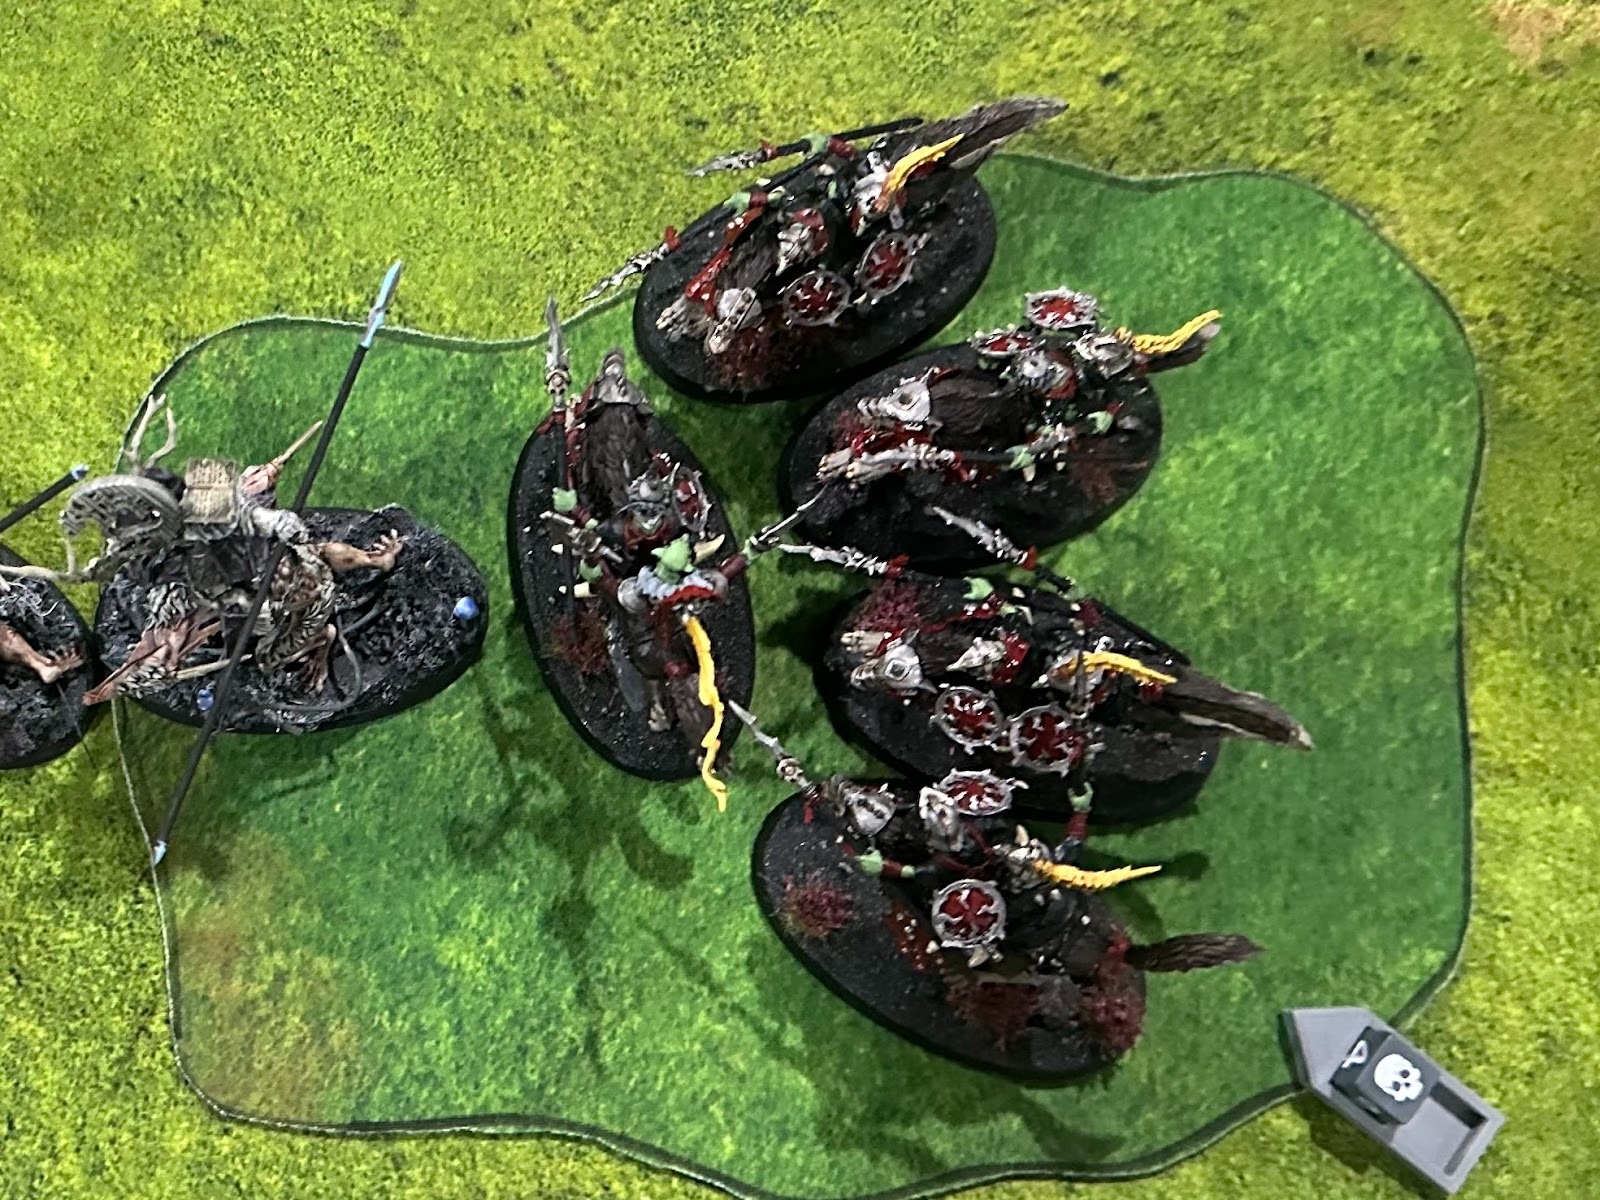
Snarlpack Cavalry
The two reinforced units of Sunstealas are joined by two reinforced units of Snarlpack Cavalry. Their role is two-fold:
- Firstly as a fighty unit. Their Strike First ability for one unit per turn on the charge is fantastic and contributes to a dirty Gitmob trick we’ll be coming back to later in the article
- Secondly, and most importantly, their passive Marking Territory ability gives them +5 Control on the charge (and this is not once per turn locked!)
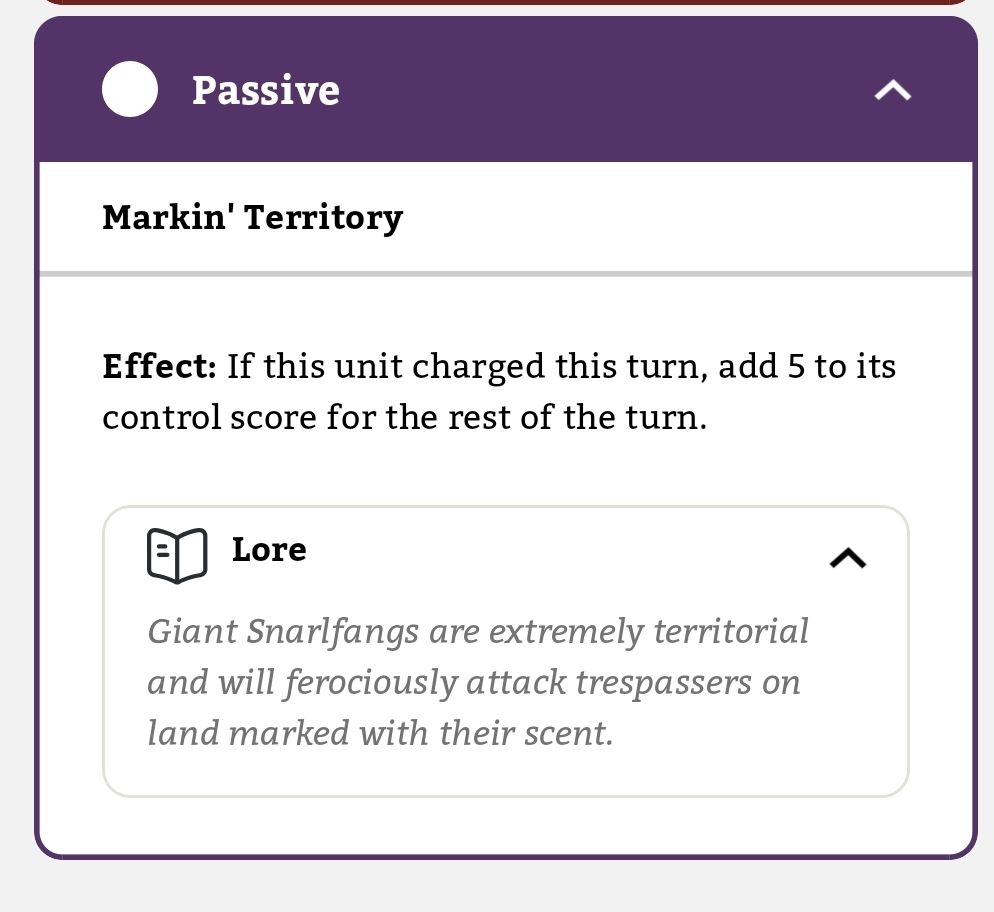
It goes without saying how useful this ability is in helping to snatch away objectives you’re engaged on. Even a single Snarlpack Cavalry model surviving combat after a charge can result in a snatched objective. I would absolutely bring them purely for this ability alone! But what’s more, as Cavalry they are one of the few units in the army that are eligible for a half-strength return through the Loonshrine.
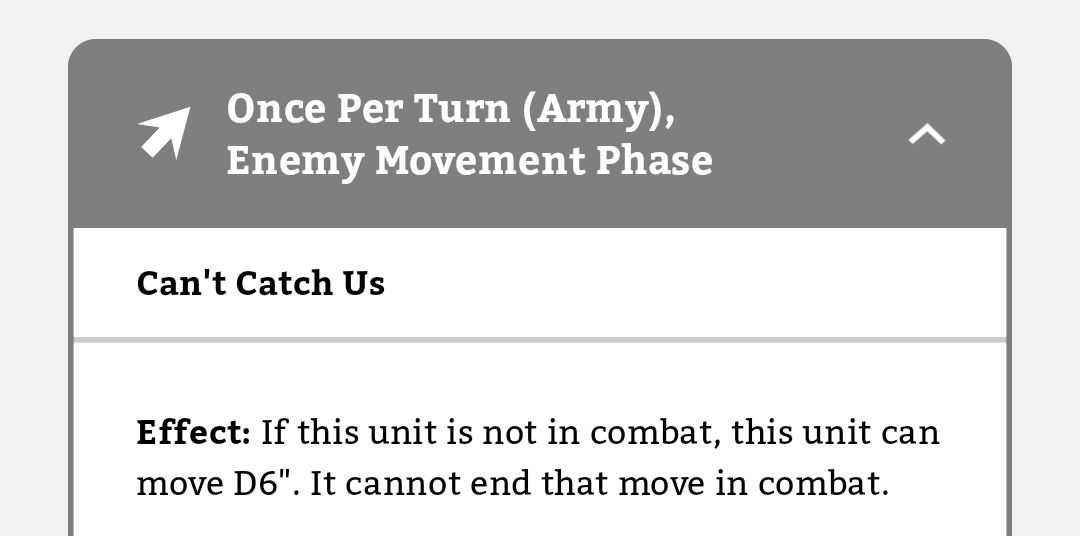
Snarlfang Riders
The other cavalry unit in the list is the smaller cousins of the Snarlpack, the Snarlfang Riders. At first glance their profile is nowhere near as impressive as the Snarlpack, however it is important to remember that there are more models in this unit, which makes up to roughly the same average damage output!
The Snarlfang Riders are another unit with an out-of-phase move, Can’t Catch Us letting them move D6” in your opponent’s movement phase. This can combo with a 1CP D6” Redeploy to carry them more distance if needed! Due to this, they are included for a similar reason to the small unit of chariots – point scoring and move blocking.
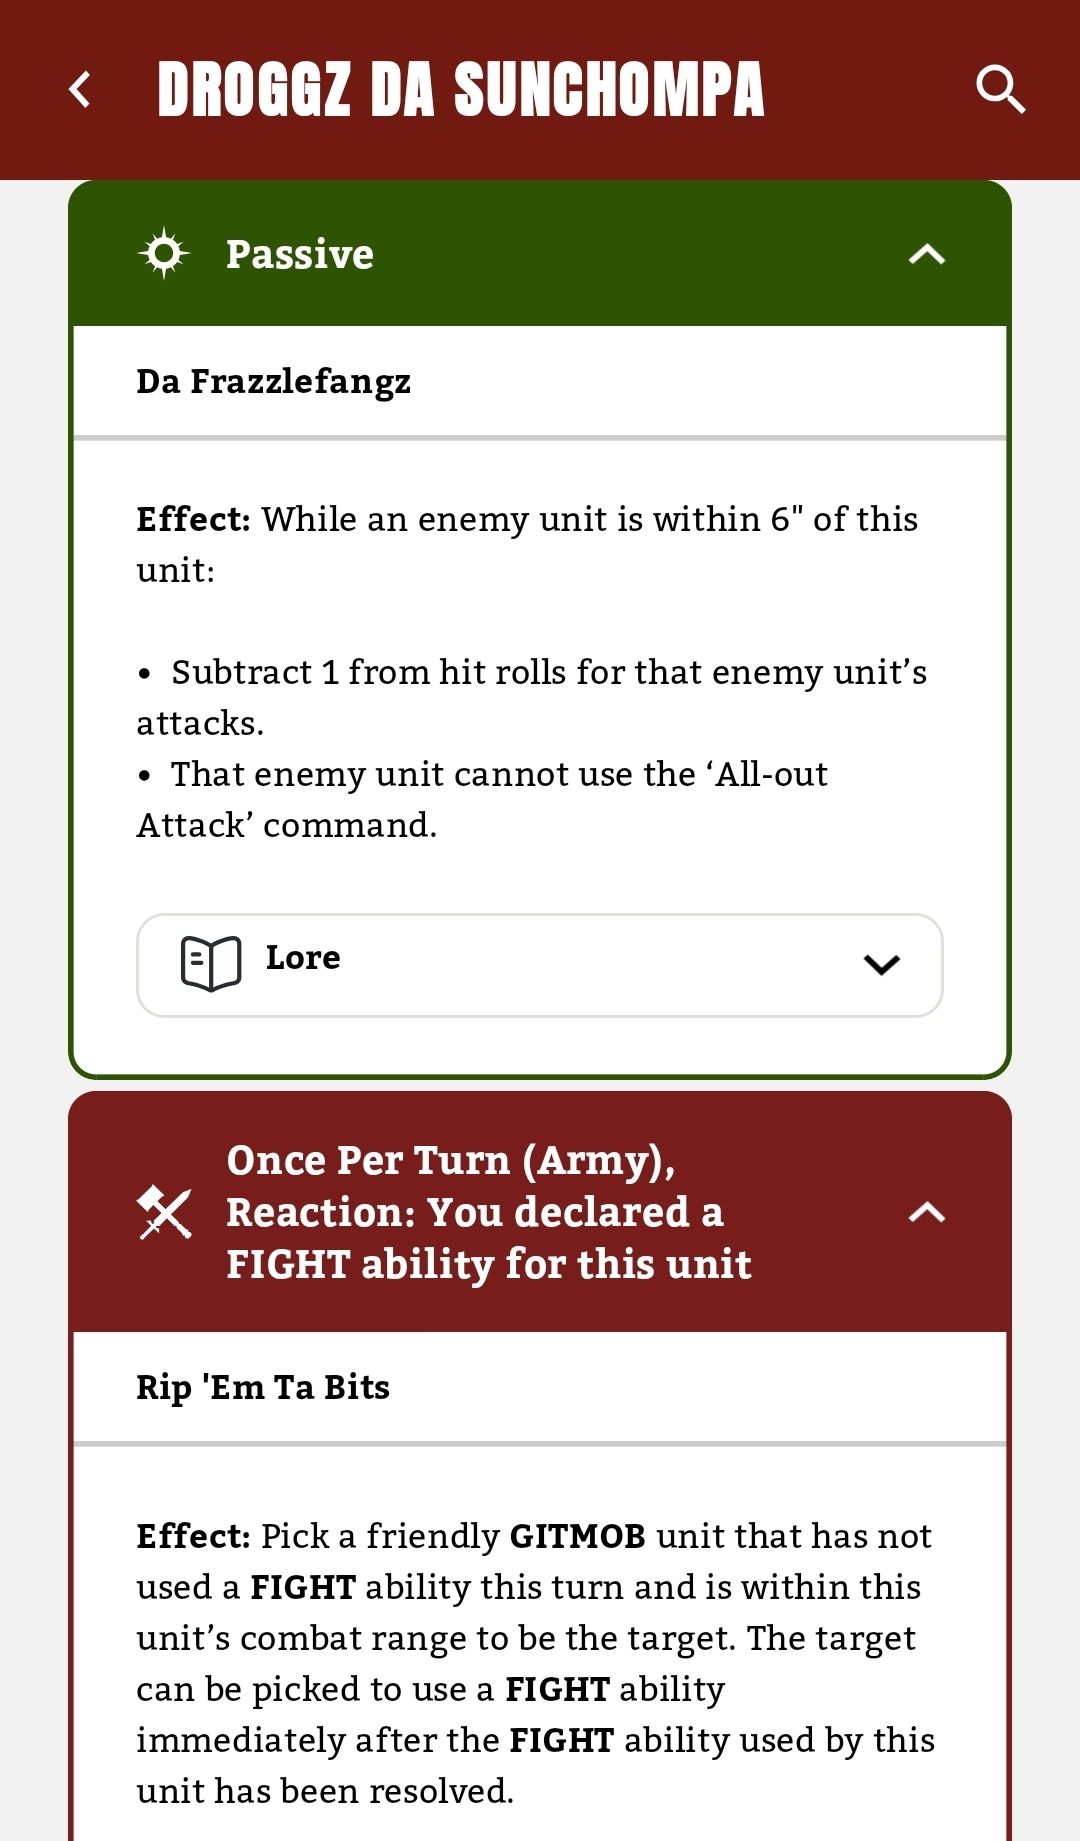
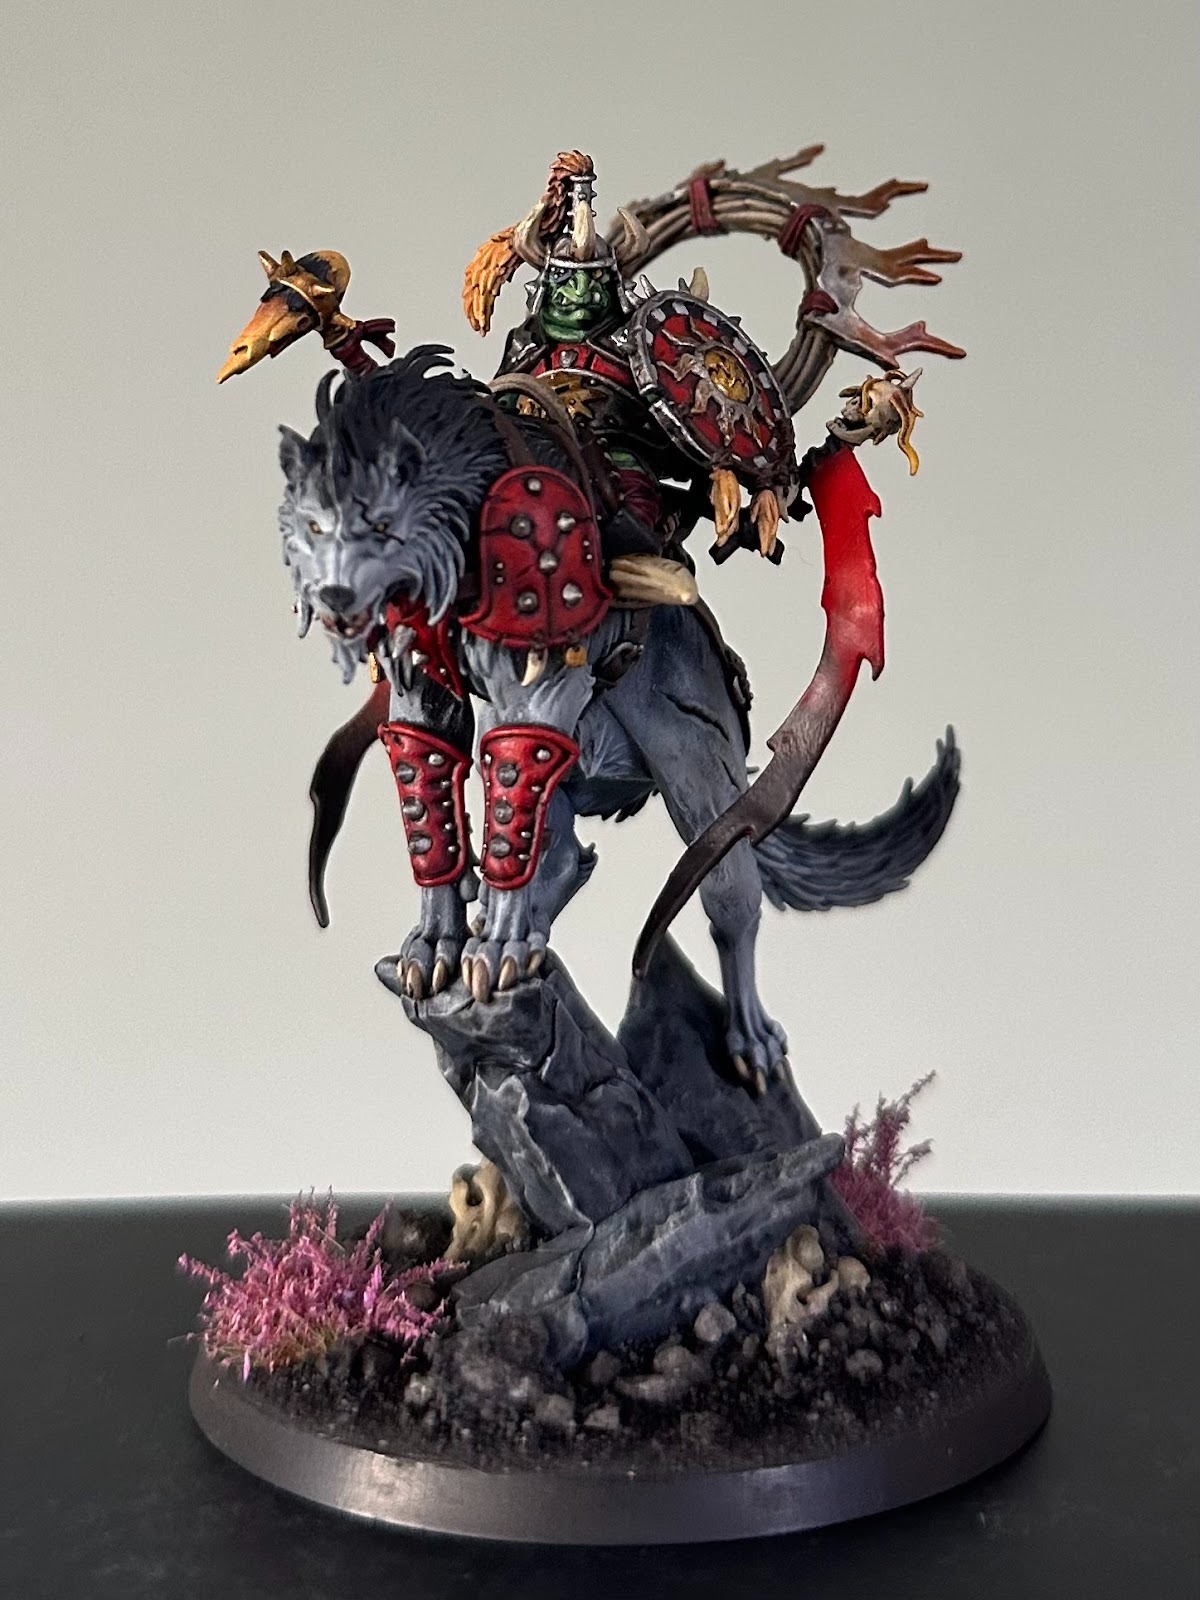
Droggz da Sunchompa
Every Gitmob-heavy list needs to include the head honcho himself: Droggz da Sunchompa. Da Frazzlefangs provide a fantastic 6” Neg 1 to hit and “No All Out Attack” debuff aura which means that Droggz is usually close to (but not always involved in!) the thick of the fighting. His Rip ‘Em Ta Bits ability is another I will discuss more later in the article, because it combos up with a few of the others we’ve bookmarked.
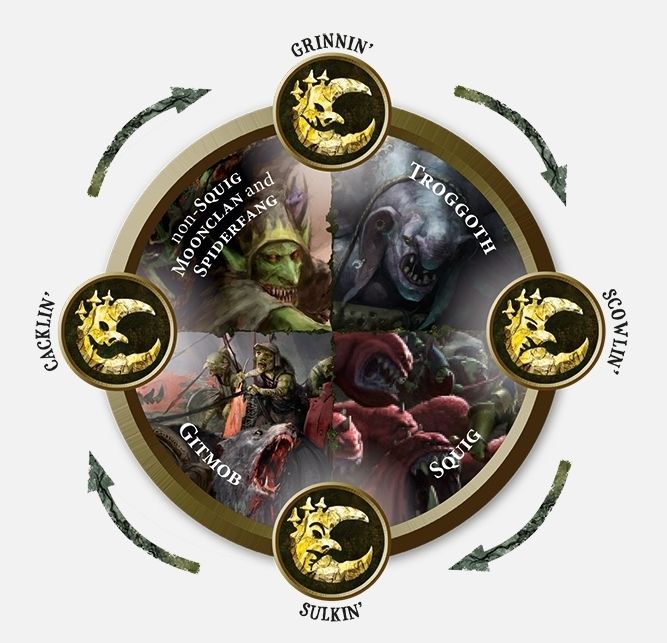
Other than his warscroll rules, his key benefit is his excellent Regminent options, allowing you to bring 0-1 units of Troggoths and 0-1 unit of Moonclan. For this list, I’ve opted to include a unit of Scourge of Ghyran Sporesplatter Fanatics, the only unit in my army that isn’t Gitmob.
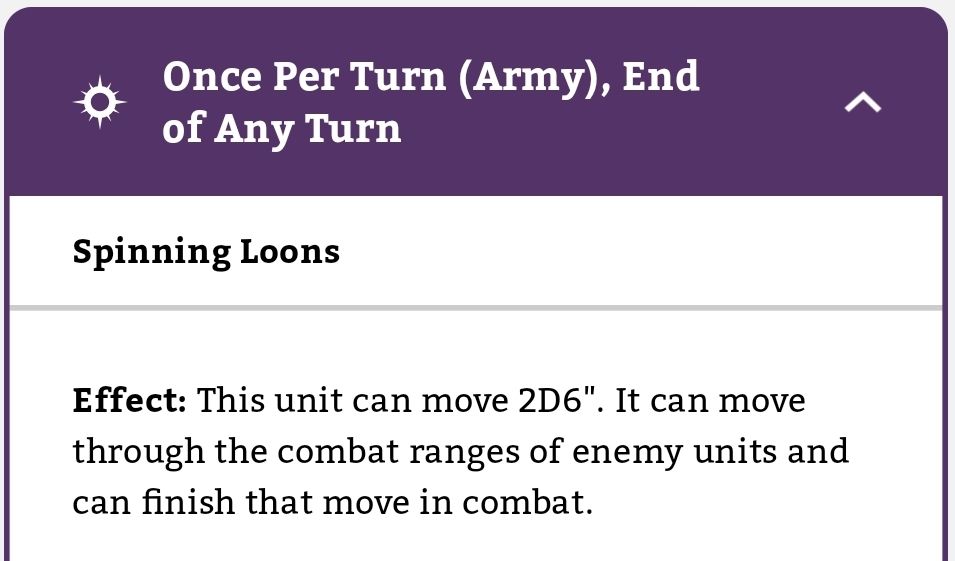
SoG Sporesplatters
The SoG Sporesplatters (as I’m sure many of you are aware at this stage) get a free end of turn move, which can take them into combat. While not Gitmob, they play into the movement jank the army relies on while adding a third unit that can make an out-of-phase move. Perfect for screwing up your opponent’s plans, or better yet, helping you to nail yours!
When playing defensively, I would tend to keep them relatively close to Droggz as their Choking Spore-Clouds (-1 attack to enemy units in combat) combos amazingly with Da Frazzlefangs to cripple enemy units and protect your lads.
An early sacrifice with SoG Sporesplatterz is never a bad thing. A half-strength return to the battlefield via the Loonshrine has made them an MVP in several games, being able to set up wholly within 12” of the Loonshrine and 3” away from enemy units. You can then make their 2D6” end of turn move in the turn they arrive to tie up enemy units in combat and really turn the game state on its head.
This forces your opponent to expend valuable resources ridding themselves of this 70-point piece of junk and if they fail to deal with them in the Hero Phase, they’re stuck there for the following Movement Phase.
Being “Non-Squig Moonclan”, for two turns of the game the Bad Moon’s position gives the SoG Sporeplatterz +5 to their control score so not only are they tying up enemy units, they’re also bouncing in and potentially stealing objectives with very little your opponent can do about it!2
Snarlboss on War-Wheela Chariot
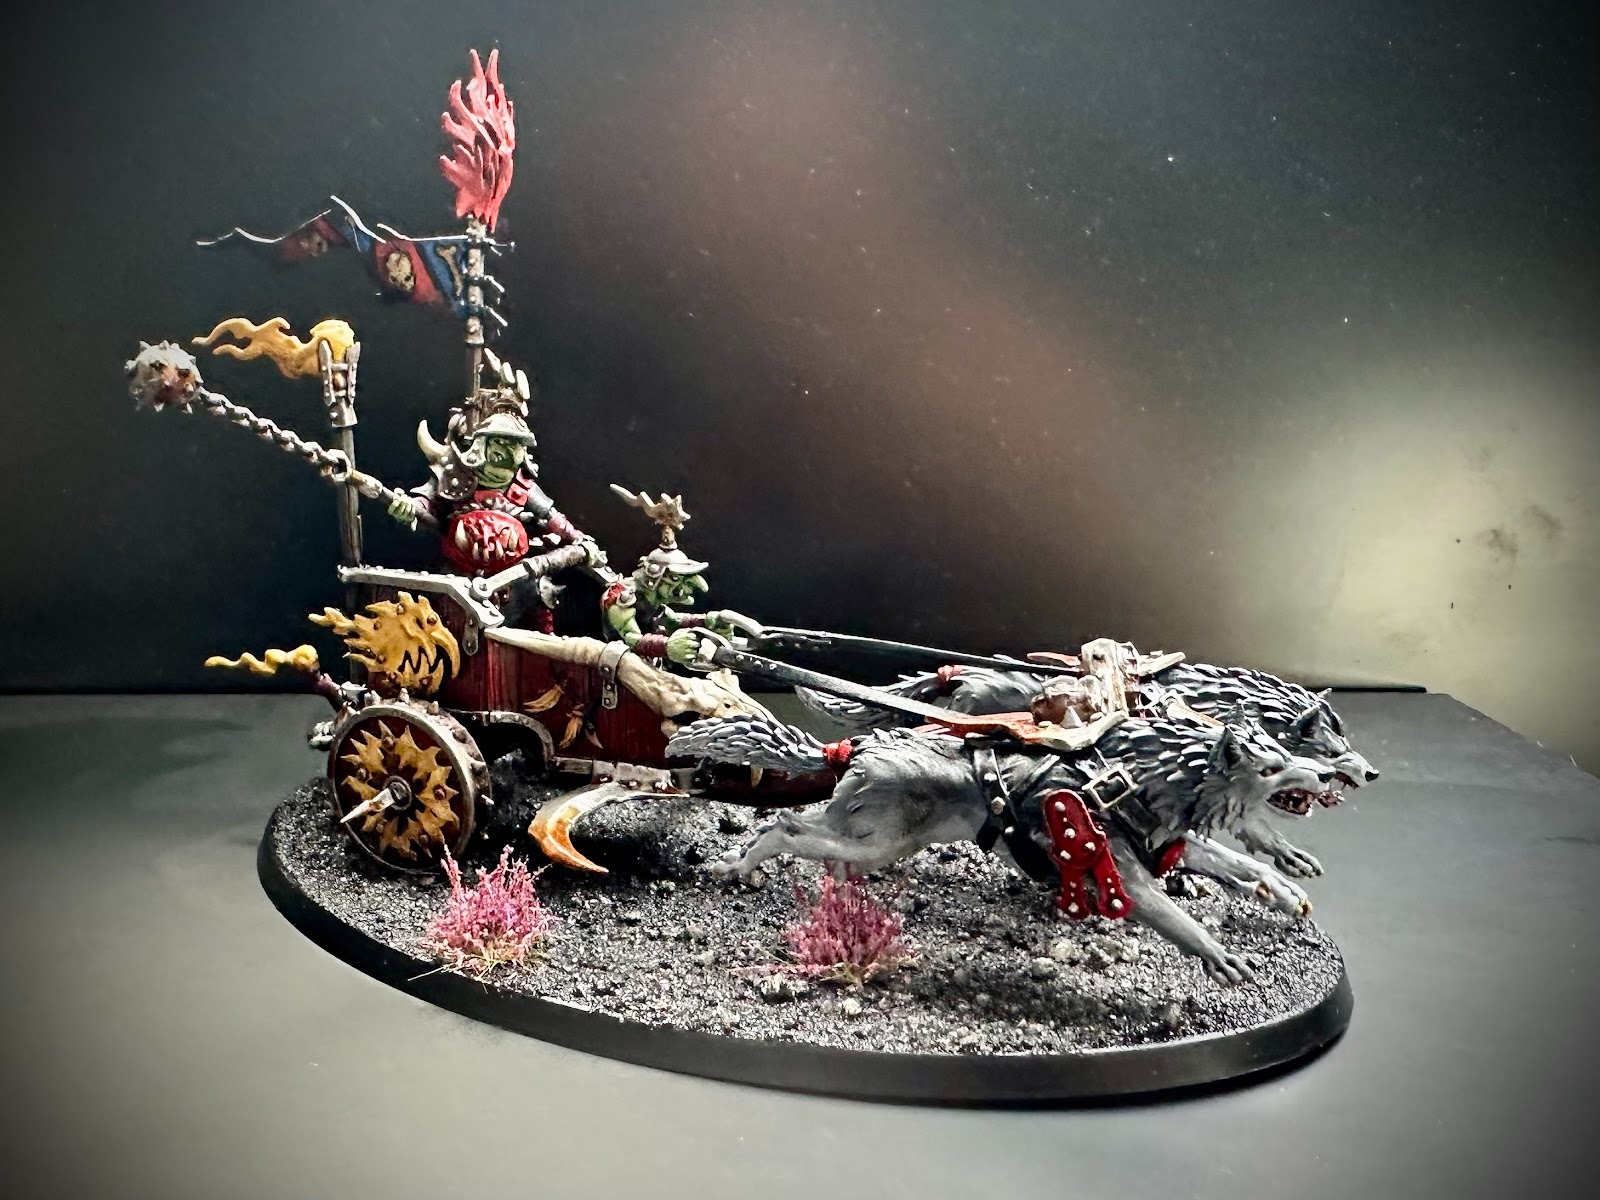
The Snarlboss on War-Wheela Chariot is another key piece in this Army. He is given the Loontouched heroic trait (so both character chariots are level 1 Wizards). This doubles the opportunity of casting Bright Fright (the UNLIMITED keyworded spell from the Frazzlegit spell lore) which lets three units use a RETREAT ability without taking damage in the Hero phase and hopefully get some successful Fey Strikes:
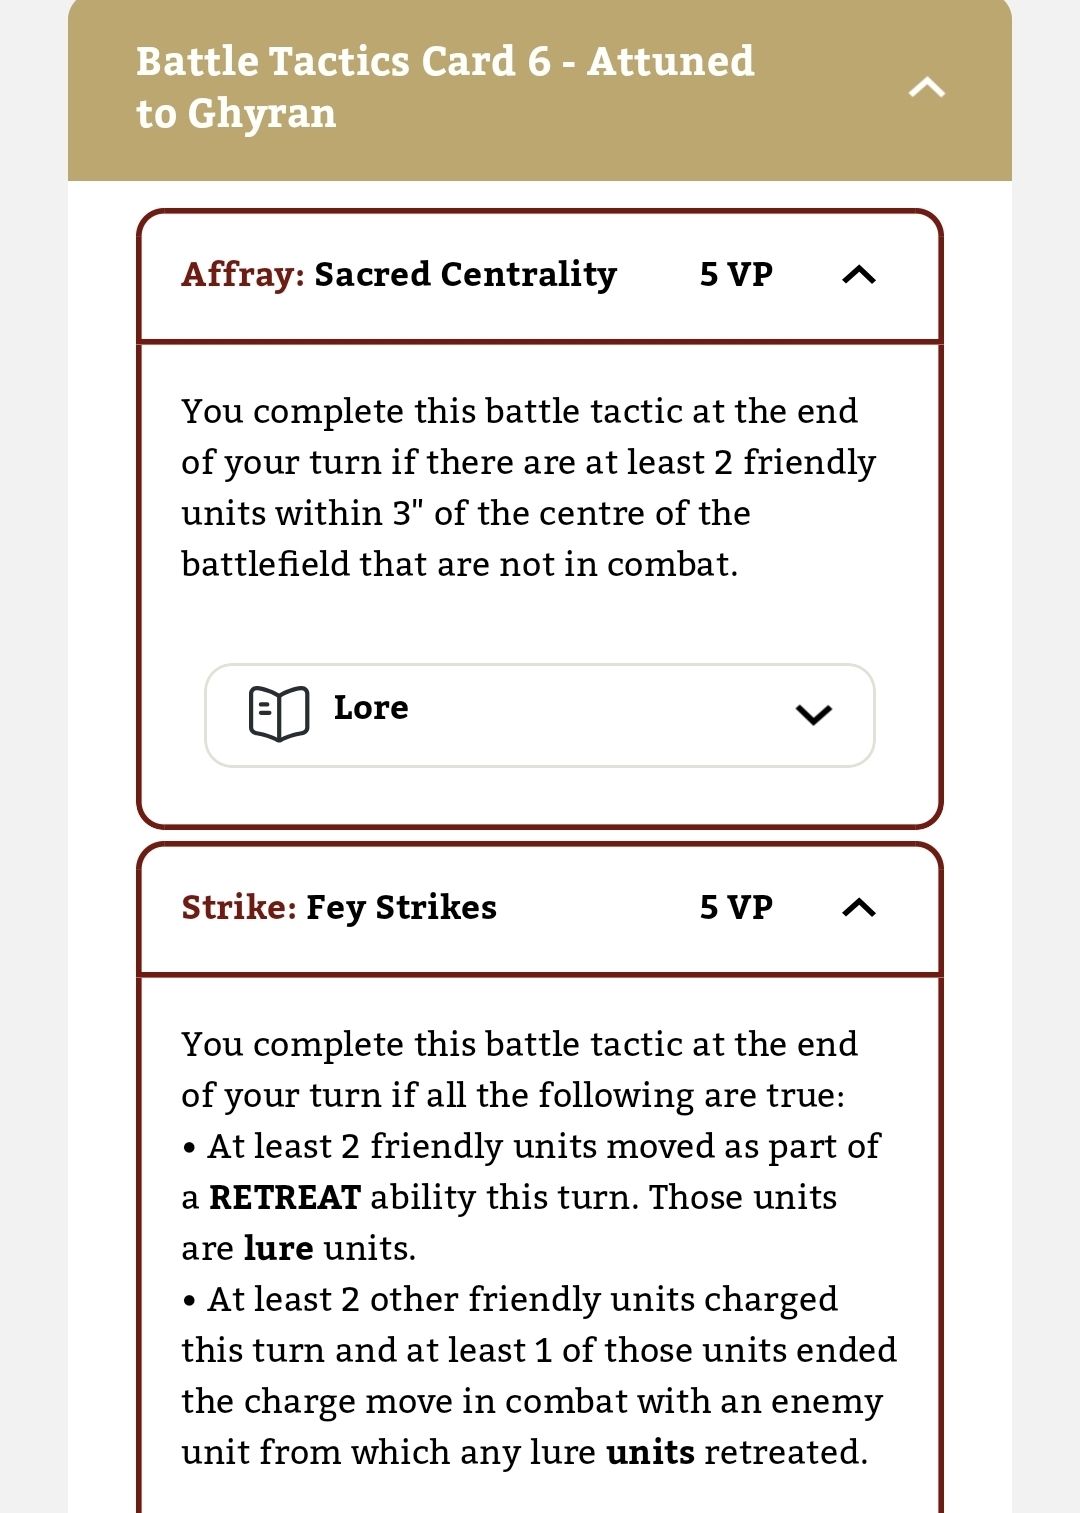
Because this spell allows you to perform the Retreat ability in the Hero phase (moving up to your move characteristic), it leaves your movement phase clear for another MOVE ability. It doesn’t specify that you can charge later that turn, so you normally couldn’t, but if the Bad Moon is favourable we’ve got that covered too:
Bearing in mind he can also pop Da Glare of Frazzlegit before this spell is cast, now your Sunsteala Wheela units are moving 18” in both the Hero and the Movement phase!

His Frazzlegit’s Flame Stream ability is similar to the Sunsteala’s Careening Destruction, allowing him to move through other units and the combat ranges of enemy units, this time dealing D6 mortal wounds to an unlucky unit of infantry on his way through3.
Frazzlegit Shaman
Talking of spell casters, the Frazzlegit Shaman is another fantastic and quite possibly underrated unit. His Gimme All Da Light ability prevents friendly non-Frazzlegit Shaman Gitmob units from being targeted by shooting attacks:
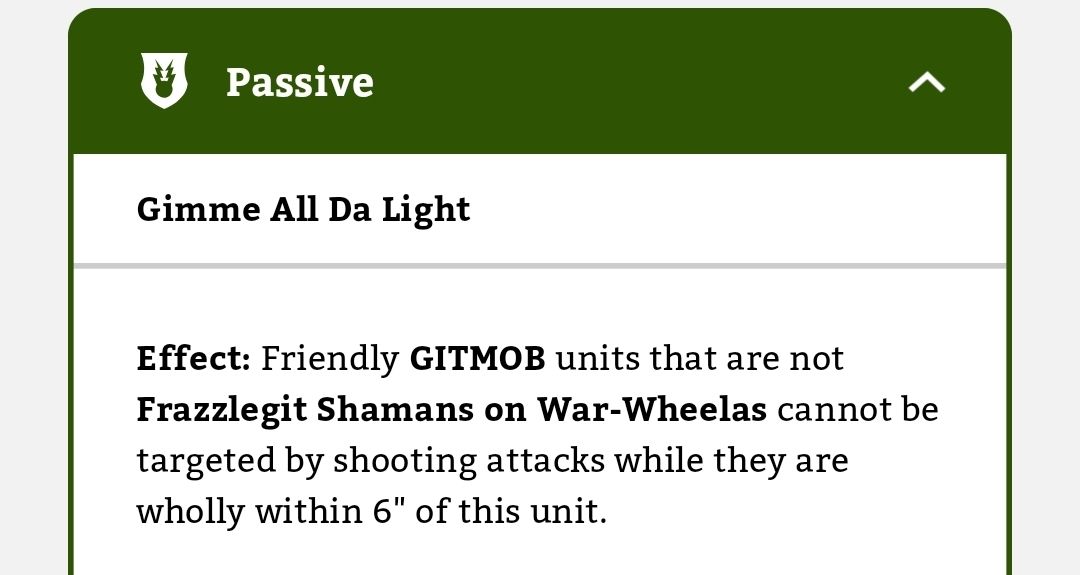
In principle your opponent could just shoot him out first and then let rip, but this ability pairs well with the current Scourge of Ghyran season’s advanced ruleset: by placing him within 1” of Obscuring terrain, suddenly he is no longer targetable either. In matchups where I’ve come across heavier shooting, his main task becomes hopping between Obscuring terrain pieces, pushing that invisibility bubble further and safely escorting and delivering my scrappier units on their way to harass and maim.
In most games I find him useful to babysit my Doom Divers, allowing them to fire-at-will without retaliation from enemy shooting. His ability has made him and the Doom Divers viable selections for an enemy’s Intercept and Recover treasure holders as they’re challenging to remove at range, and an opponent usually has to chew through another 1500 points of slip-sliding Gitmob before they’re able to reach them.
Doom Divers
The two Doom Divers provide longer-ranged threats with both the highest rend and damage characteristic of any weapon in the army. These are probably the only units in the army that want to avoid Obscuring through fear of the half-range missile weapons penalty – hence generally living in the Frazzlegit Shaman’s shadow instead.
The Shoddy Wing-like Gizmos Once per Turn (Army) rule lets one of them reroll while sacrificing rend, while the other I will generally give All Out Attack.
I will admit their ability to achieve desired output is swingy from game to game: I’ve had games where they’ve shot Kharadron Frigates out of the sky, and games where they’ve genuinely done more damage in combat! But the threat of Rend 3 Damage 3 shooting picking off key components puts extra pressure on opponents throughout the game.
Manifestations: Aetherwrought Machineries
The Aetherwrought Machineries manifestation lore brings a fourth unit with out-of-phase movement that can carry it into combat and create pinning opportunities in the Aethervoid Pendulum, a beauty of a reroll charge bubble in Chronomantic Cogs and a handful of ward-smashing crit-mortal attacks from the Quicksilver Swords. And it’s free.
“So, Wotz da Plan Boss?”
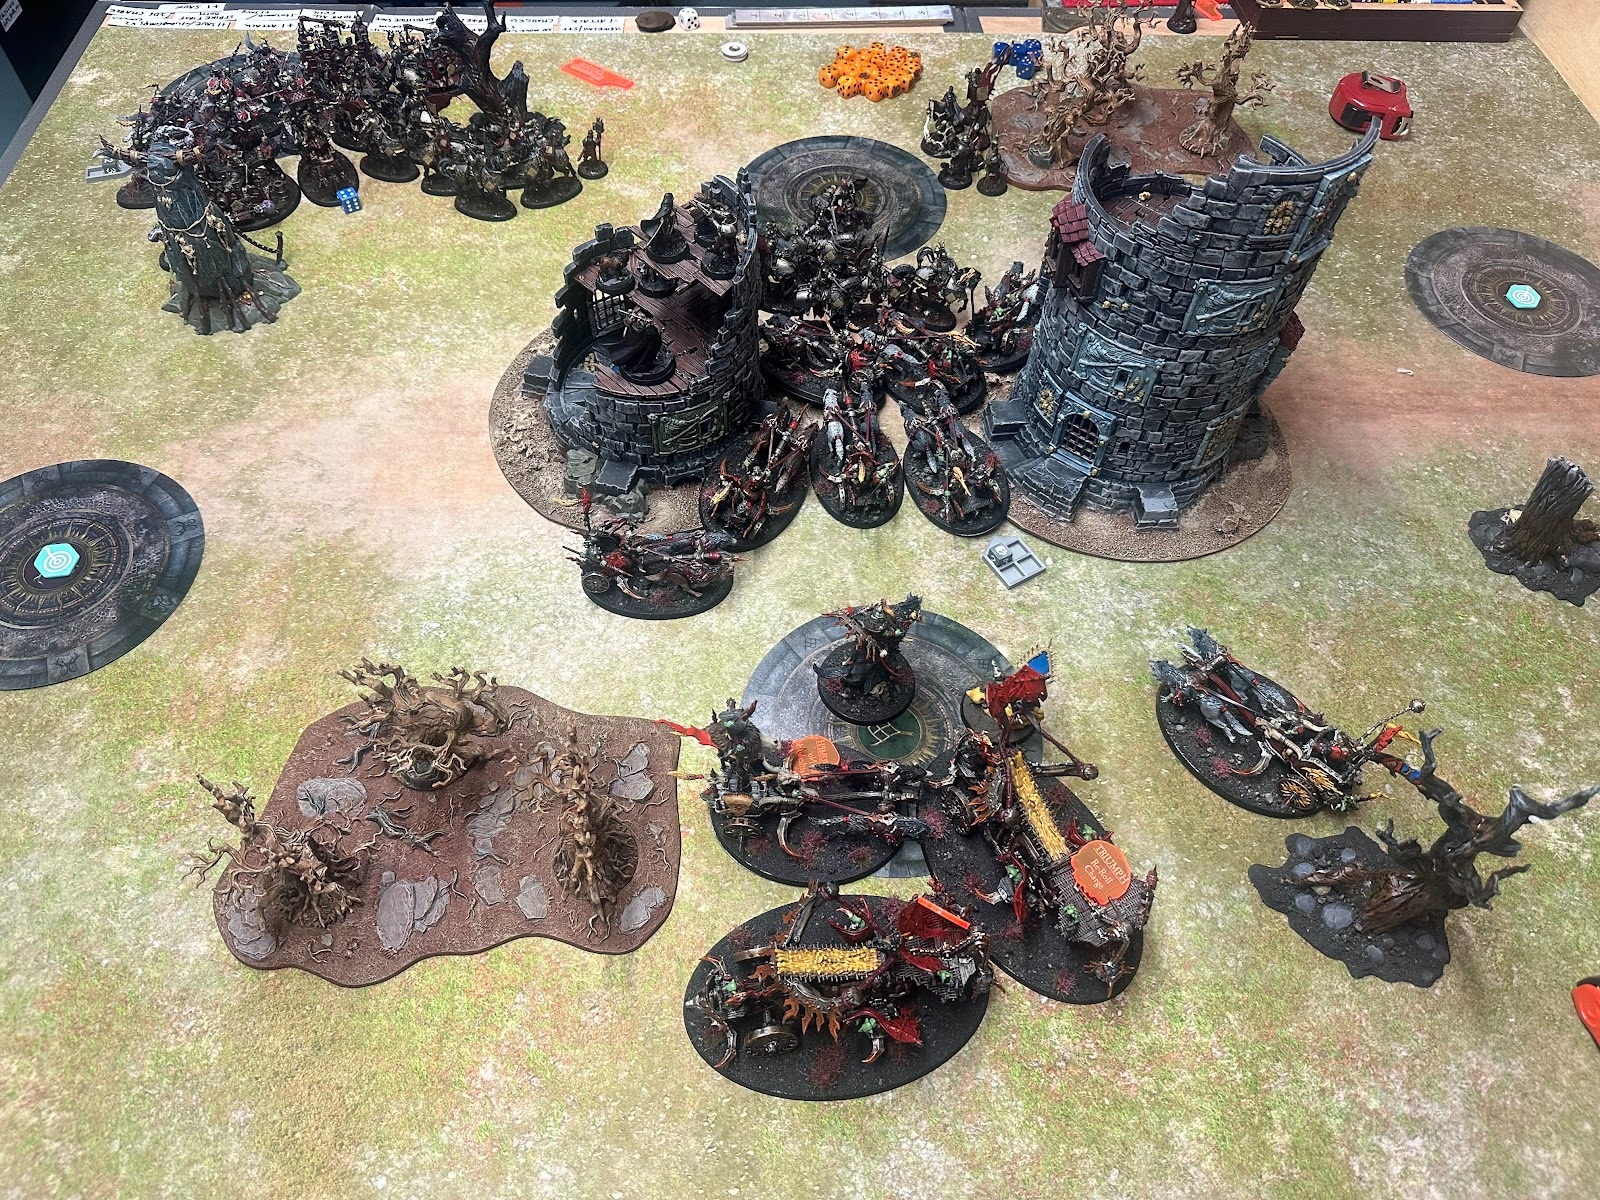
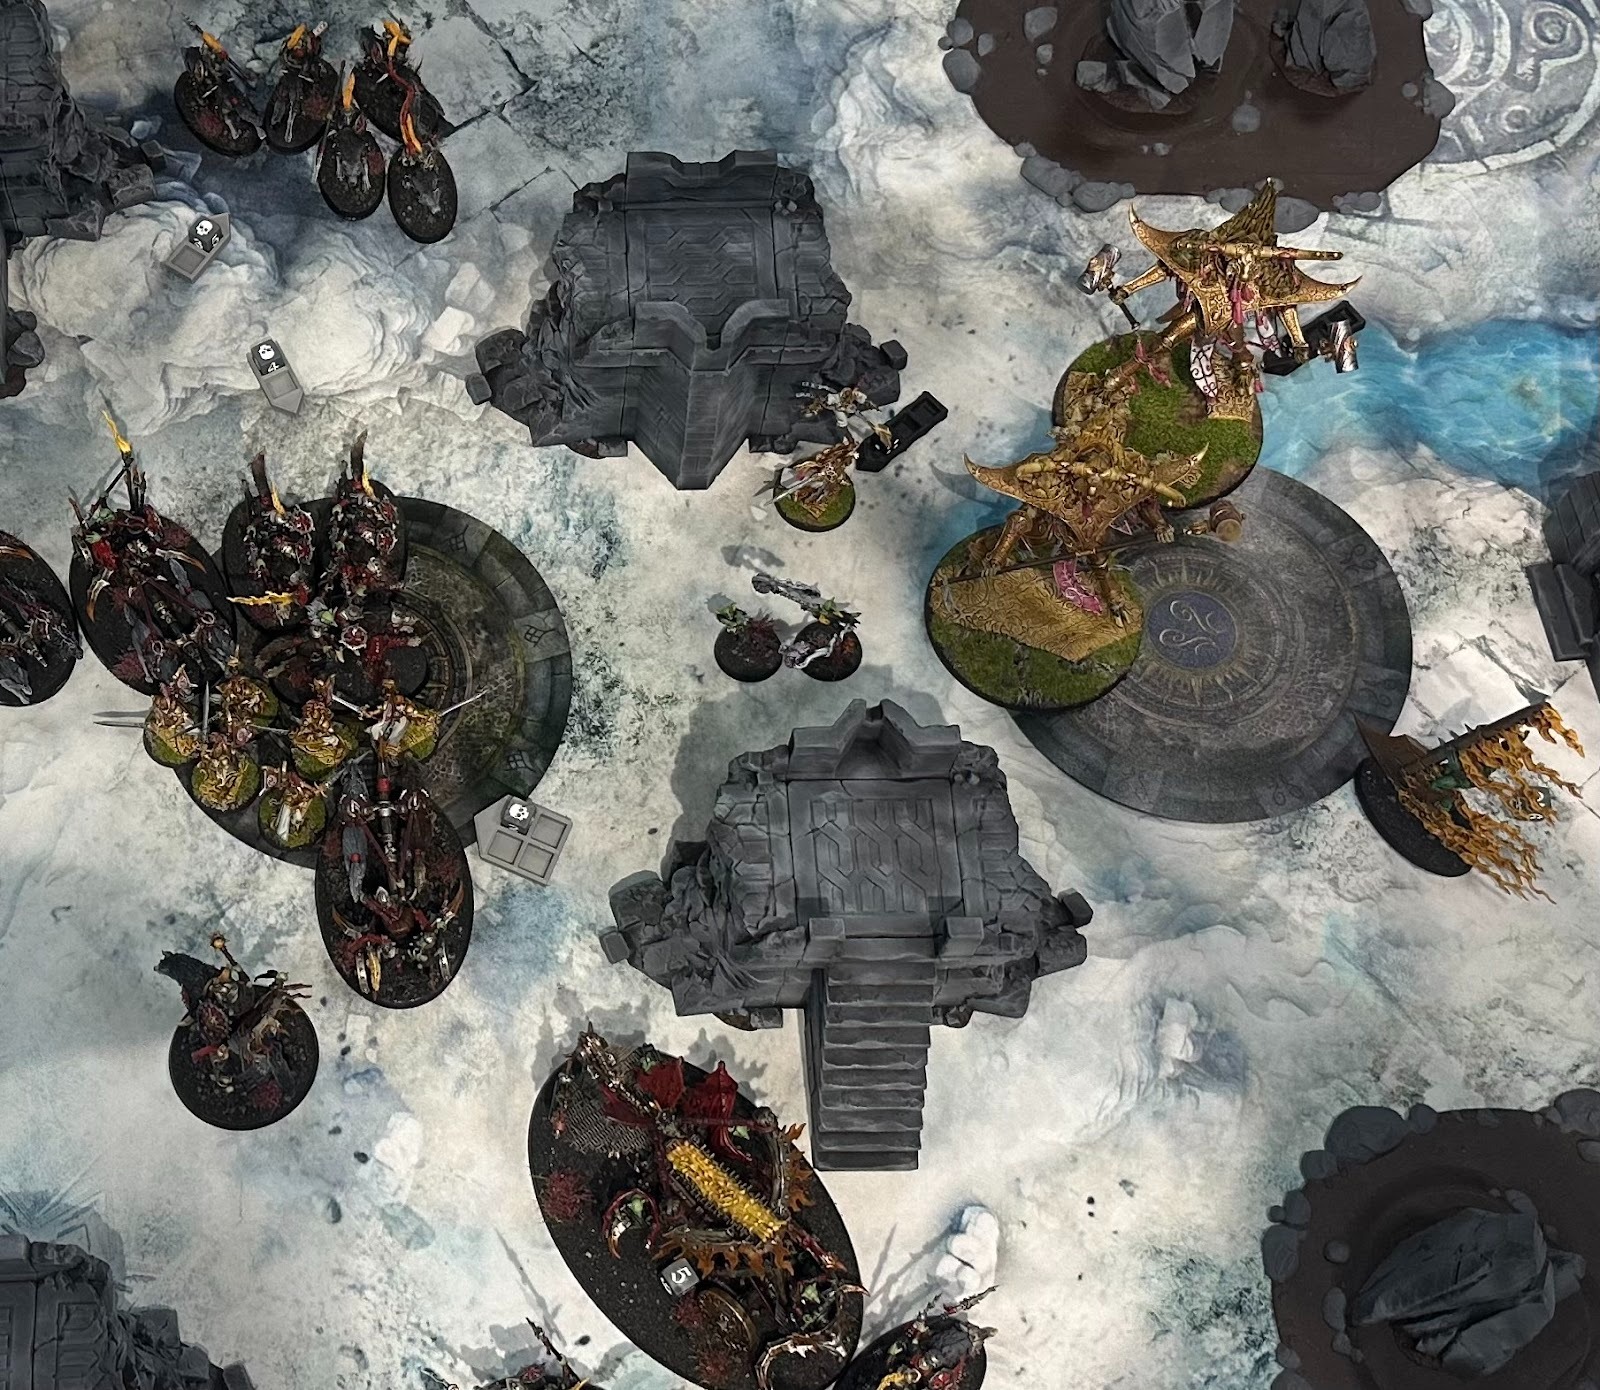
When faced with a full Gitmob force, almost every opponent I’ve met has both commented on the size of the army (generally it looks huge by comparison to theirs) and expected that because the army has mega speed, my first move is to yeet across the board and crash into their lines. This often results in them backboarding their army. This works in your favour, because the intention isn’t to run straight into them turn 1. Back boarding usually puts your opponent in a less-than-desirable position early on, especially if they’re a slow army.
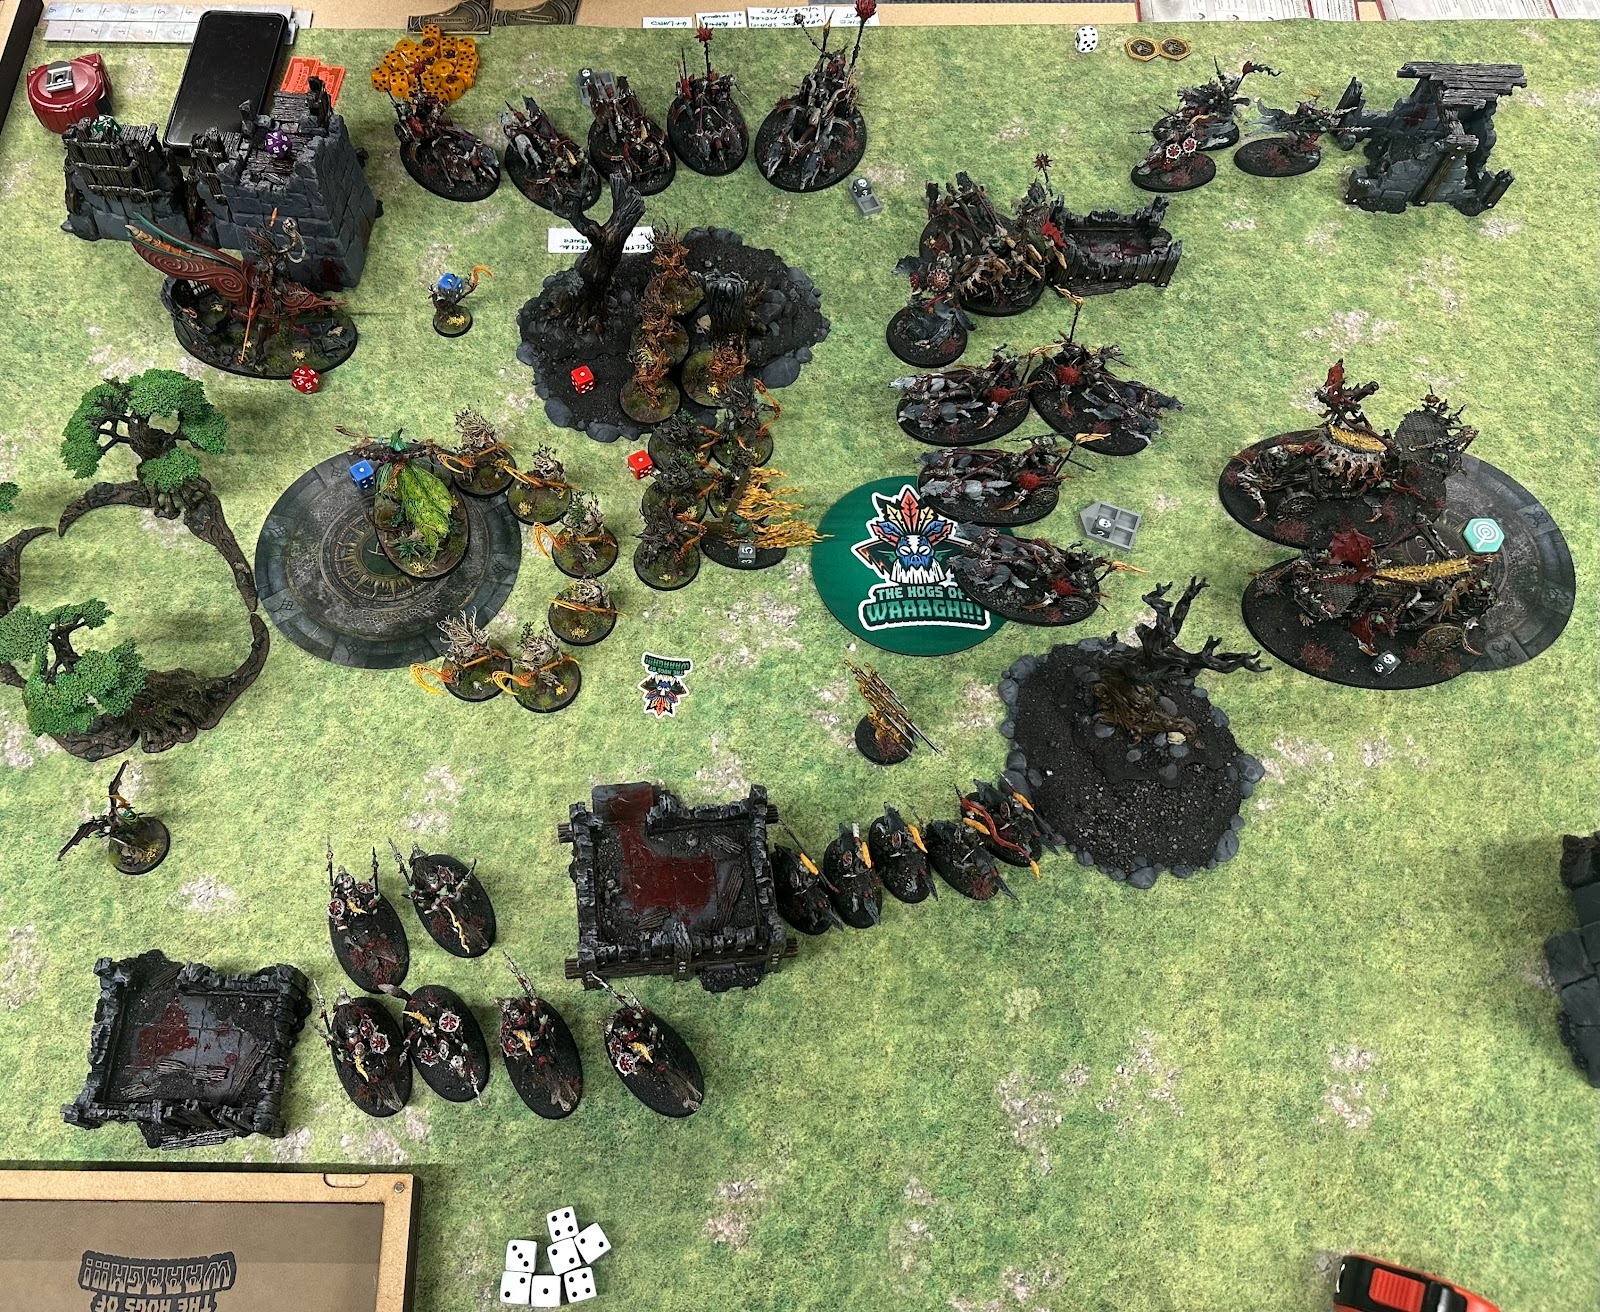
Deploying a Gitmob heavy army can be quite challenging due to the amount of models with large base sizes. My first drop tends to be my largest models.
The Frazzlegit Shaman tends to be placed first. With him I’m looking for a relatively central Obscuring piece to let him toe that magical 1”. This protects him from becoming an early target while pushing protection from shooting further (useful when facing armies like Kharadron Overlords).
He is then followed by the two Doom Divers, ensuring they are wholly within 6” of the Frazzlegit Shaman and over 1” away from Obscuring terrain so they can avoid the half-range penalty to shooting whilst being protected from shooting attacks themselves.

I’d then look to deploy the unit of 2 Sunsteala Wheelas and the Snarlfang Riders relatively centrally (ideally grabbing some Obscuring if possible) as key components to achieve Attuned to Ghyran’s Sacred Centrality – I wouldn’t usually advise throwing units forward to stand in the mid-board, however the advantage of these two is that they can zip back (or forwards) in your opponent’s movement phase. The chariot can move back 12” and the Snarlfang riders can access both the D6” Can’t Catch Us roll and a D6” Redeploy, letting them bounce back into screening or move-blocking positions.
From this point, the aim is to ensure the Doom Divers and Loonshrine are well screened. I will usually try to ensure that Droggz and the Snarlboss set up relatively close together, near to a unit of Sunsteala Wheelas and well screened.
Patience is Key
For turn 1, patience is key. Hold back, hug Obscuring terrain while maintaining your own screens, and score what is opportunistic. The aim is to bait opponents into overstretching their army, allowing the Gitmob to react and pick off their overstretched units.
I tend to find myself in a position to set up for Fey Strikes in turns 2 or 3 and aim to have the Moon hit Sulkin’ and Cacklin’ in these turns so when the time does come that I need to fall back, the army can then charge back in with renewed vigour and (re)trigger some of those “on the charge” abilities.
I have been taking Master the Paths as my second set of BTs: generally for Cut off the Head you are going to end up killing a character at some point in a game. The Sunsteela Wheelas’ Careening Destruction and Snarlboss on War-Wheela’s Frazzlegit Flame Stream can make excellent sniping moves on infantry characters that your opponent is trying to keep well protected. Typically this is a turn 2 or 3 manoeuvre and usually around the time I pop the Snarlboss on War-Wheela’s Da Glare of Frazzlegit to add 6” to both his and the Sunsteala Wheelas’ movement characteristics for the rest of the turn.
This, combined with a Gitspeed cast from the Frazzlegit lore (adding another 2” to that move) can put your chariots right up in hero-sniping range with a sweet 20” move. It also allows for other units of chariots to opportunistically zip into positions to flank and harass your opponent’s force, and threaten objectives where you need them.
Wot duz da krumpin’?
Everything!
In a Gitmob-heavy army, there is no one unit that does all the heavy lifting with respect to damage and I would describe the Gitmob as wanting to Gang Up and Bully enemy units.
The core of the army will generally focus around Sunsteala Wheelas, Snarlpack Cavalry and Snarlfang Riders. It’s important to understand these three units, when unbuffed, will crank out roughly the same average damage as one another. However the sheer amount of flat Damage 2 across the Gitmob units from the Snarlfangs’ attacks make this army feel like an army of wolves with goblin companions and not the other way around – this is where you get the most bang for your buck.
Sunsteala Wheelas have the highest amount of Snarlfang attacks, meaning they are a priority target for the Sunbiter Pack’s extra rend buff and All Out Attack (when the conditions are suitable) to ensure enough of those Damage 2 jaws land and sink through your opponent’s armour.
Rip ‘Em Ta Bits!!!
The other advantage Gitmob have is the ability to out-activate your opponent, being able to swing with four units before your opponent gets to swing, which is a useful trick for some of the tougher units and situations where you need to thin out enemy bodies. This takes some setting up in your own turn and works on the proviso your opponent doesn’t have any Strike First of their own:
- This activation starts with a unit of Snarlpack Cavalry triggering their Strike First ability on the charge.
- The first ‘fights normally’ activation is then Droggz Da Sunchompa whose Rip ‘Em Ta Bits ability allows him to pick a friendly GITMOB unit within his combat range to fight straight after him.
- The target you are aiming for with this is the Snarlboss on War-Wheela who, when selected to fight, has his own ability Keepin’ Up Wiv Da Boss ability.
- This ability can in turn trigger a friendly unit of Sunsteela Wheelas to fight next!
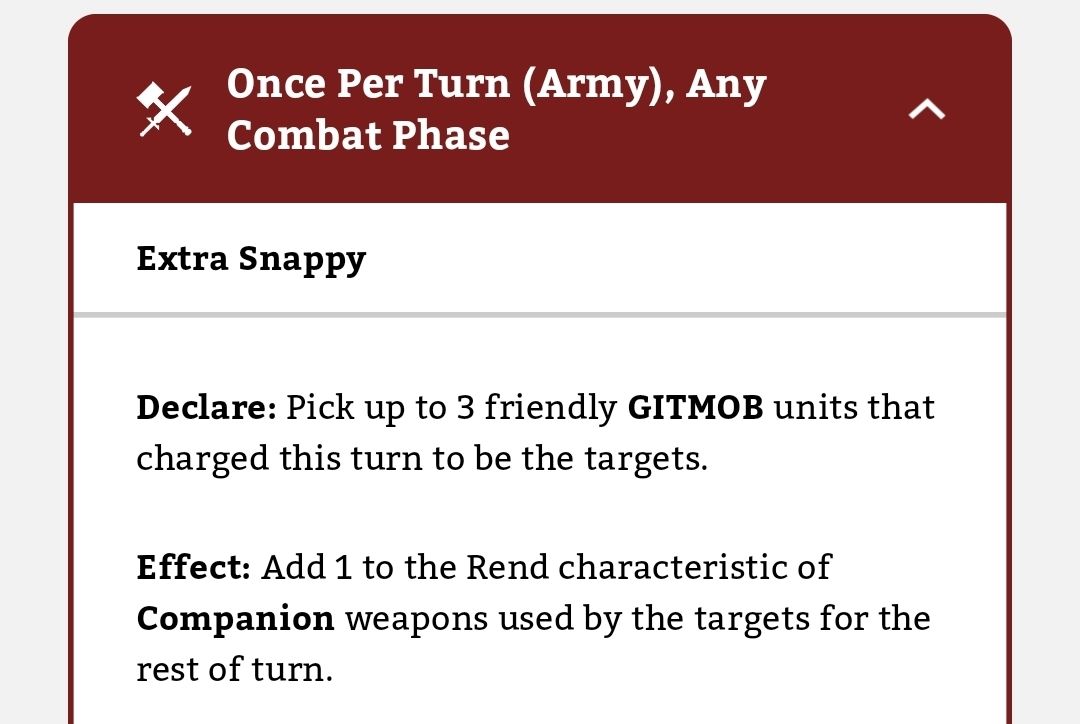
By throwing the Sunbiter Pack rend buffs on the Snarlpack Cavalry, Snarlboss on War-Wheela and Sunsteela-Wheelas, this four-unit activation throws out 52x Rend 1 Damage 2 Snarlfang attacks before you even consider the Goblin attacks.

Dogpile!!!
Considering Snarlpack and Sunstealas are on large oval bases, it can sometimes be difficult to squeeze them into a combat and get all of them to fight.
There is a bit of a trick4 to using space efficiently to ensure everyone is within that 3” reach, and typically it looks something like this:
It’z Too Tuff!!! LEGGIT!!!
While massed Damage 2 is fantastic, it’s no secret that general lack of rend is the major downside for Gitmob units. This does occasionally mean there are some units you will just bounce off.
In these cases, I tend to resort to move blocking with Sunsteela Wheelas or Snarlfang Riders, or locking units down with a throwaway unit of token Scourge of Ghyran Sporesplatter Fanatics (or the Aethervoid Pendulum). This allows the rest of my army to focus down the squishier units in my opponent’s army that are off trying to score objectives.
So don’t get overly stressed if you can’t kill something – work around it, constrain it and pick off the more vulnerable scoring units instead.
Da Last Wurd
In summary, a Gitmob-heavy force is a notoriously difficult army to pin down, being able to retreat and redeploy into more advantageous positions and charge back in alongside other sweet rapid movement jank.
In true Gittish style, pick the fights you know you’re going to win and hamper your opponent for the fights you won’t!
Hunt like a wolf pack to mob objectives and bring down targets, making the most out of that spammable Damage 2.
Look past the bad press from their release – once you nail the playstyle, they are an incredibly rewarding army that can punch with the best of them!
Finally, before I finish up, I would like to give a shout out to my Team – The Hogs of WAAAGH!!!! – and also my local club, The Outriders: MK who are hosting their first GT at the end of the Nov 2025 at Player’s Paradice Gaming Centre, Milton Keynes – hopefully see you there!!!

If you’d like to help us continue our work, we’d love to have your support. All Patreon Tiers include Discord access, exclusive articles and regular contests. Our Tiers are priced to be within everyone’s reach, so please click here to join us today!


great breakdown!
LikeLiked by 1 person