
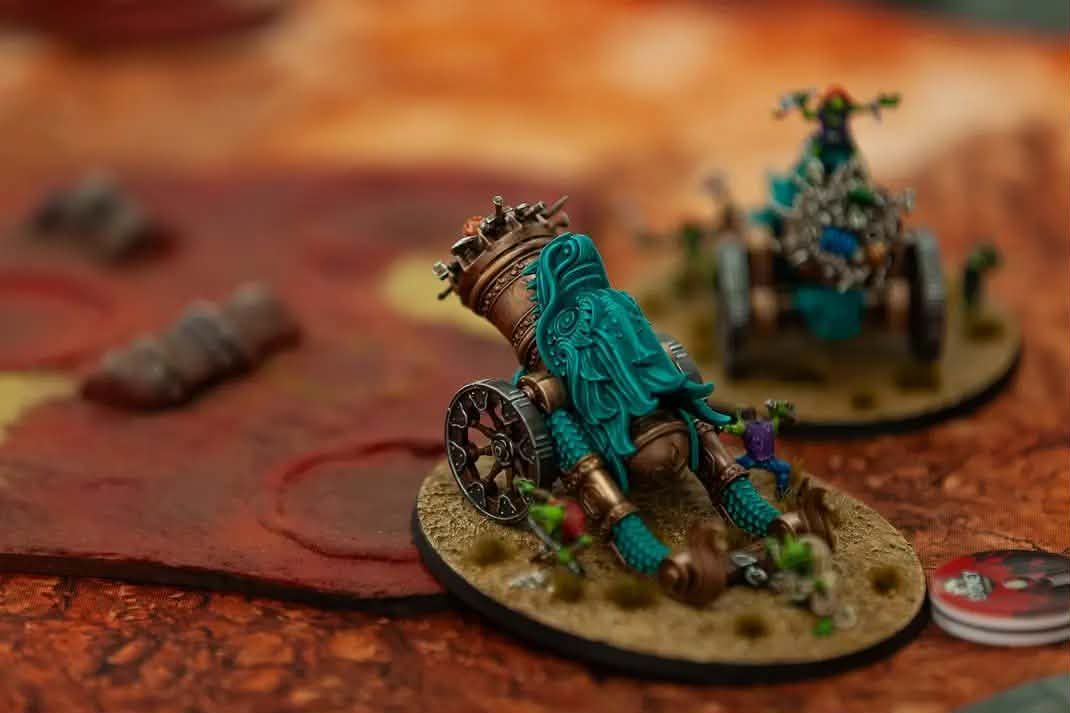

Mitch Bugg is one of Australia’s top competitive players and well known for winning tons of events with Destro armies. Mitch ran his Ogors at AOS Worlds this year, contributing to Team Australia’s scintillating 5-1 performance, which included the scalps of former champions Team England and Team USA. Mitch is pretty hyped for the new Battletome and has already played a heap of games, so let’s take a look at the list he’ll be starting with competitively, how it works and how it wins games.
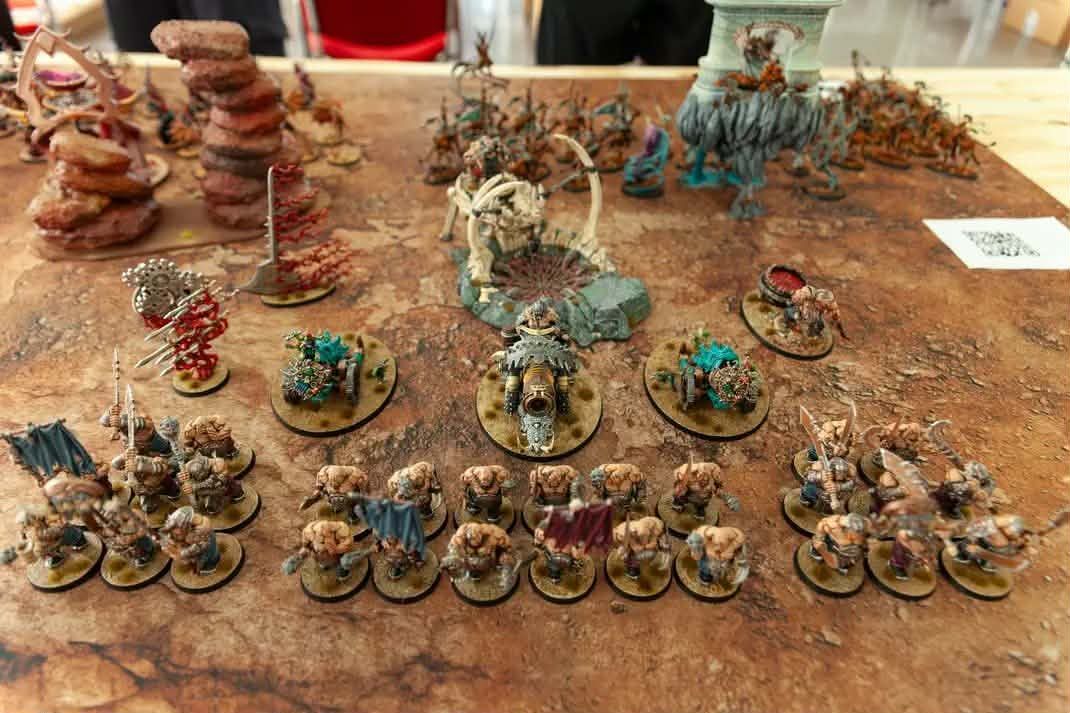
Kicking off with two questions
It’s no secret I love Ogor Mawtribes. The faction has always suited my Destro brain and play style perfectly. So when I first took a look at the new Ogor Mawtribes book, my first thought was…where’s the damage and how do I make it go fast?
It’s safe to say I couldn’t have been happier with what I saw and after reading the battletome from front to back: my meat was well cooked, properly seasoned and ready to be served.
I noticed like many others that Redd the Maw was a thing. He has the ability (in my own Hero Phase) to give a visible friendly non-Hero Ogor Mawtribes unit move-run-charge and all for the low, low cost of a single CP!
On one hand this certainly solves the problem with speed and damage delivery for those 6″ inch movement foot troops1.
On the other hand, it does pose a problem. Under the new matched play season it can be rather tricky to score battle tactics, especially because many require you to position your units in specific places or ways. So you’re going to want more than a couple of scoring units available.
Gone are the days of taking Restless Energy and Intercept and Recover, stacking the army with elite units and going full-send with a Butcher and a whole bunch of move-run-charge meat men ready to give their Kranskies to anyone who wanted it. With so many points being dropped into Redd and the meat and potatoes units like Gluttons, that really doesn’t leave much left to fill out a list.
So with all that said, there seems to be a universal debate going on currently amongst the Mawtribes when it comes to list building that a lot of players ask me to weigh in on: is Redd the Maw THE option to take in a list, or is there another way to play Ogors?
This is the Overtyrant’s guide to edging with Ogor Mawtribes.
The List
The Overtyrant’s guide to edging with Ogor Mawtribes 2000/2000 pts
Ogor Mawtribes
Hunger-Filled Tribe
General’s Handbook 2026-27
Drops: 2
Spell Lore – Lore of Gut Magic
Manifestation Lore – Aetherwrought Machineries
Battle Tactic Cards: Blazing Onslaught, Burning for Vengeance
General’s Regiment
Butcher (170)
• General
• A Choice Cut
• Leave Not a Morsel
Cleavers (440)
• Reinforced
Gluttons (400)
• Reinforced
Gluttons (400)
• Reinforced
Regiment 1
Bloodpelt Hunter (130)
Frost Sabres (70)
Frost Sabres (70)
Hunters with Sabrefangs (320)
• Reinforced
Faction Terrain
Mawpit
This list is just one of many I’ve been playing lately and typical of how I approach the game. It includes hammers for damage, anvils for durability and scoring units for tactics.
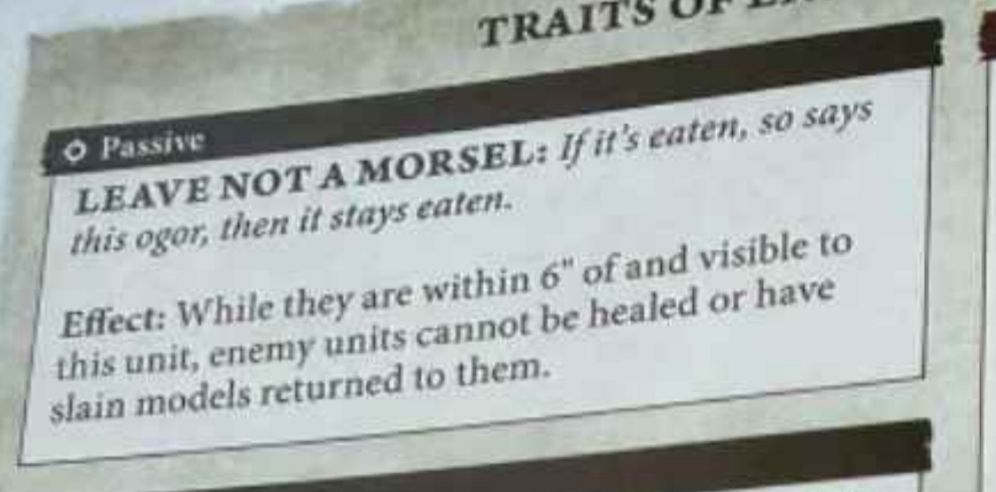
The Butcher was added to increase durability in an already-durable army, taking the artefact to reduce damage each phase to friendly infantry units wholly within 12 of him, while his warscroll ability hands out a ward save (6+, or 5+ to Mawseekers units) to a friendly unit in EACH movement phase meaning you can figure out where your opponent plans to send some damage and try to reduce it. While this can seem quite a lot worse than Redd’s aura ward, it does have one big upside that you can issue it to a unit then send them off up the table, and they keep the ward wherever they go.
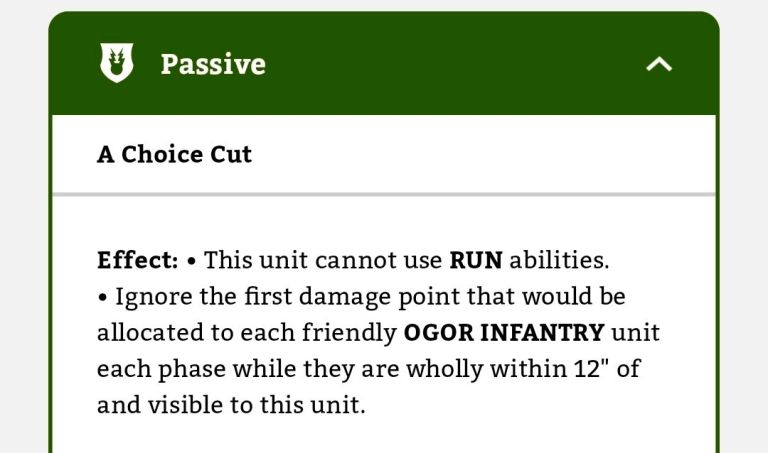
The heroic trait Leave Not A Morsel was taken to ensure that no enemy units nearby are healing or returning slain models and winning out the grind as aim to put my anvil units on objectives:
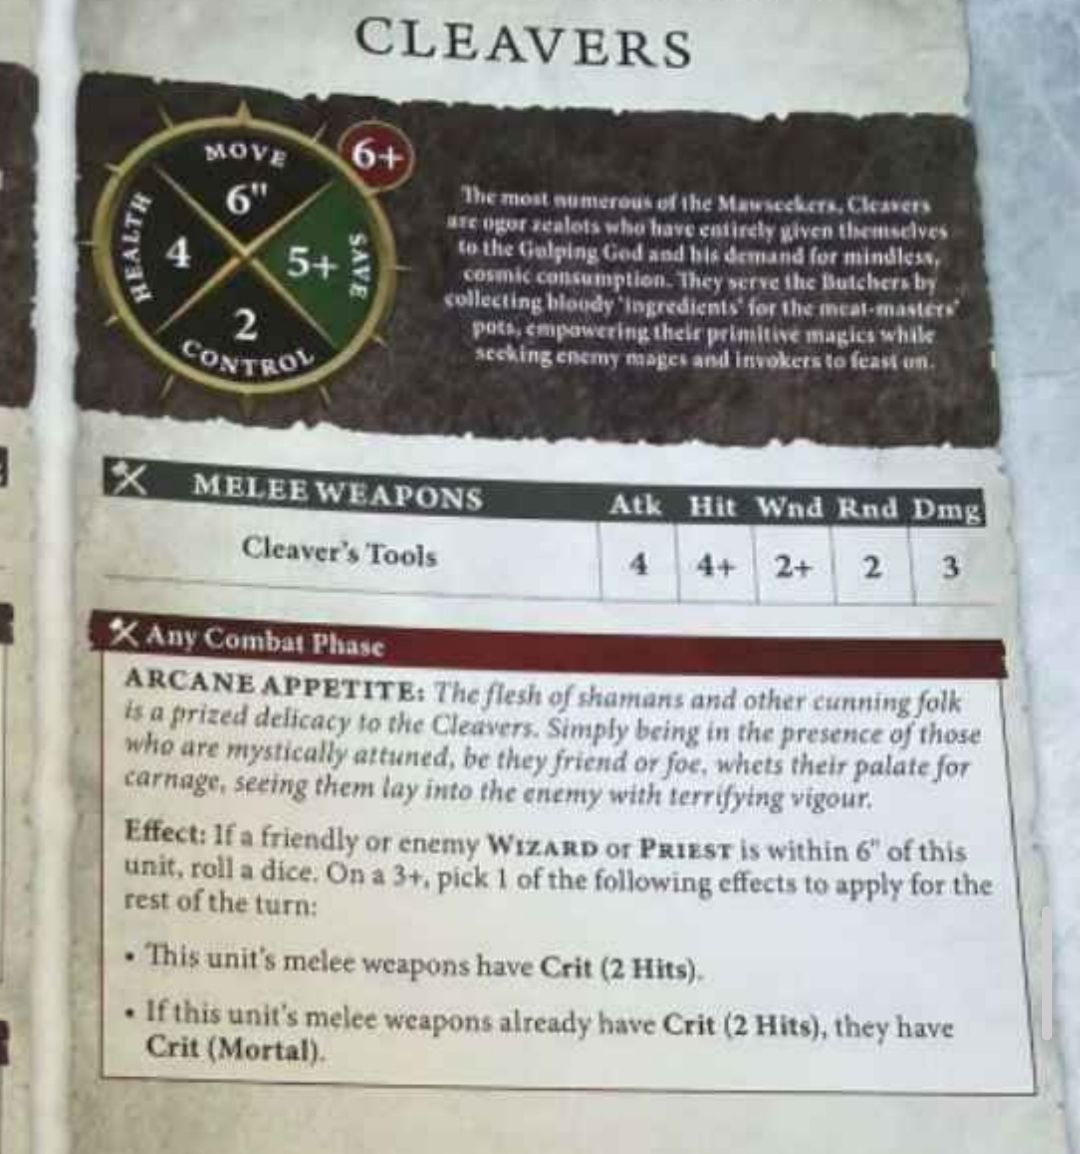
Cleavers are my favourite unit in the book by far. They put out an incredible amount of damage and they synergise perfectly with the Butcher. Not only by being able to benefit from an increased ward save but because by standing near the Butcher, they have a chance to gain crit hits or crit mortals added to their attacks:
The Gluttons are the anvils and a tough unit to ensure that objectives stay under your control. Once they get on a point and benefit from the Eat ‘Em Alive ability of -1 to rend, along with an All Out Defence command, they’re sure to be there long after you’re dead and gone.
Tactics and scoring
Let’s get into the question of Regiment 2 and how it’s used with the tactics I’ve chosen, which is the most important part of this list.
The first tactic of Burning for Vengeance requires you to place a friendly unit wholly in each board quarter and for those units to be 9″+ inches away from the centre.
Previous lists I trialed with this book included more elite units, which meant less total units on the board and I found this to be trickier than expected, because it meant I had to ultimately divide my army up AND stay away from the centre of the board with them. All while trying to get onto objectives and into a position whereby moving those units up the field into my opponent’s board quarters/territory didn’t mean I would lose them on the next turn.
So Frost Sabres are an amazing unit and something I’ve used in so many of my games over the years. By adding them to the list I can now keep control of the flow of the game and score tactics without overstretching my army.
What I mean by this is that I no longer have to rely on putting my more expensive units like Gluttons or Hunters somewhere I don’t want them to be – pushing up a big important unit when I’m not ready.
Without access to move – run – charge in the first turn I’m not as much of a threat, so having fast Frost Sabres gives me the ability to move up the board, tag some objectives and score my first tactic. The power to achieve all this without putting anything of value in range of being hit next turn is amazing. What’s more, with the reduced amount of Obscuring on the board they can remain invisible while they are within 3″ of any terrain features. No Covering Fire against my doggos, thank you.
Hunters add a phase of damage for the first tactic from Blazing Onslaught and of course they are always useful for their deployment phase jump, or they can start off the board with the Bloodpelt Hunter.
Also, who doesn’t enjoy a sneaky mid-game tactic for controlling the enemy Hideout, by dropping in with that Bloodpelt Hunter?
Why Hunger Filled Tribe?
Maw-Cult Fanatics has already been popular for its healing in an army that lacks recursion, and I do like it, but I’ve gone with another choice here.
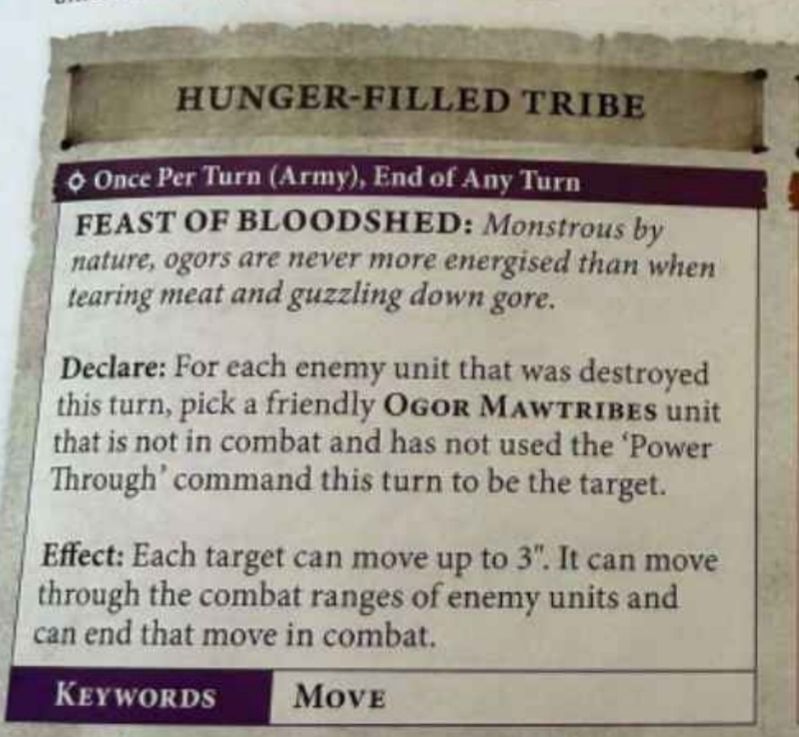
This subfaction leans into the idea of “movement wins games” and the possibilities are endless:
- A 3″ move means I can move a unit back into range of a spell from the Butcher
- Just shy of an objective? It’s mine now
- Maybe my Frost Sabres are close by to an enemy unit that’s set to come in and wipe out something important next turn. Now they move into combat range and tie it up, so that can’t happen
There are stipulations on what friendly unit can move of course but I find the subfaction to be simply the most useful and can create problems your opponent has to solve.
Final thoughts on the book
I’ve played a lot of games with this new book now, and trialed every unit. So here are few more ideas for some cool things you can do with new Ogors.
Looking deeper into that 3″ move subfaction and some tricks I’ve been able to pull off in games already: picture this with the Maulbeast Cav…
You charge in with a unit and wipe something out… now you’re not in combat, and therefore eligible to make the 3″ move at the end of turn.
You can make that 3” move into combat…or go backwards to gain some distance from your opponent. If you’re able to just tag something else right on 3” (so you’re just in combat with it), you can then use the Power Through command and to move backwards and gain even more distance:
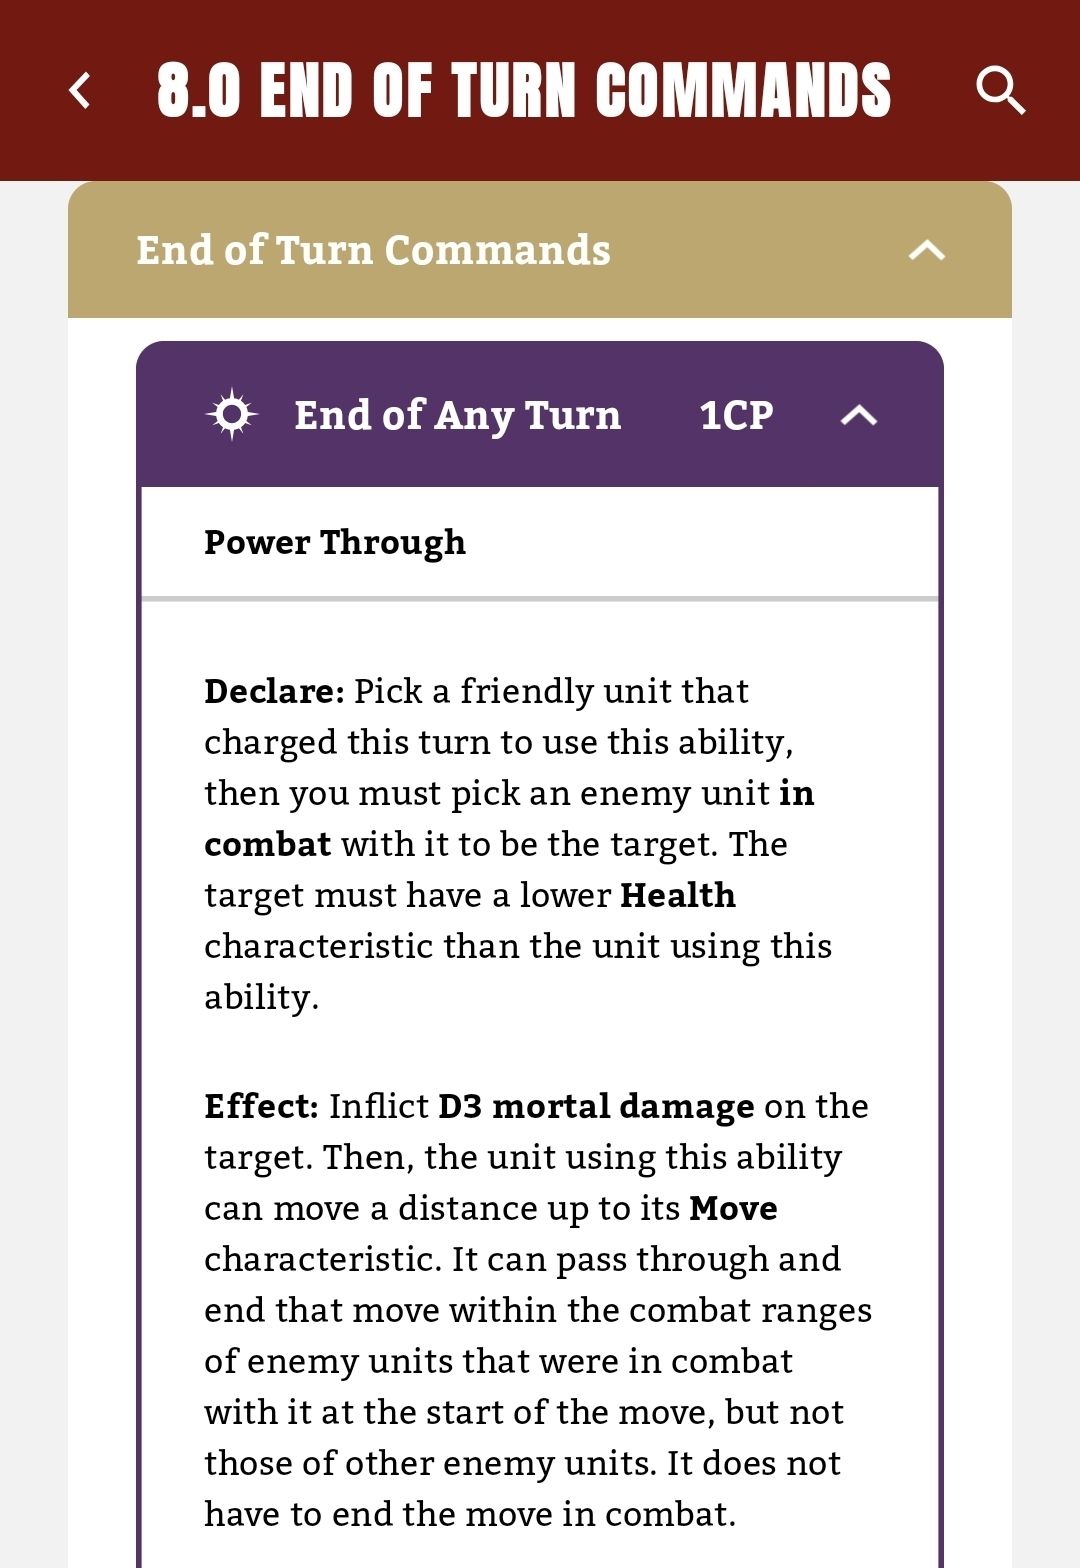
Like an Ogor version of Strike and Fade
Maulbeast Cav blowing up a unit and then moving backwards 13 inches ain’t bad, and then with a Redeploy you can get out of threat range from whatever’s coming back at you. Gluttons moving back 9” isn’t so bad either. So if you position carefully, you can go in and scalpel a unit and then take no damage back in return.
Just remember two things:
- You have to do the Power Through last, because Feast of Blood (above) specifies that you can’t pick units that have already powered through. But there’s nothing stopping you from doing it in reverse order.
- And while the 3” move and Power Through both have the MOVE keyword, they are not Core abilities so it doesn’t fall under the Rules of One.
It’s kinda cooked. You go in and wipe something and end up 9-13 inches back depending what unit you’re using.
Taking it a step further with Gluttons, if you do take Redd in your list, you can plan to have the Gluttons finish wholly within 12” of Redd at the end of your turn to then counter cast his movement spell and move them back even further. Grabbing +1 to cast from Gutseers or a Place of Power can be effective in helping with that plan:
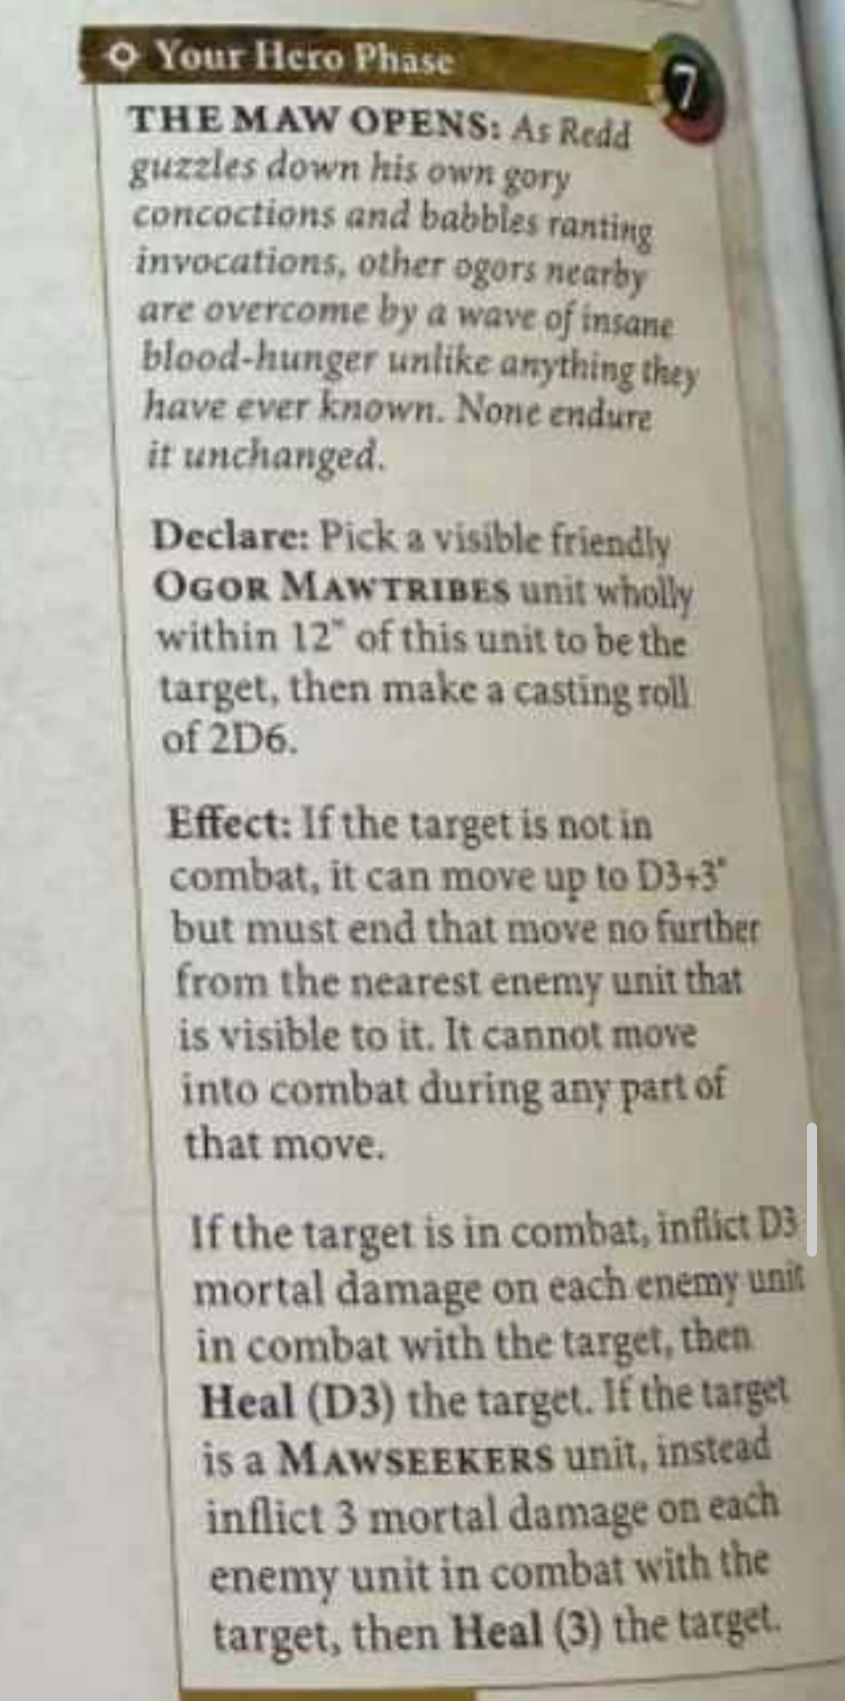
Another thing I’ve managed to pull off with this subfaction is going in with 10 Gluttons and wiping a big screen, only to then move forward 3” into combat and tag about four different enemy units. Then choosing -1 to rend and keep the 6+ ward from the Butcher (as it lasts until my next turn) and just pinning my opponent in their territory. No objectives or tactics that turn, sir!
In fact I’ve done the same with a stretched out unit of 4x Maulbeast Cav as they are naturally on the superior 3+ save, so with the 6+ ward, -1 rend and an All Out Defence they are so tanky you really lose nothing and pin a bunch of shit in place. Sublime.
So with quite a few games under my belt now, what I’m enjoying about this army is that it has great core stats but it also does things your opponent can’t plan for, because they don’t know what you’ll do with your movement tricks. That’s what makes this a really hard army to play against, and one that’s ready to win you a lot of games. I hope you enjoy it as much as I have so far.
~ Mitch Bugg

If you’d like to help us continue our work, we’d love to have your support. All Patreon Tiers include Discord access, exclusive articles and regular contests. Our Tiers are priced to be within everyone’s reach, so please click here to join us today!


- Now that the faithful auto-include Index Butcher with his move-run-charge aura has gone (but not forgotten). ↩︎


Well this gets me more hyped to finish my Thunderscorn-style kitbashed Ogor monsters to run with the Maulbeasts! Ye olde metal Shaggoth will make a fine Butcher. Also forlorn at spending the money to make infantry out of Kroxigors and spare Dragon Ogre bits, cuz that’s gonna be expensive (they’ll be complete with tiny vestigial limbs at their waists since they won’t have matured into full Dragon Ogors).
Frost Sabres will be missed when they go to Legends. They were useful like that in the previous book.
LikeLike